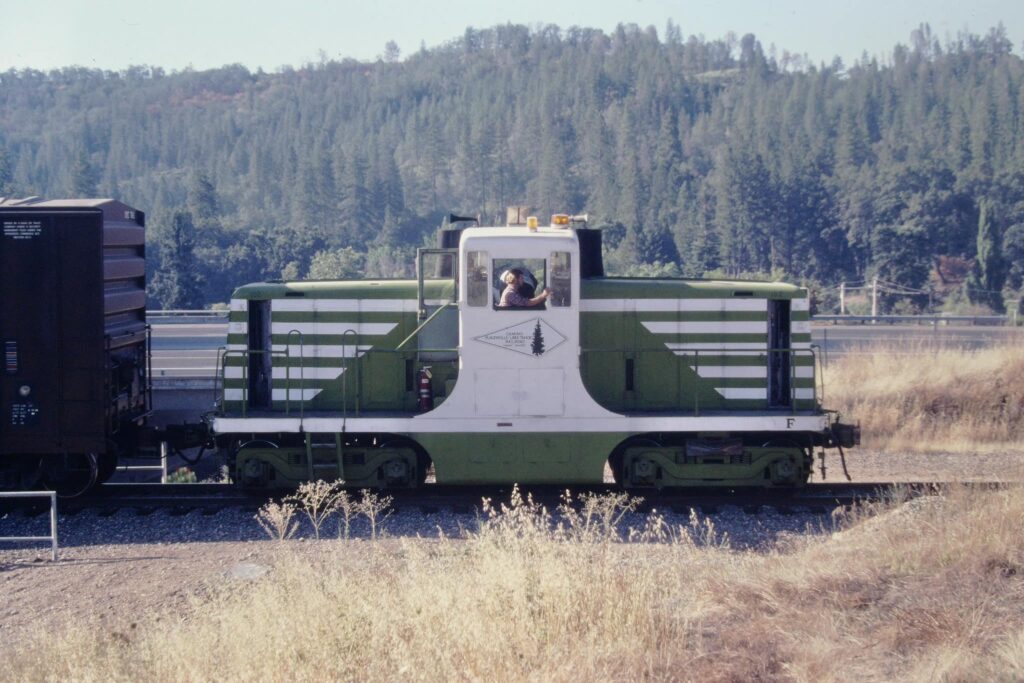
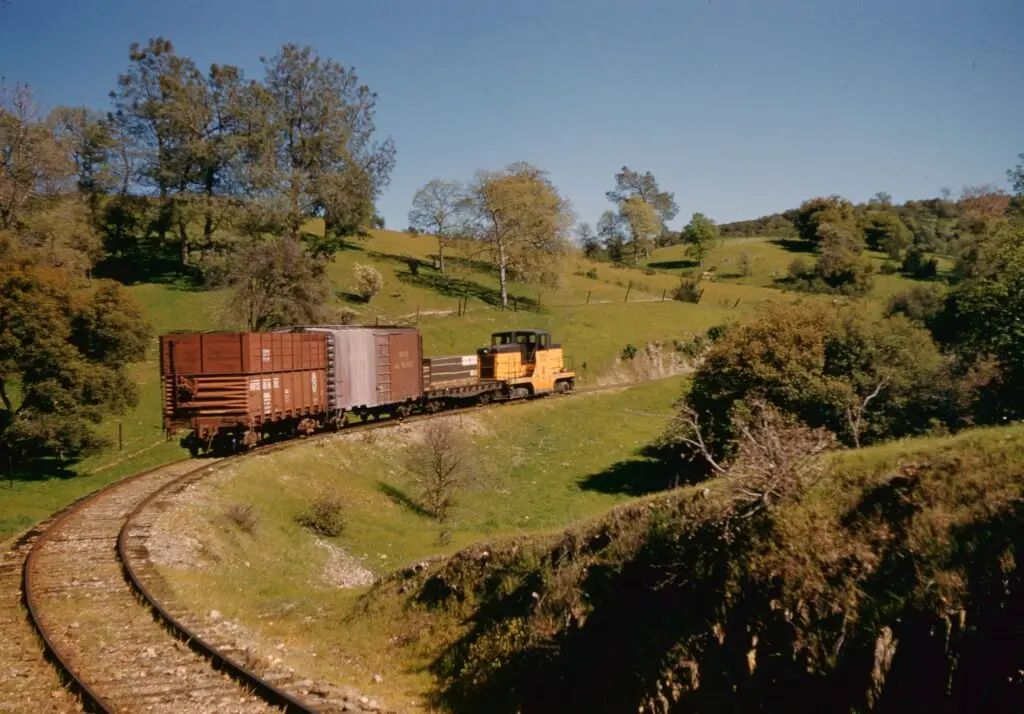
Amador Central No. 8 with three cars from Ione, California, heading to Martell. Photo from the Pacific Northwest Railroad Archive
Few locomotives have left as lasting an impression on shortline railroads and industrial switching as the General Electric (GE) 44-ton diesel-electric switcher. Compact, versatile, and engineered to meet a particular regulatory niche, the 44-tonner became one of the most recognizable light switchers of the mid-20th century.
I wasn’t a massive fan of 44-tonners; however, after quite a bit of research, that sentiment quickly changed.
As some of you may know, my modeling has been inspired over the years by the logging and mining industries. Recently, I have been doing more research for my railroad, and I never realized how many California shortlines once had a 44-tonner in their roster. Now, my interest is piqued.
Origins
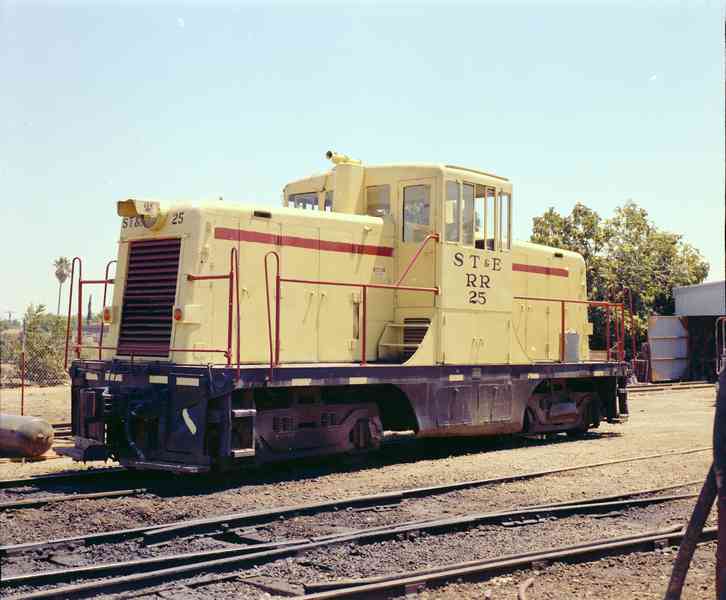
After conducting extensive research, I found some interesting information about the locomotive. Introduced in 1940, the GE 44-ton switcher was primarily designed to replace steam switch engines on industrial lines and small railroads. At that time, labor agreements in the U.S. required a fireman to operate any locomotive weighing more than 90,000 pounds. Weighing just under this limit—about 88,000 pounds in working order—the 44-tonner could be operated legally with only an engineer, which helped reduce operating costs for smaller railroads.
The locomotive was designed with double-reduction gearing, which provided strong pulling power even with modest horsepower. Its compact wheelbase of 6 feet 10 inches allowed it to navigate curves as tight as a 50-foot radius, making it well-suited for industrial and branch line service.
These little locomotives were starting to grow on me, and based on my research, would be a perfect addition to my Northern California shortline.
The Base Model
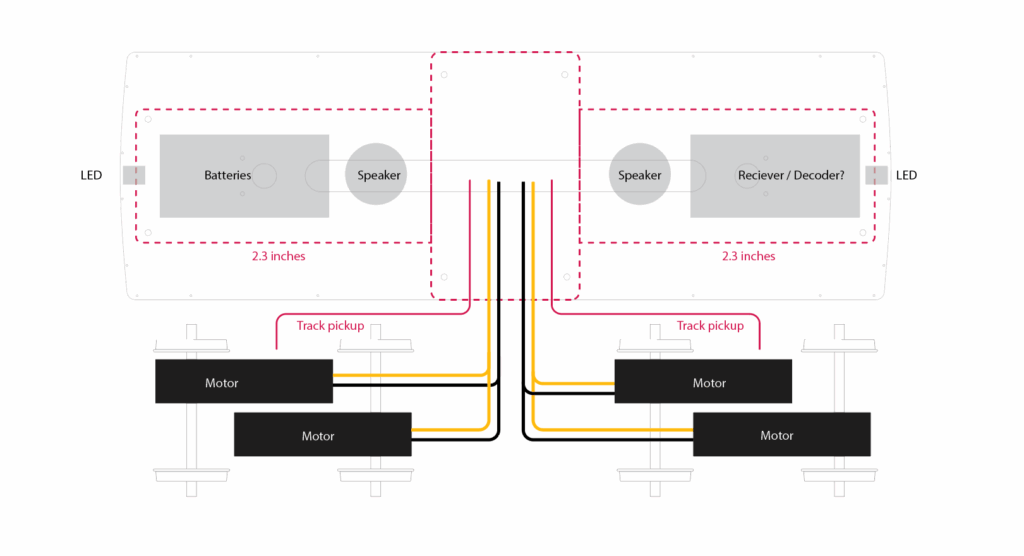
Fast forward a bit, and I had the opportunity to purchase a couple of Rich Yoder 44-ton brass imports, which I bought: a Phase IV and a Phase I. I like these models-reasonably priced and a great starting point for modelers to super-detail them. All my locomotives are dead-rail. That means I use a remote control and batteries to run my equipment. I began working on a plan to install an S-Cab system in them; however, under each hood is a motor powering each truck. This leaves little room for most of my equipment.
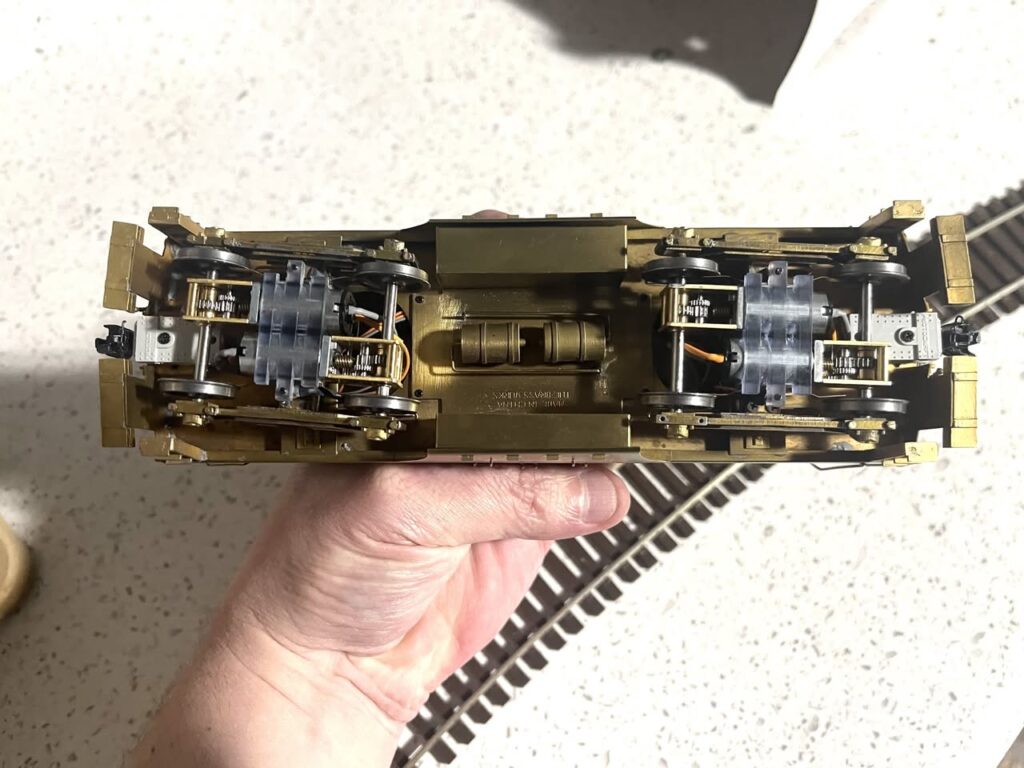
Jay Criswell, owner of Right-O’-Way, mentioned to me that he was experimenting with small motors with gearboxes that would work on these models. The Phase I model I purchased was from him with these motors attached to the trucks. This would leave room in the hoods for my equipment.
Time to Learn New Skills
The first locomotive I purchased was from fellow modeler, Jeffery (Jeff) Duprey. It was a later Phase IV model. I disassembled it and began planning ways to improve the details and plan the installation of the S-Cab equipment.
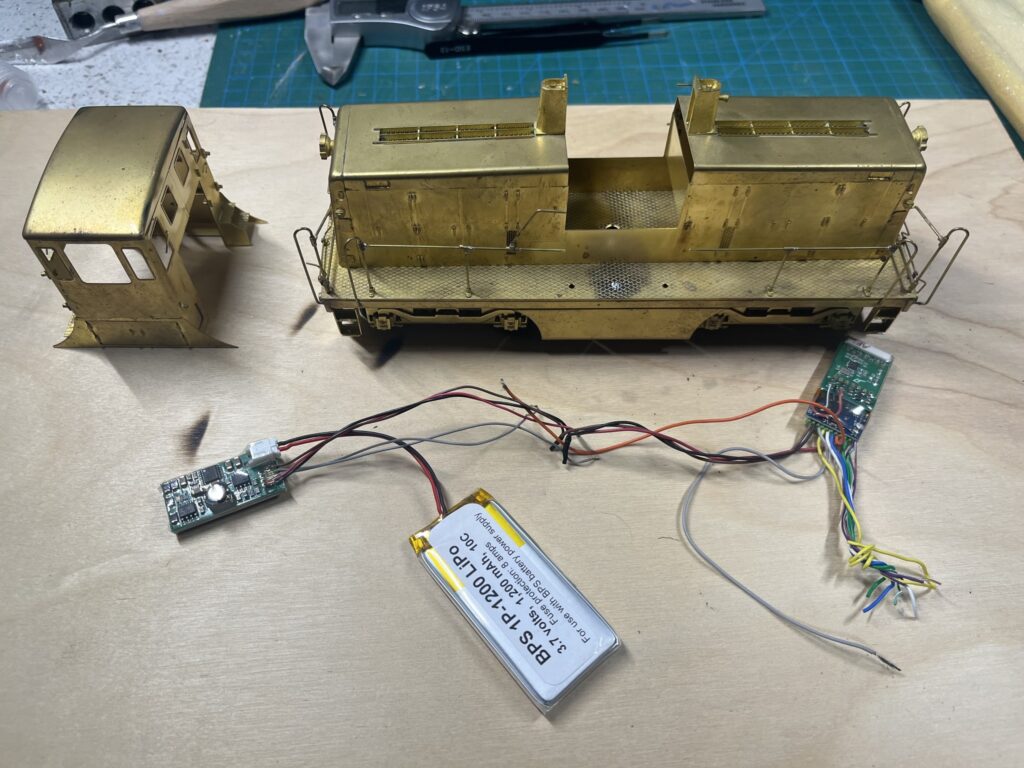
After finding a set of plans in the April 1973 issue of Model Railroader Magazine, as well as a few digital copies of the original operations manuals, I noticed some flaws in the models. To start, the locomotive frames are approximately 12 inches too long. Both hoods are almost six inches too short and wide. The width is to accommodate the large motors.
I was disappointed; however, it occurred to me that I might be able to fix some of the flaws. I’m familiar with modeling in Styrene, but not in brass. So I began reaching out to friends who have worked in brass to gather tips and tricks for working in the medium.
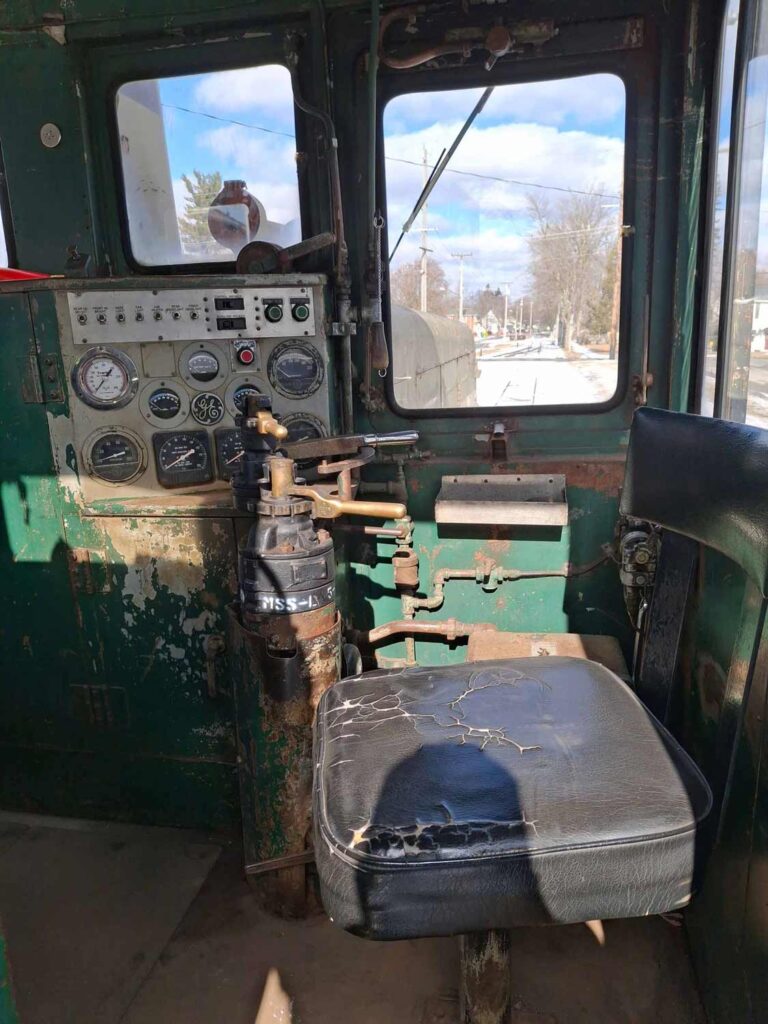
Jeff and I began to discuss the project, and he informed me that he is an engineer at a railroad museum and drives a 44-ton locomotive. He was kind enough to provide so many details on the construction and how the locomotives work. He also took extensive photos of the underframe, cab, and electrical and air equipment under the cab.
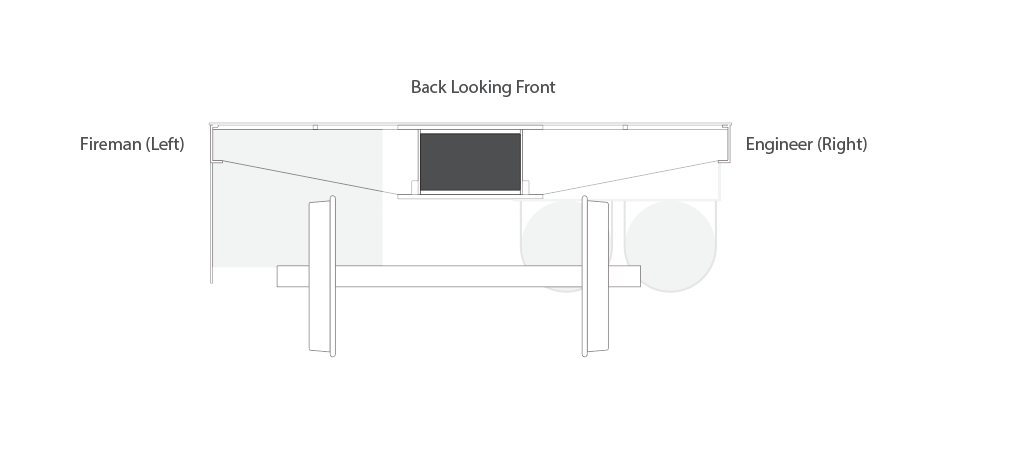
The locomotives are even simpler than I realized, and so I decided to build a scale underframe as well.
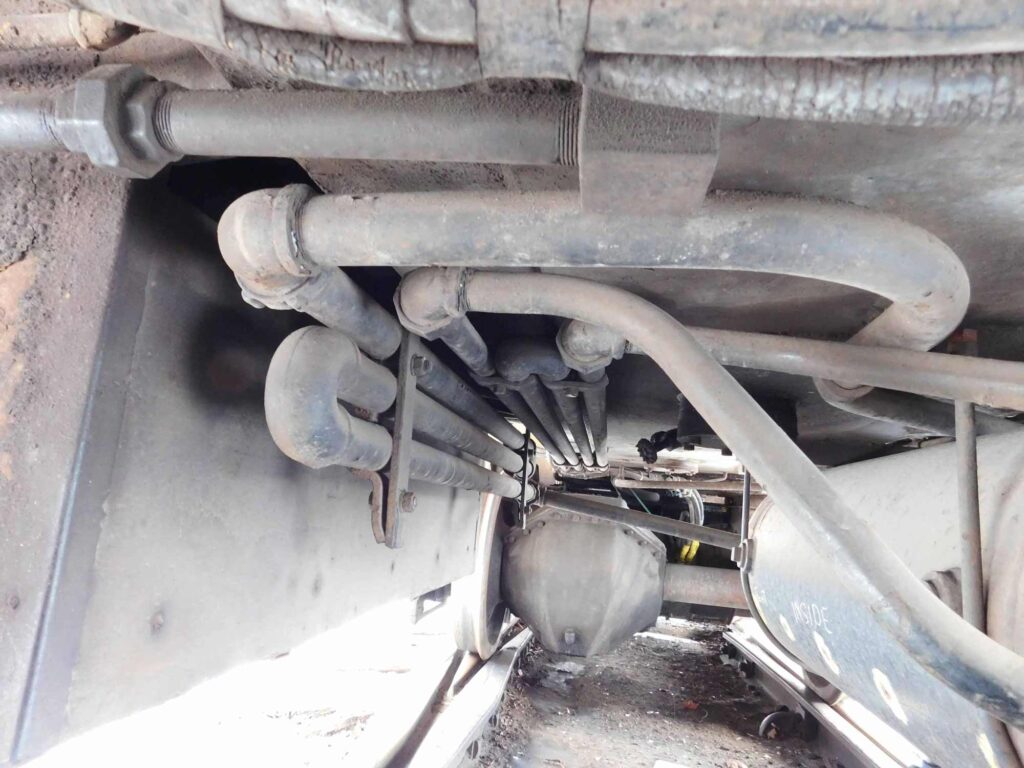
My first challenge was a lack of detailed blueprints. Jeff provided measurements of the frame components, and along with the plans from Model Railroader, I started drawing the frame and air lines. I have never drawn accurate scale drawings before, so this was my first learning experience. I used Adobe Illustrator to create the basic components and sent them to Jeff for review. I made changes based on the suggestions he made.
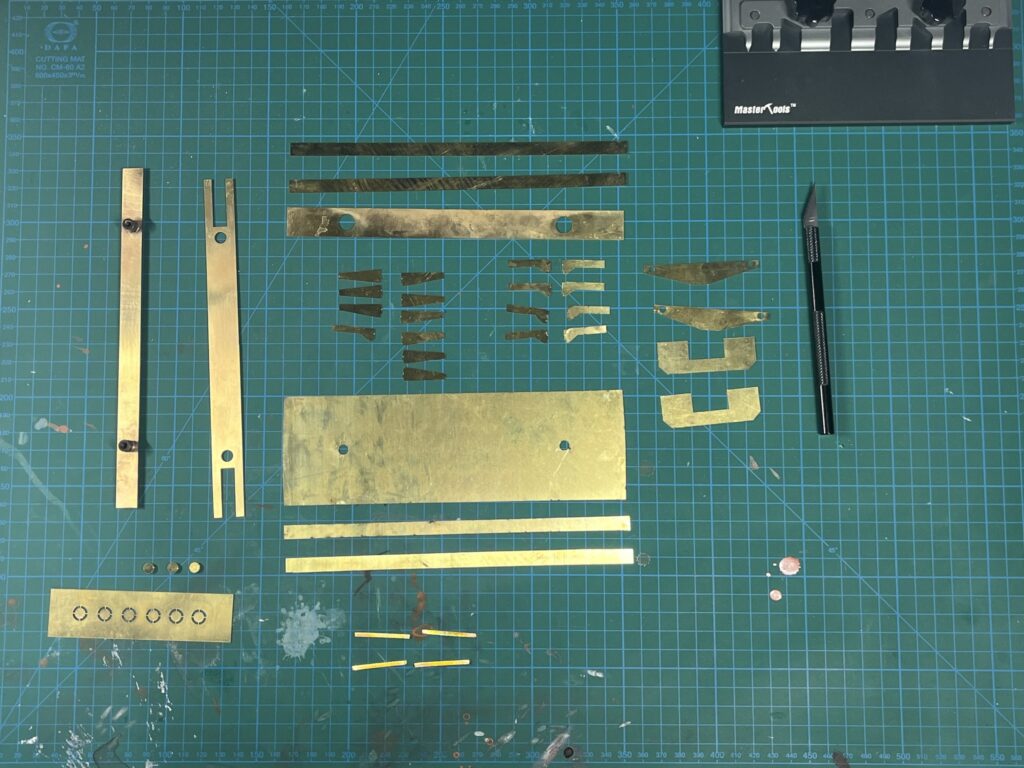
I printed each piece of the frame and attached it to the appropriate brass sheets. Using a jeweler’s saw, I began cutting them out. I couldn’t believe how sloppy my skills at cutting and filing are, and I was frustrated. So much so, I thought about scrapping the project.
I spent a few days continuing my drawings, and then another crazy idea occurred to me: what if I laser-cut all the components and create a kind of kit? I researched laser cutters, but those are currently out of my price range, and I’m unsure if this is a one-time scenario. Further research revealed a few companies in the United States that offer laser cutting services. They can cut “shim” brass sheets, some even cutting as small as 0.005″ sheet.

I uploaded a few of my component drawings from Illustrator and tried two different companies: SendCutSend, and OSH Cut. Each has a set of standard thicknesses they work with, and I designed most of the parts to accommodate their specs.
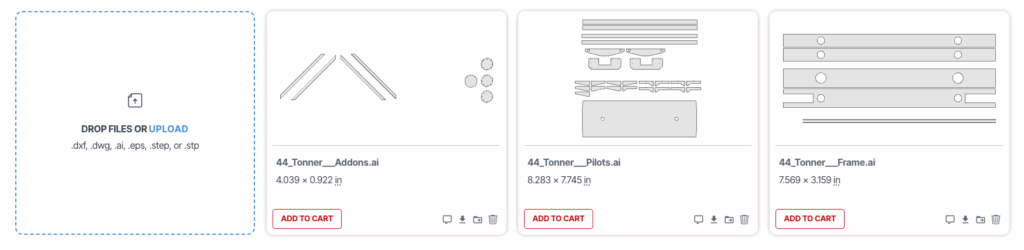
Once I received the parts, I was impressed by the quality and the precision of the cuts. Now that I have a clear path forward, I can tighten my designs and start building.
The Plan
The current plan is to build two locomotives. I’ll start with the Phase I model. In this project, I will create a complete underframe and detail it as thoroughly as possible. The hoods and cab will remain original, and I will modify the frame to accommodate the Yoder structure. This will give me the chance to improve my soldering skills and refine my technical drawing capabilities.
If this works well, I plan to completely scratch-build the later Phase IV model, but salvage as much as I can. This should be a fun project, so stay tuned as I post more and talk about what I learn along the way. Who knows, I could even create a kit for anyone who wants to build one as well.

WoW!! What a project. While I also am a fan of the GE 44’s, I couldn’t find affordable brass models, so I started with a Williams/Bachmann model. While it came as a 3 rail unit, I gutted the mechanism and used two Stanton drives custom built by NWSL. This gave me the perfect conversion to 2 rail and eliminated all the guts inside the shell. The body is very well modeled and accurate to the drawings in the Model Railroader. Since the model came with a very nice speaker mounted inside the fuel tank I simply added the Tsunami DCC sound decoder and it runs like a Swiss watch!
Now that I have the P48 bug, I will be doing a further conversion of the drives to accomodate the narrow gauge. With the hoods now empty, I am thinking of possibly going battery power. https://www.facebook.com/1156763397/videos/10211871261194395?idorvanity=1076998665735509
This is a short video of the conversion.
Cheers! Rick & Debbie Bell
That’s a great model Rick!