As a new-be in the hobby, I was content with laying flex track on plywood, spraying it flat black, painting the ties a wood color and call it good. As I spent more time railfanning, I noticed a significant difference in the prototype compared my rails. I also began to notice how the environment would affect the look as well.
Title photo by Jason Krieger
I’m not going to focus on all of the elements that go into prototypical track. My focus here is to discuss the main elements, how we look at the color and some of the details to enhance your model track. There are many wonderful articles on track and details, my favorite being from Mike Cougill, Detailing Track, sold through his web site, OST Publications. His book focuses on O Scale, however, the items will translate into all scales. Detail parts for your track can be purchased through Right O’ Way or The Proto:87 Stores. Further, you do not need to handlay your track to achieve realistic results. There are many, manufacturers of highly detailed track on the market.
Taking a Closer Look at the Prototype
So, what is the prototype all about? Well, let’s dissect the elements of rail.
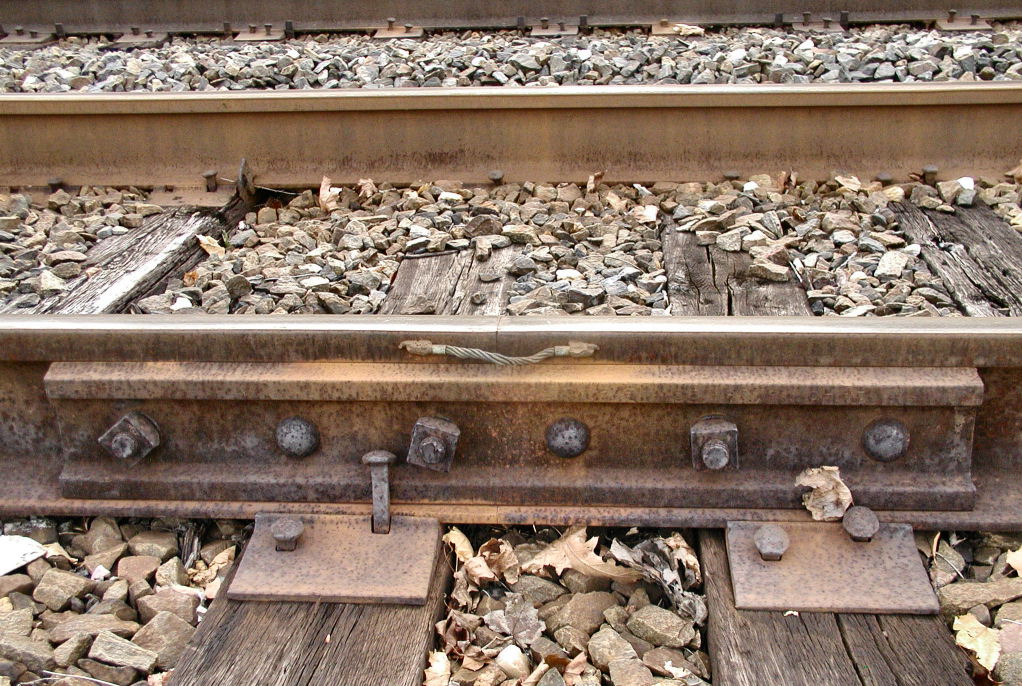
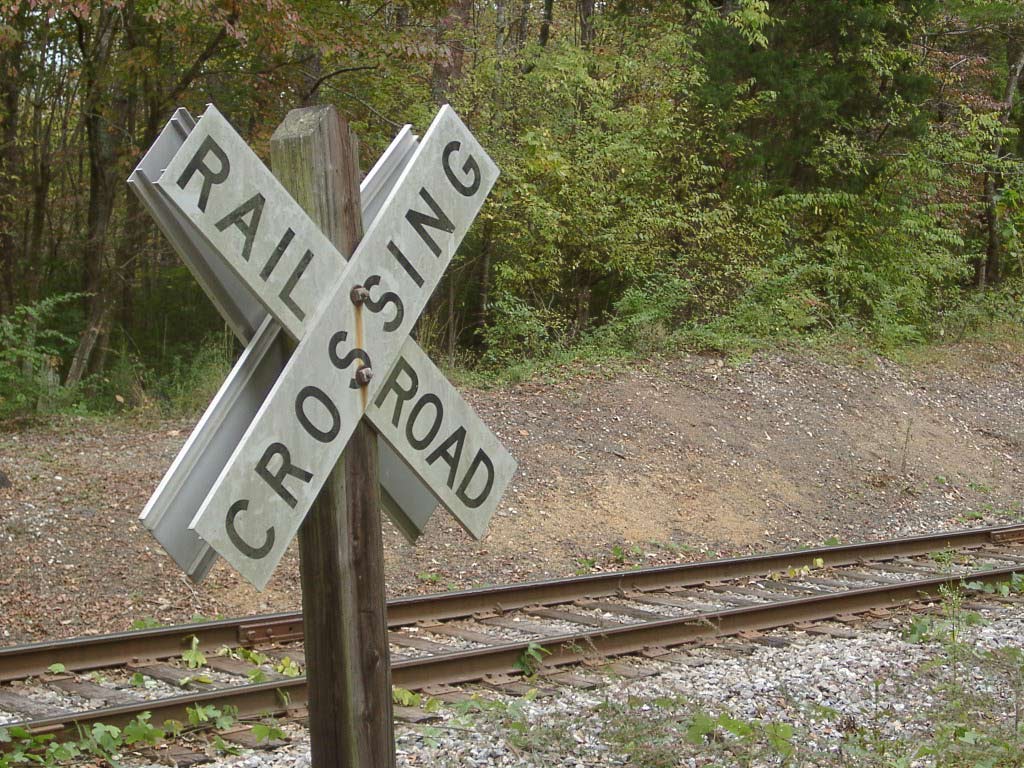
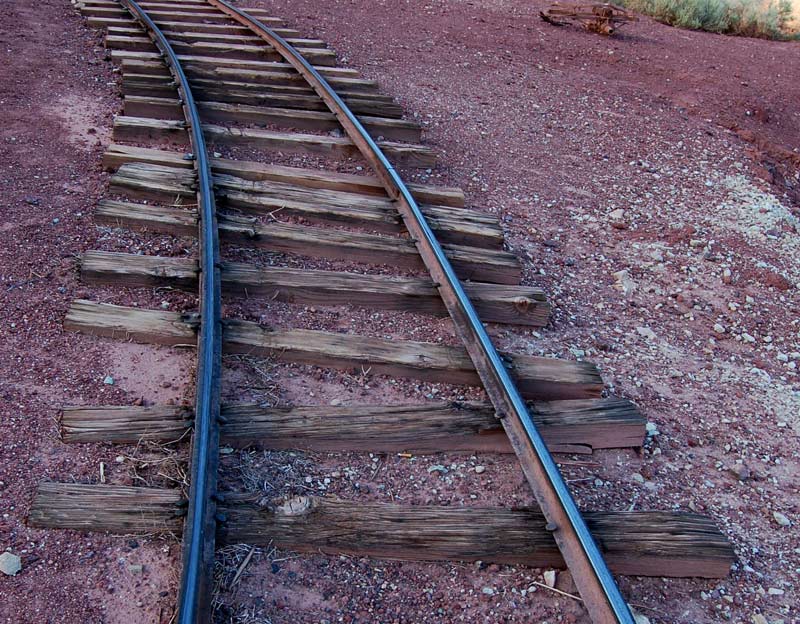
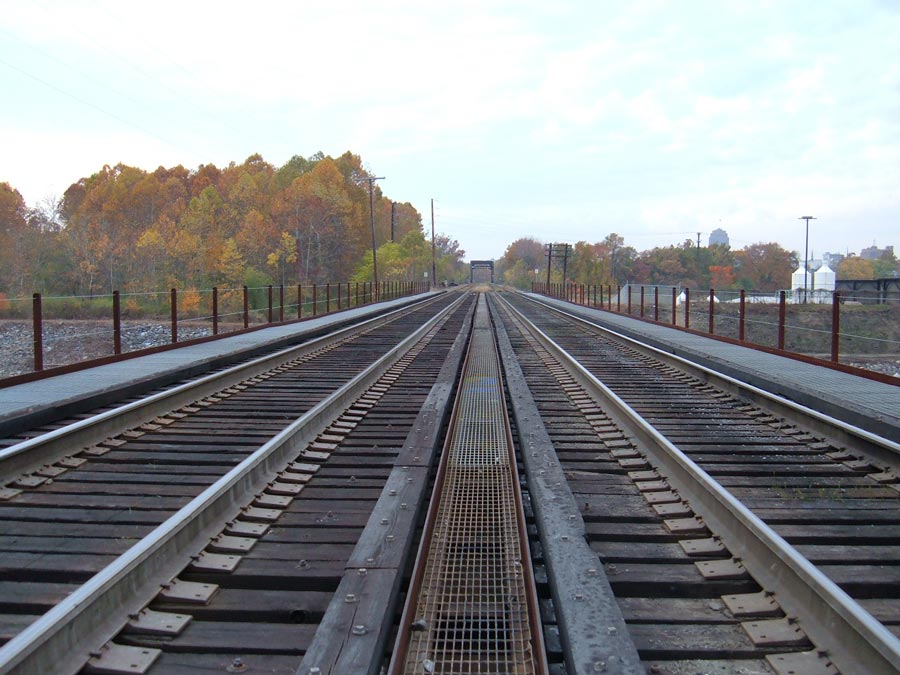
First, there’s the rail itself. Brand new steel rail usually is dark grey in color, rarely black. Unlike most mining or logging railroads who spiked their rail directly to the ties, most higher class roads used steel tie plates to protect the ties from wear. All rail is held together by bolted joint bars unless it is welded and, in some cases, the prototype would use plastic insulating joiners because of their signaling system. The steel rails sit on wooden ties, while some modern railroads use concrete ties. Wooden ties are coated with creosote to prevent rot and, when new, is very close to black.
Although there are many more details on the prototype, this is a quick overview of what we will be looking at for this series of articles.
Colors
Of course, the ties are going to rest in ballast made of crushed rock or dirt. Further, the top of the ties will be exposed to rain, sun and wind causing them to crack and fade. If you’ll notice, most of the fading is from the rails outward leaving the wood just slightly darker near the rails. The actual color of the ties depends a lot on the environment. As mentioned above, creosote is really dark, almost black. The sun bleaches the wood over time and the black will fade leaving shades of grey and even some brown. As the ties interact with their settings, wind and rain will wash dirt onto and into the ties further adding to the color.
The rail, tie plates and joint bars are made from steel and as we previously mentioned, are a dark grey when new. Wikipedia states that “Rust is an iron oxide, usually red oxide formed by the reaction of iron and oxygen in the presence of water or air moisture”. What that means to us model builders is that, as soon as the steel is exposed to moisture, rust is going to appear. This process will be further sped up with the presence of salt in the air such as coastal railroads. Our grey rails will start to show shades of orange on the steel with the older rust appearing darker. Sun beating down on the top of the rails, tie plates, joiners and spikes will further bleach the top making them appear lighter than the sides.
Finally, dirt and wind will cover everything in dust and mud so your rails and ties will start to take on the color of the earth you model.
As with any structure, we always start with a good foundation and in the case of railroad track, that would be the ties. Previously, I noted that wood ties (wood ties will be the focus for this article) are coated with creosote, which, are almost completely black when new. As the ties are exposed to the sun, they begin to bleach or lighten to shades of grey and brown. The exception to this would be logging railroads. Most of the time, logging railroads would use fresh cut lumber to lay temporary rails into the woods in order to reach the loading sites. If the rails stayed for any length of time, the ties would usually begin to turn lighter shades of grey.
That should give us a good idea for what we are trying to achieve with our model track. Part two we will discuss my approach laying model track.