Bill of materials
- Plaster of Paris
- Sand or Tile Grout
- Aged Concrete Color
- Flat Black and Medium Grey Oil Paint
- AK-Interactive Dirt Effects & Tank Track Rust
- Real Dirt
- Paper Towels
This project started a while ago when Edward Traxler and I were talking about cheep scenery material that we could use in our projects. He mentioned playground sand that is found in 50lb bags at your local hardware store. This conversation got me thinking, could this be used to simulate concrete? I’m not sure I am the first one to do this and to be honest I may have seen this done elsewhere, however, I can’t find it or remember where I saw it.
Let’s begin
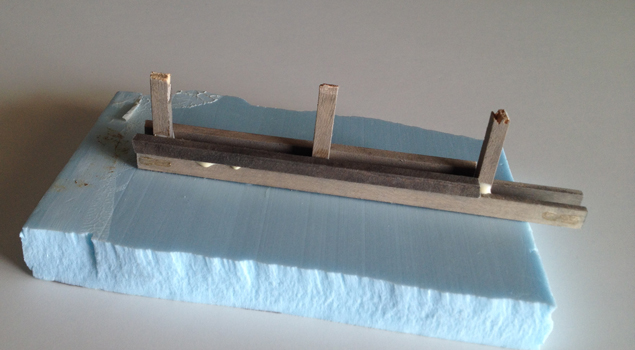
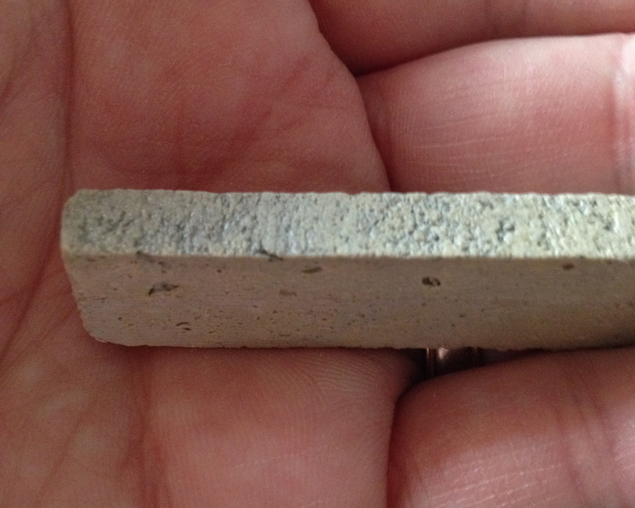
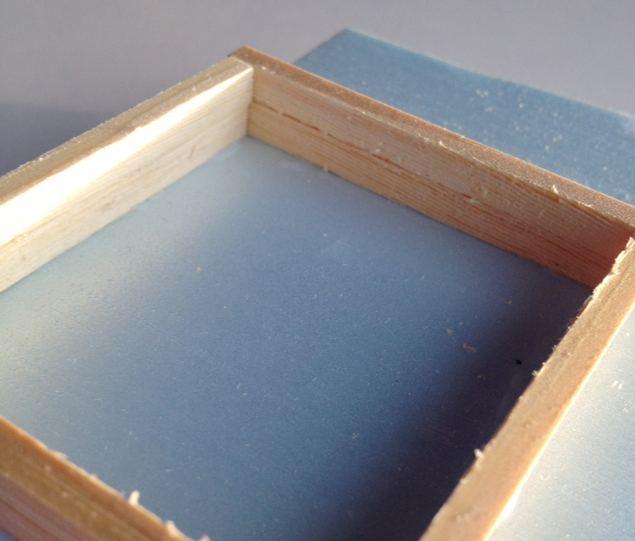
I built forms from old pieces of scrap wood I had in my junk box. I like to add grain texture to the wood as it will be transferred to the plaster casting when the forms are removed giving the concrete a realistic detail. Once dry, I can make the concrete.
The Concrete Mix
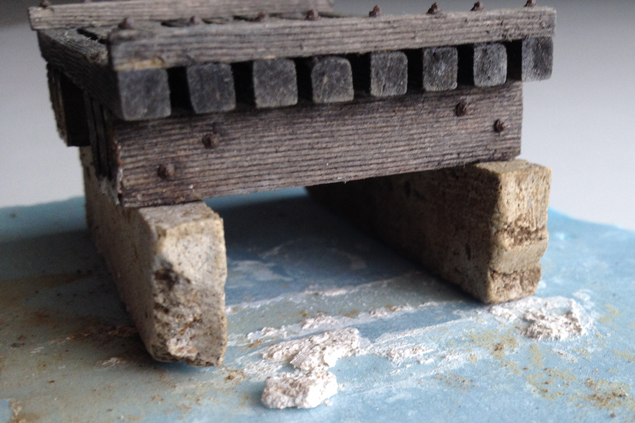
For this tutorial, I am building concrete forms for a small wooden bridge I created some time ago. Start by sifting your sand through a cheap pair of pantyhose. The amount of sand used is based on the amount of decay or texture I want to show. So for more texture, I add more sand.
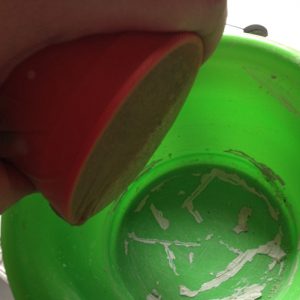
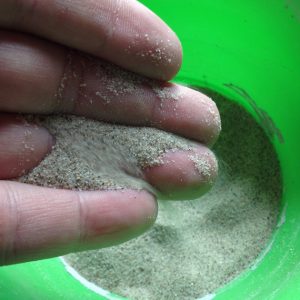
I stir the sand and plaster together in a plastic bowl until both are mixed thoroughly. I then add Aged Concrete to the mix to add color. This is very important to add color to the mix and I use a lot of it. The last thing I want is white plaster showing through my cement mixture when I am chipping away at it. Now add your water.
You will notice as you stir the plaster and sand together that the mixture has the feel of scale concrete. This is exactly what we are wanting. Once completely mixed, I pour the plaster into the castings.
I like to let the castings dry until they are solid and I can handle them. I do not want them to fully cure yet.
Preparing the Casting
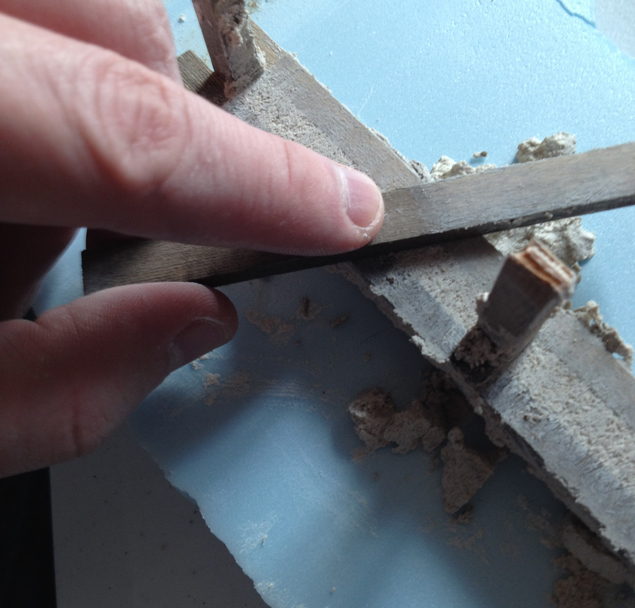
As mentioned, the casting is not fully cured; however, I am able to handle it. Be extra careful not to remove any of the wood details left behind.
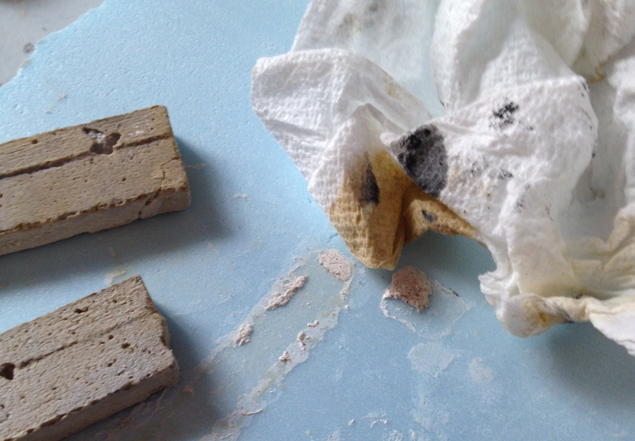
To distress the casting, I use a dry paper towels to roughen certain areas of the casting. you can use your fingers, toothpicks or dental tool to chip away larger sections if you wish. Note, there is no white plaster showing through which will make life much easier as we finalize our weathering. Once I have the desired look, I leave it to fully dry.
Weathering
I only use a paintbrush for some of the washes I am going to apply to the concrete. My preferred tool is either paper towels or a rag.
Create a light wash of medium grey oil paint by heavily diluting it down. Using a plastic plate I pore the wash onto it. I dip my paper towel into the wash and lightly dab it onto the casting. Make sure that if the wash runs, it flows down the casting not up or sideways. I follow that wash with another coat of heavily diluted Aged Concrete.
Next, I use flat black oil based paint wash to brush over the entire casting bringing out all of the details and blending the colors. I like very little color and more thinner for this application. If needed, I can apply more aged concrete and follow it up again with the black wash.
To finalize the concrete, I dip a paintbrush into my plate with the black wash and then into real dirt. This dirt is brushed over the entire casting making it nice and muddy. A paper towel is used to dab and massage the dirt into the cracks and to remove all extra dirt. I add as many coats as needed.
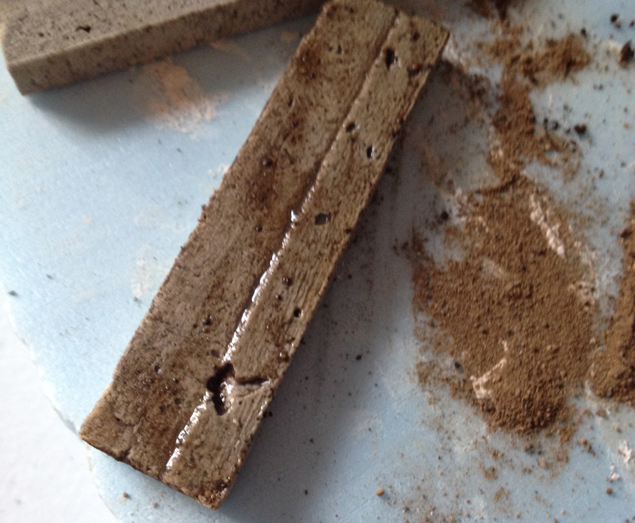
Now that the dirt is dry, I am going to add some additional dirt effects to vary the colors by using AK-Interactive’s Dirt Effects. I mix the color in with some paint thinner and dab it onto my casting with a paper towel and let it dry.
AK-Interactive’s Tank Track wash to add light streaks of rust on the face and sides of the casting and when dry, seal the entire casting.
Distressed Concrete
Now, I will take that process a step further and show you how to make concrete that is in need of repair and falling apart. To begin, I once again start with my frame. In this case railroad ties which have been distress to show wood grain which will transfer to my plaster casting when removed from the mold.
As I’m mixing my plaster and sifted sand mix, I grab some of the unsifted sand and place it in a corner of the mold. Don’t worry about the chunks of rock in the sand, these will help your weathering process in the coming steps.
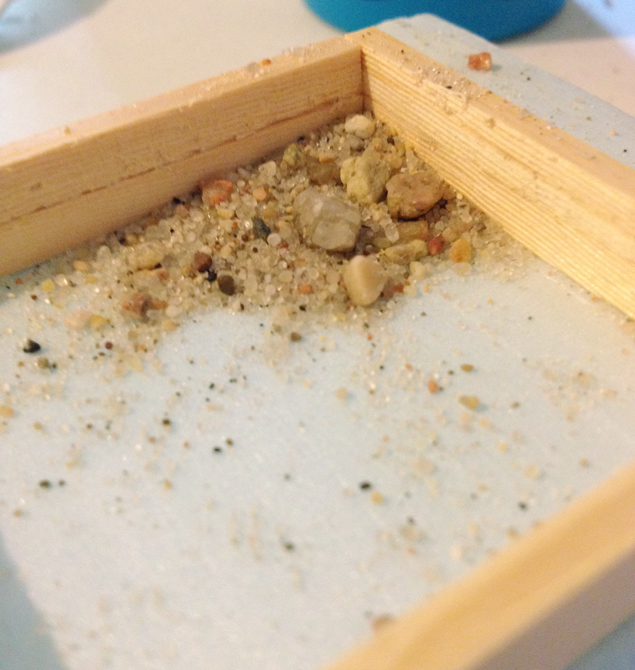
Once your plaster is mixed, pore it into the mold.
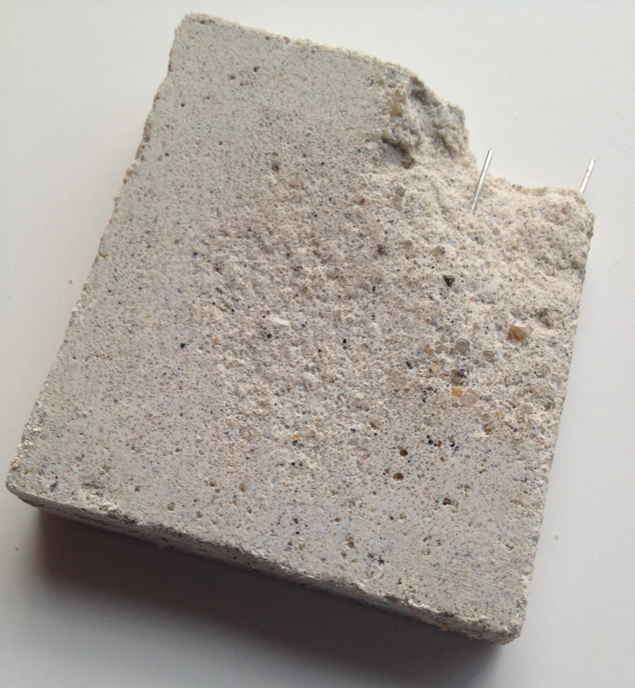
If you’ve worked with real concrete in the past, you will know that most of the concrete we see is reinforced with steel rebar. This helps to add strength and is often overlooked in our models. Spacing of your rebar is dependent on the size of the concrete slab, usually 10” – 16” on center. If you want to take your detail even further, visit http://www.blocklayer.com/rebar-slabeng.aspx, where you will be able to calculate the prototypical spacing for your project.
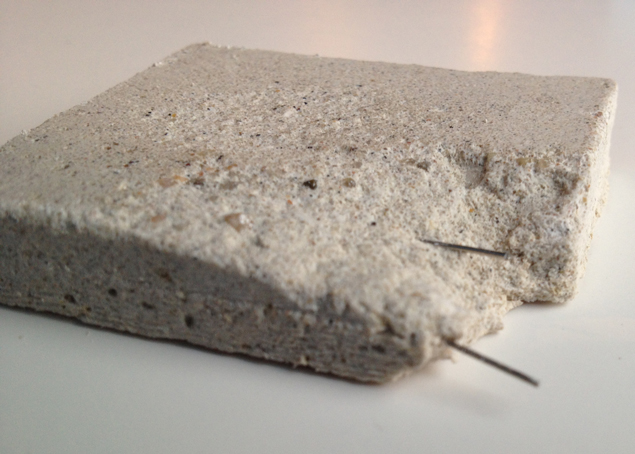
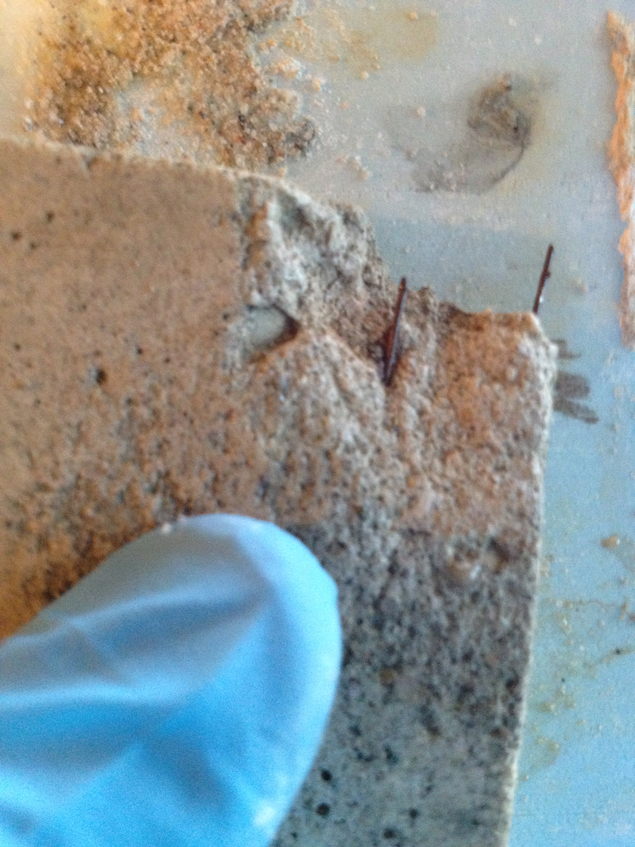
The easiest way I have found to add my rebar is to fill the mold half way with your plaster mix. Now , while the plaster is still wet, add your brass wire by placing it on top of your concrete mix. Once in place, fill the mold the rest of the plaster.
You will note that for this article, I did not add my rebar in prototypical manner so be gentle with your comments.
Shaping your Casting
I like to remove my casting before it fully cures but still solid. Doing so allows me to work with the casting much easier.
Once you remove your casting from the mold, most of the sand will be embedded into your plaster. Using a toothpick or razor knife and a dry paper towel I chip away at the unwanted material. Most of it will come off with ease however you may have to work some of the stones out of the mix. Leaving some in will increase the level of detail as well. Something to keep in mind, especially for the larger scale modelers.
My paper towel is also used to remove unwanted material. Additionally I have found paper towels useful for sanding, smoothing and roughening up my castings. Great multipurpose tools!
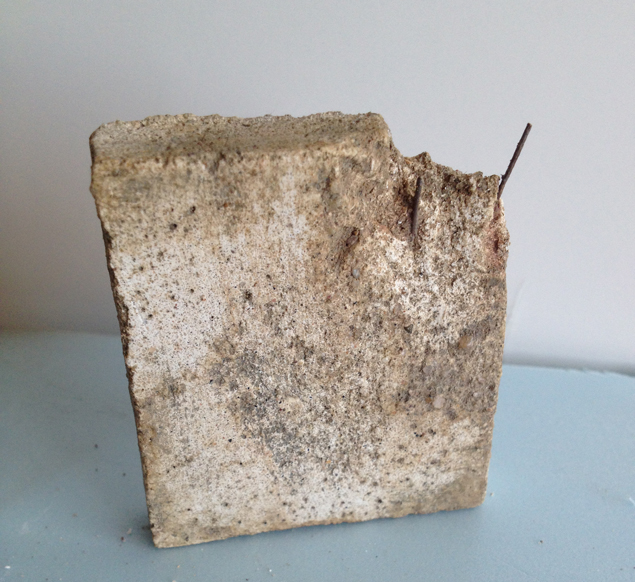
Once you have chipped away your sand and plaster, you should begin to see your rebar, if added. After you are satisfied with the casting, you can move on to your base coats of paint.
Now you can paint the casting similar to what I did above. Build your layers of colors as you apply your paint and washes.

Very interesting technique. I will keep this in mind for my next cement job
Thank you Gene.
I like how you used simple materials and techniques to create realistic-looking weathered concrete.