Benchwork has always been a problem for me. I’ve never had the time or space to learn to build proper benchwork so most of my modeling has been confined to diorama’s. With that said, I turned to Tim Horn of Tim Horn Lasercutting to produce the the layout in 4 sections.
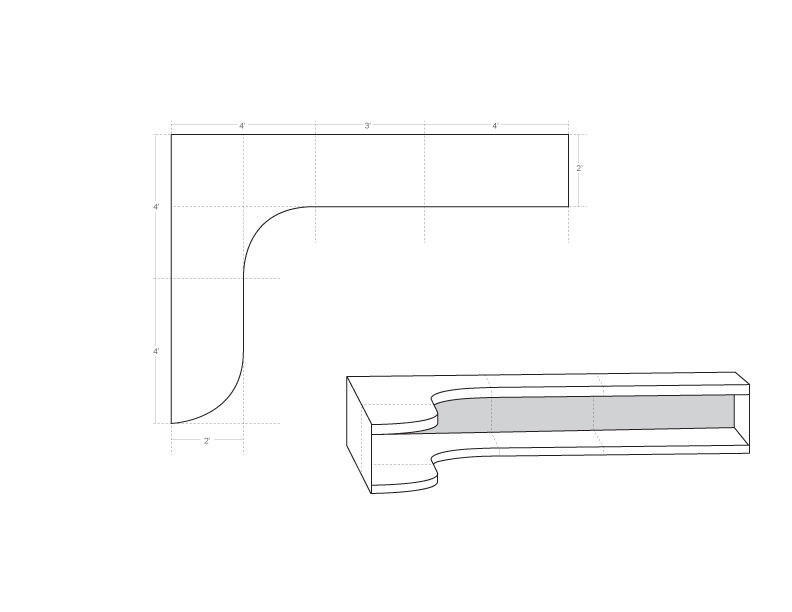
A basic drawing was created in Adobe Illustrator which Tim used to design the modules. There was a slight edit made in the final design which, was the addition of a creek bed for the Angels Creek bridge. I have purchased a module from Tim in the past and knew of the quality he produces so I was extremely excited to get these modules once the designs were finalized.
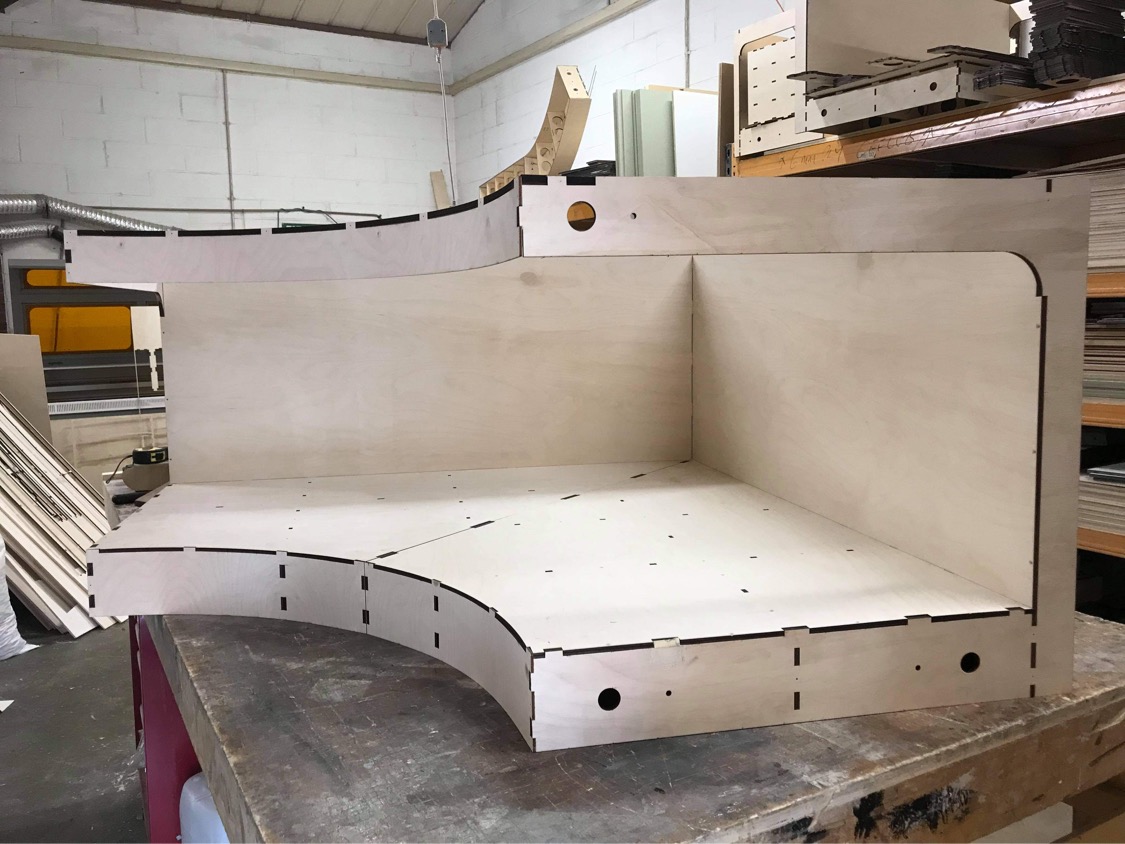
Based on the design, three of the modules would have to be custom made and one, a three-foot module, would be one of Tim’s standard designs.
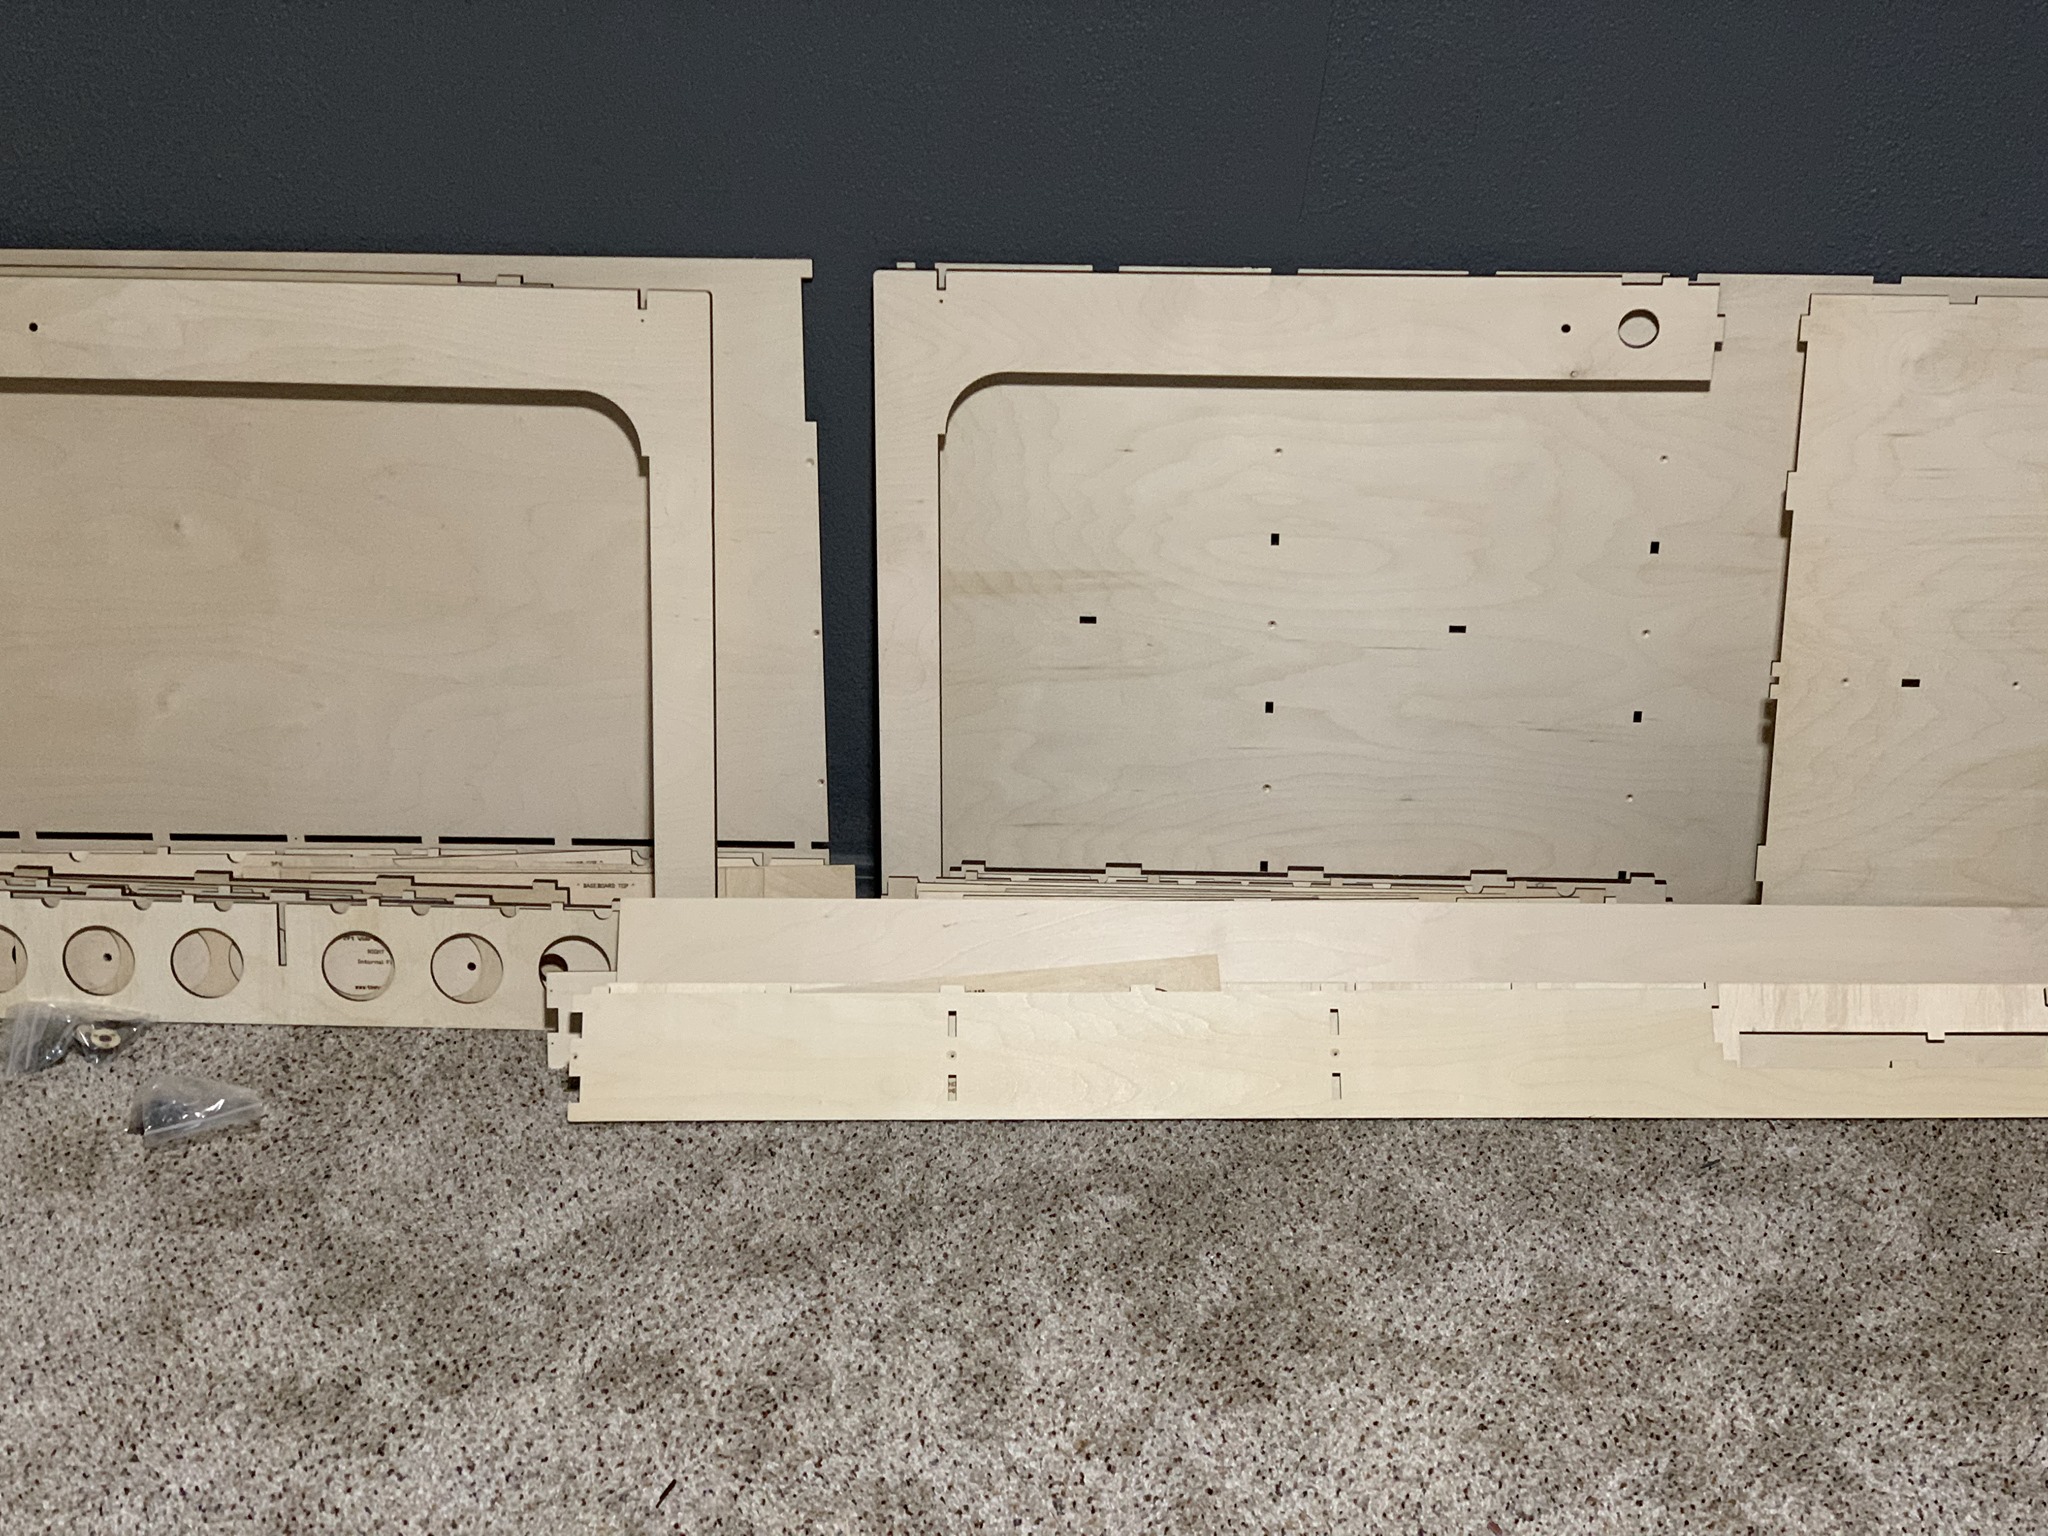
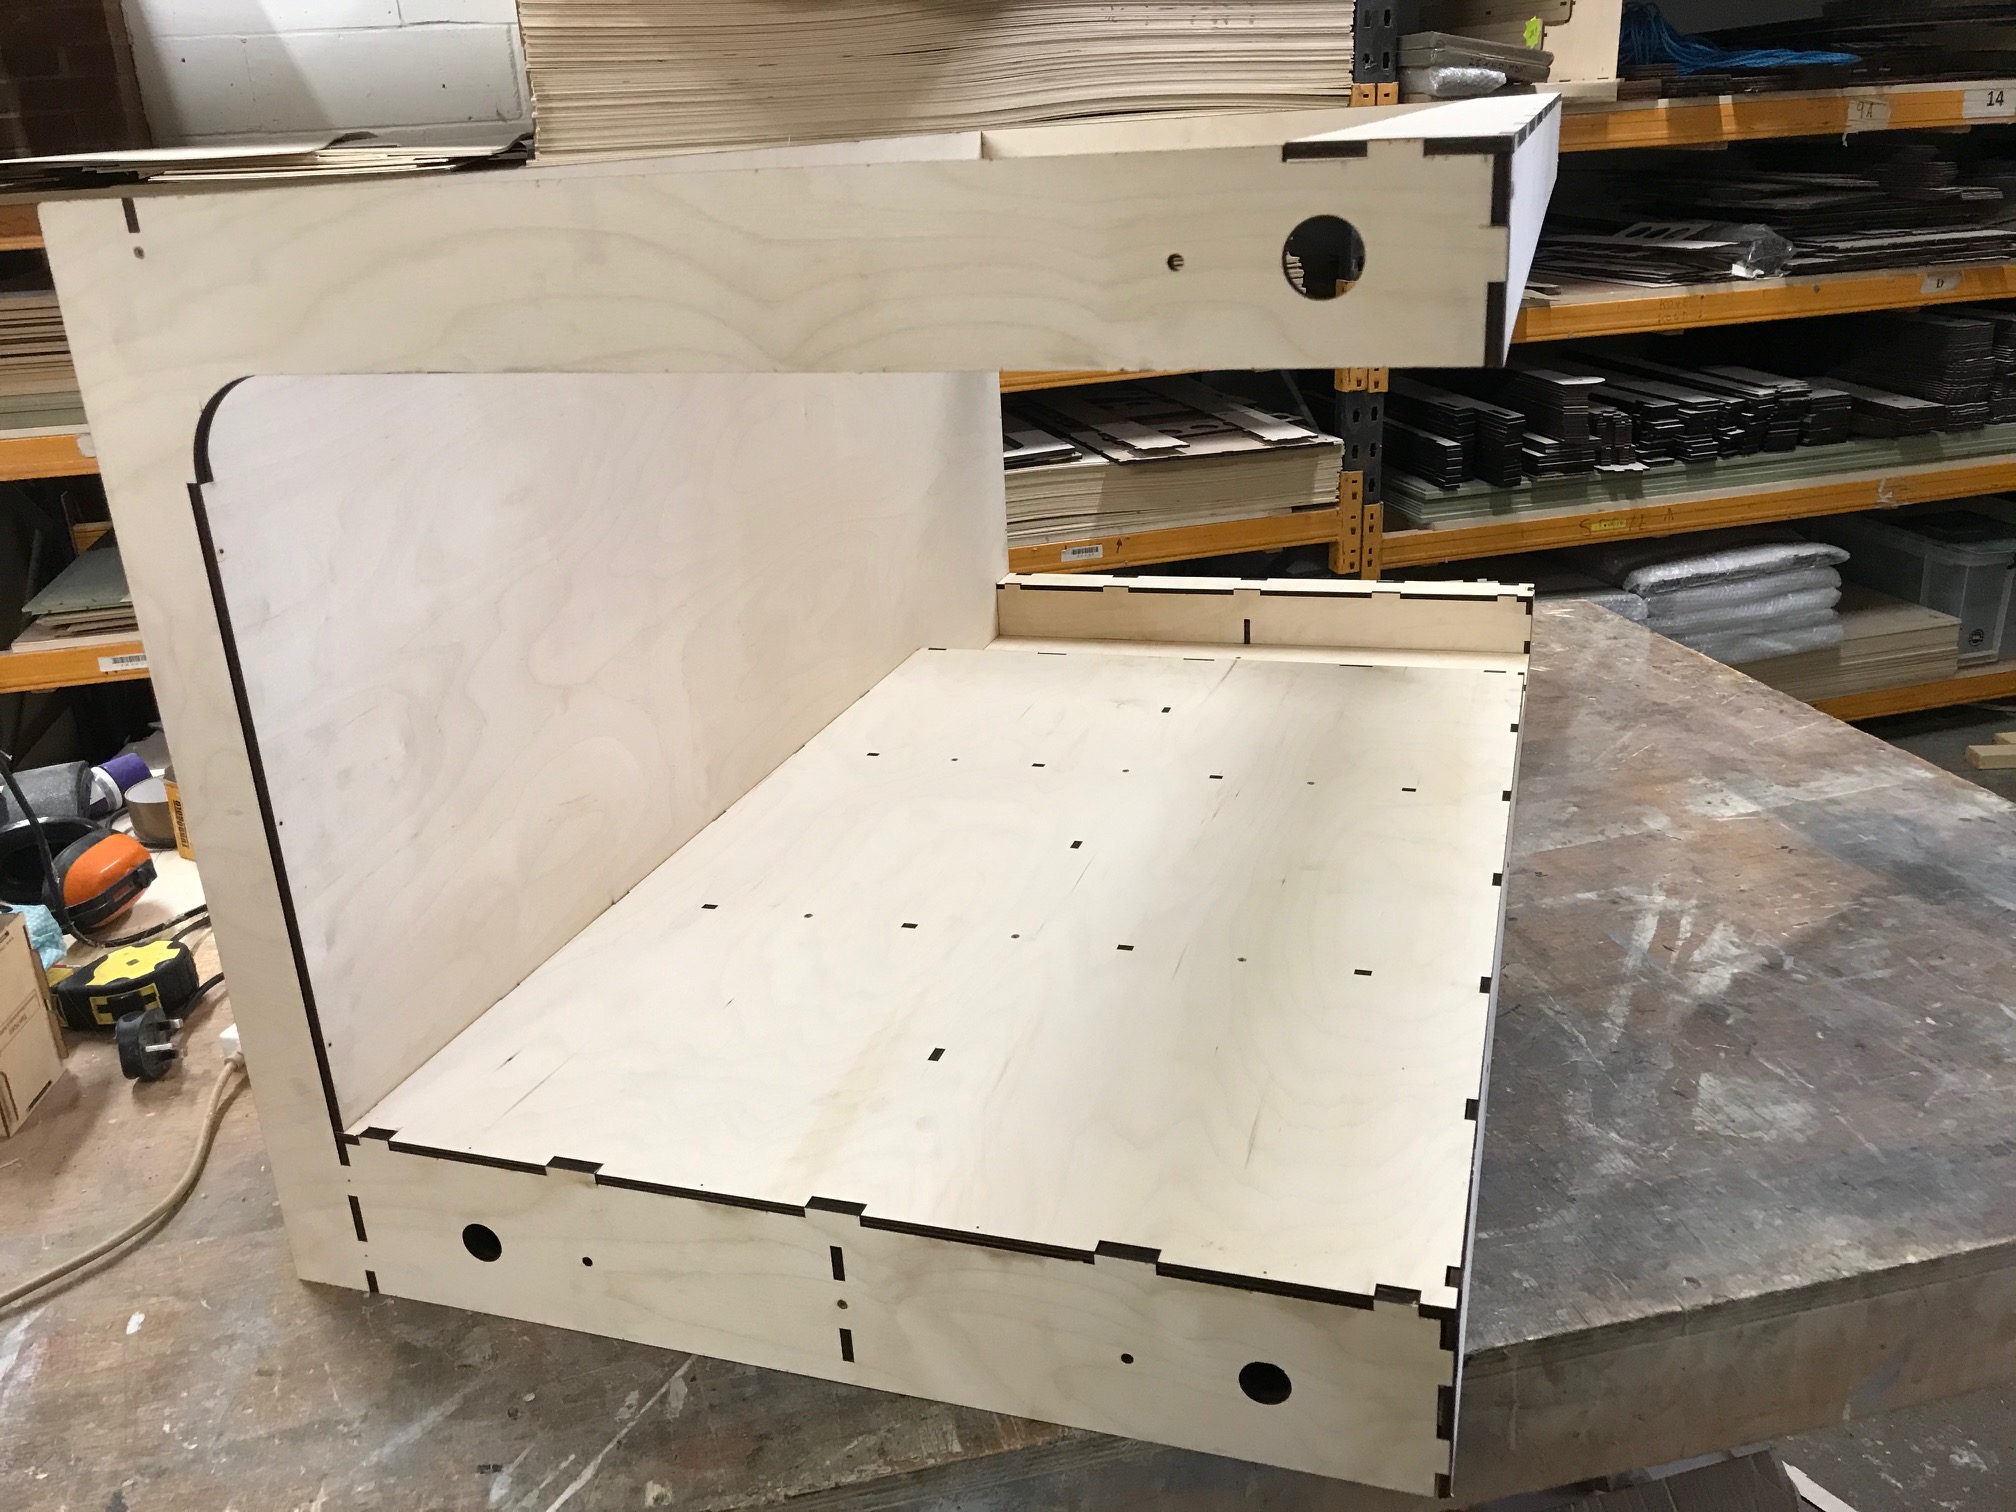
Tim was able to send three of the four modules and I started assembling them. Assembly is straight-forward; wood glue and provided wood screws. The modules are 24-inches deep so I purchased 16-inch long metal brackets to provide a base for the modules to rest on. 2×2 inch wood was fastened to the walls and then the modules were fastened to them to secure them in place.
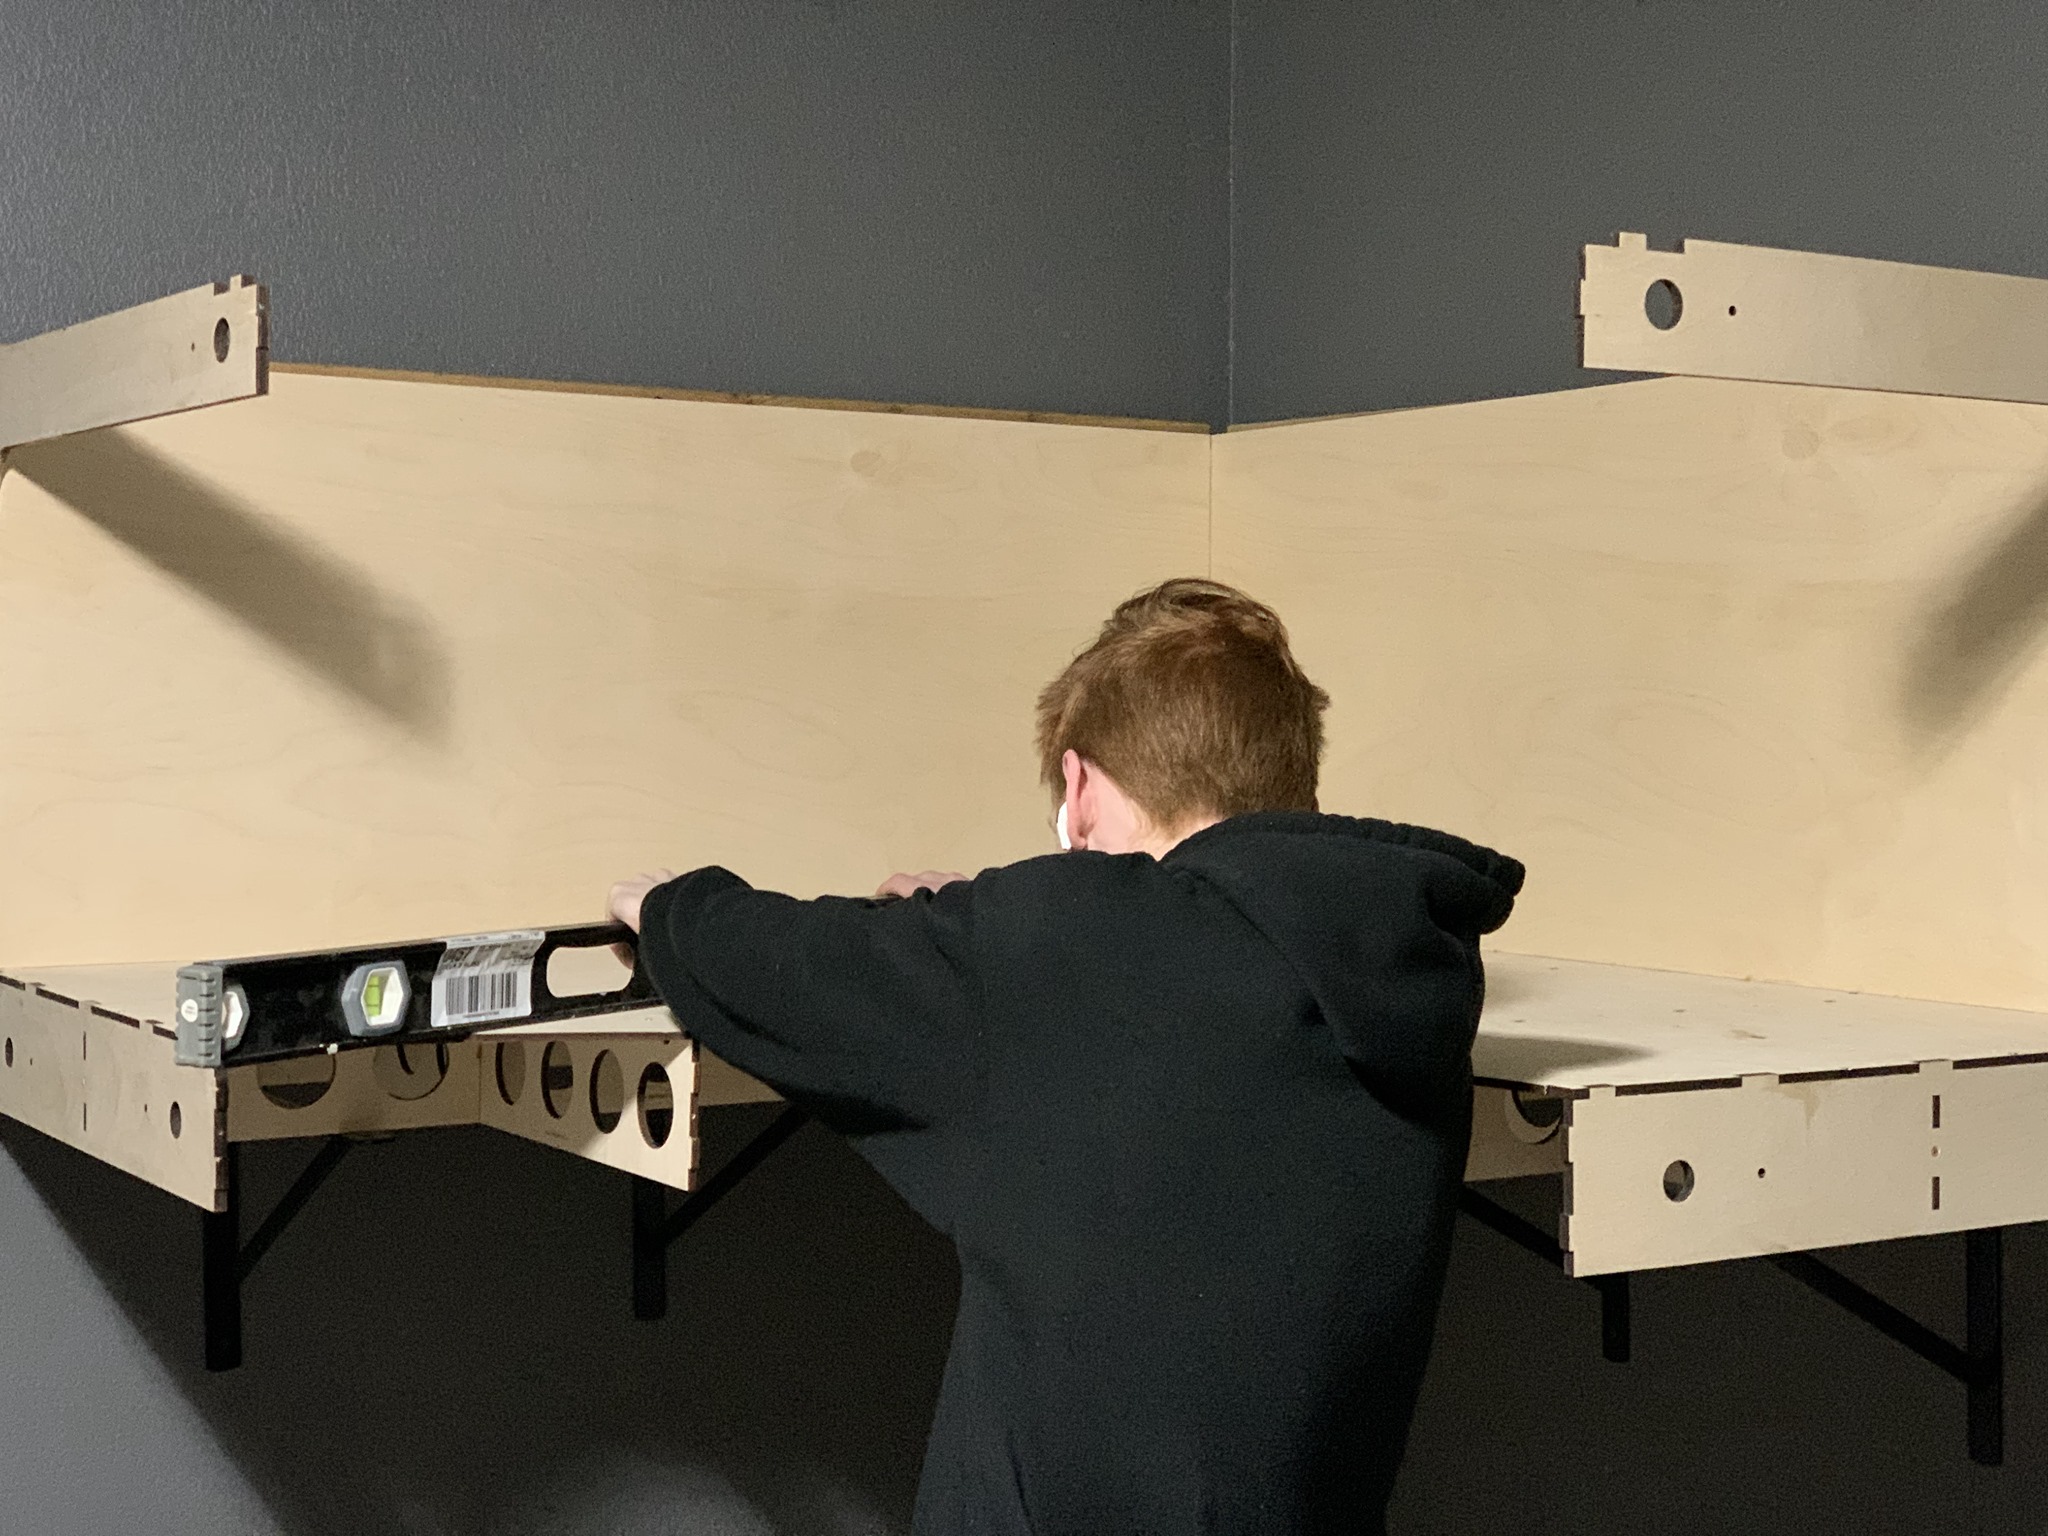
As I secured the modules to the walls, bolts provided by Tim were used to bolt the modules together at the base and top.

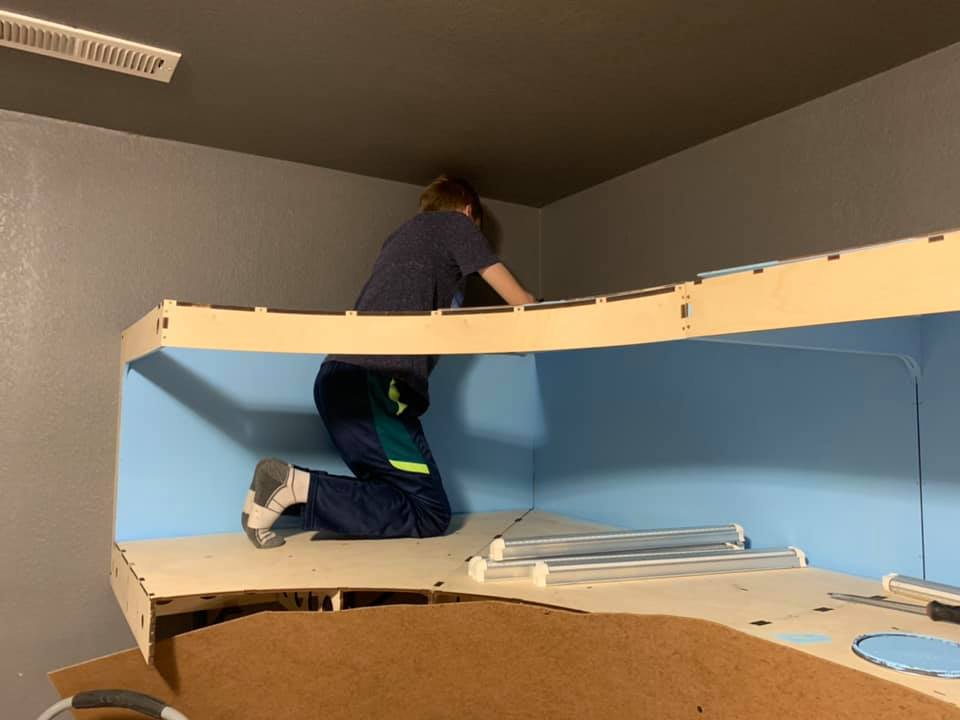
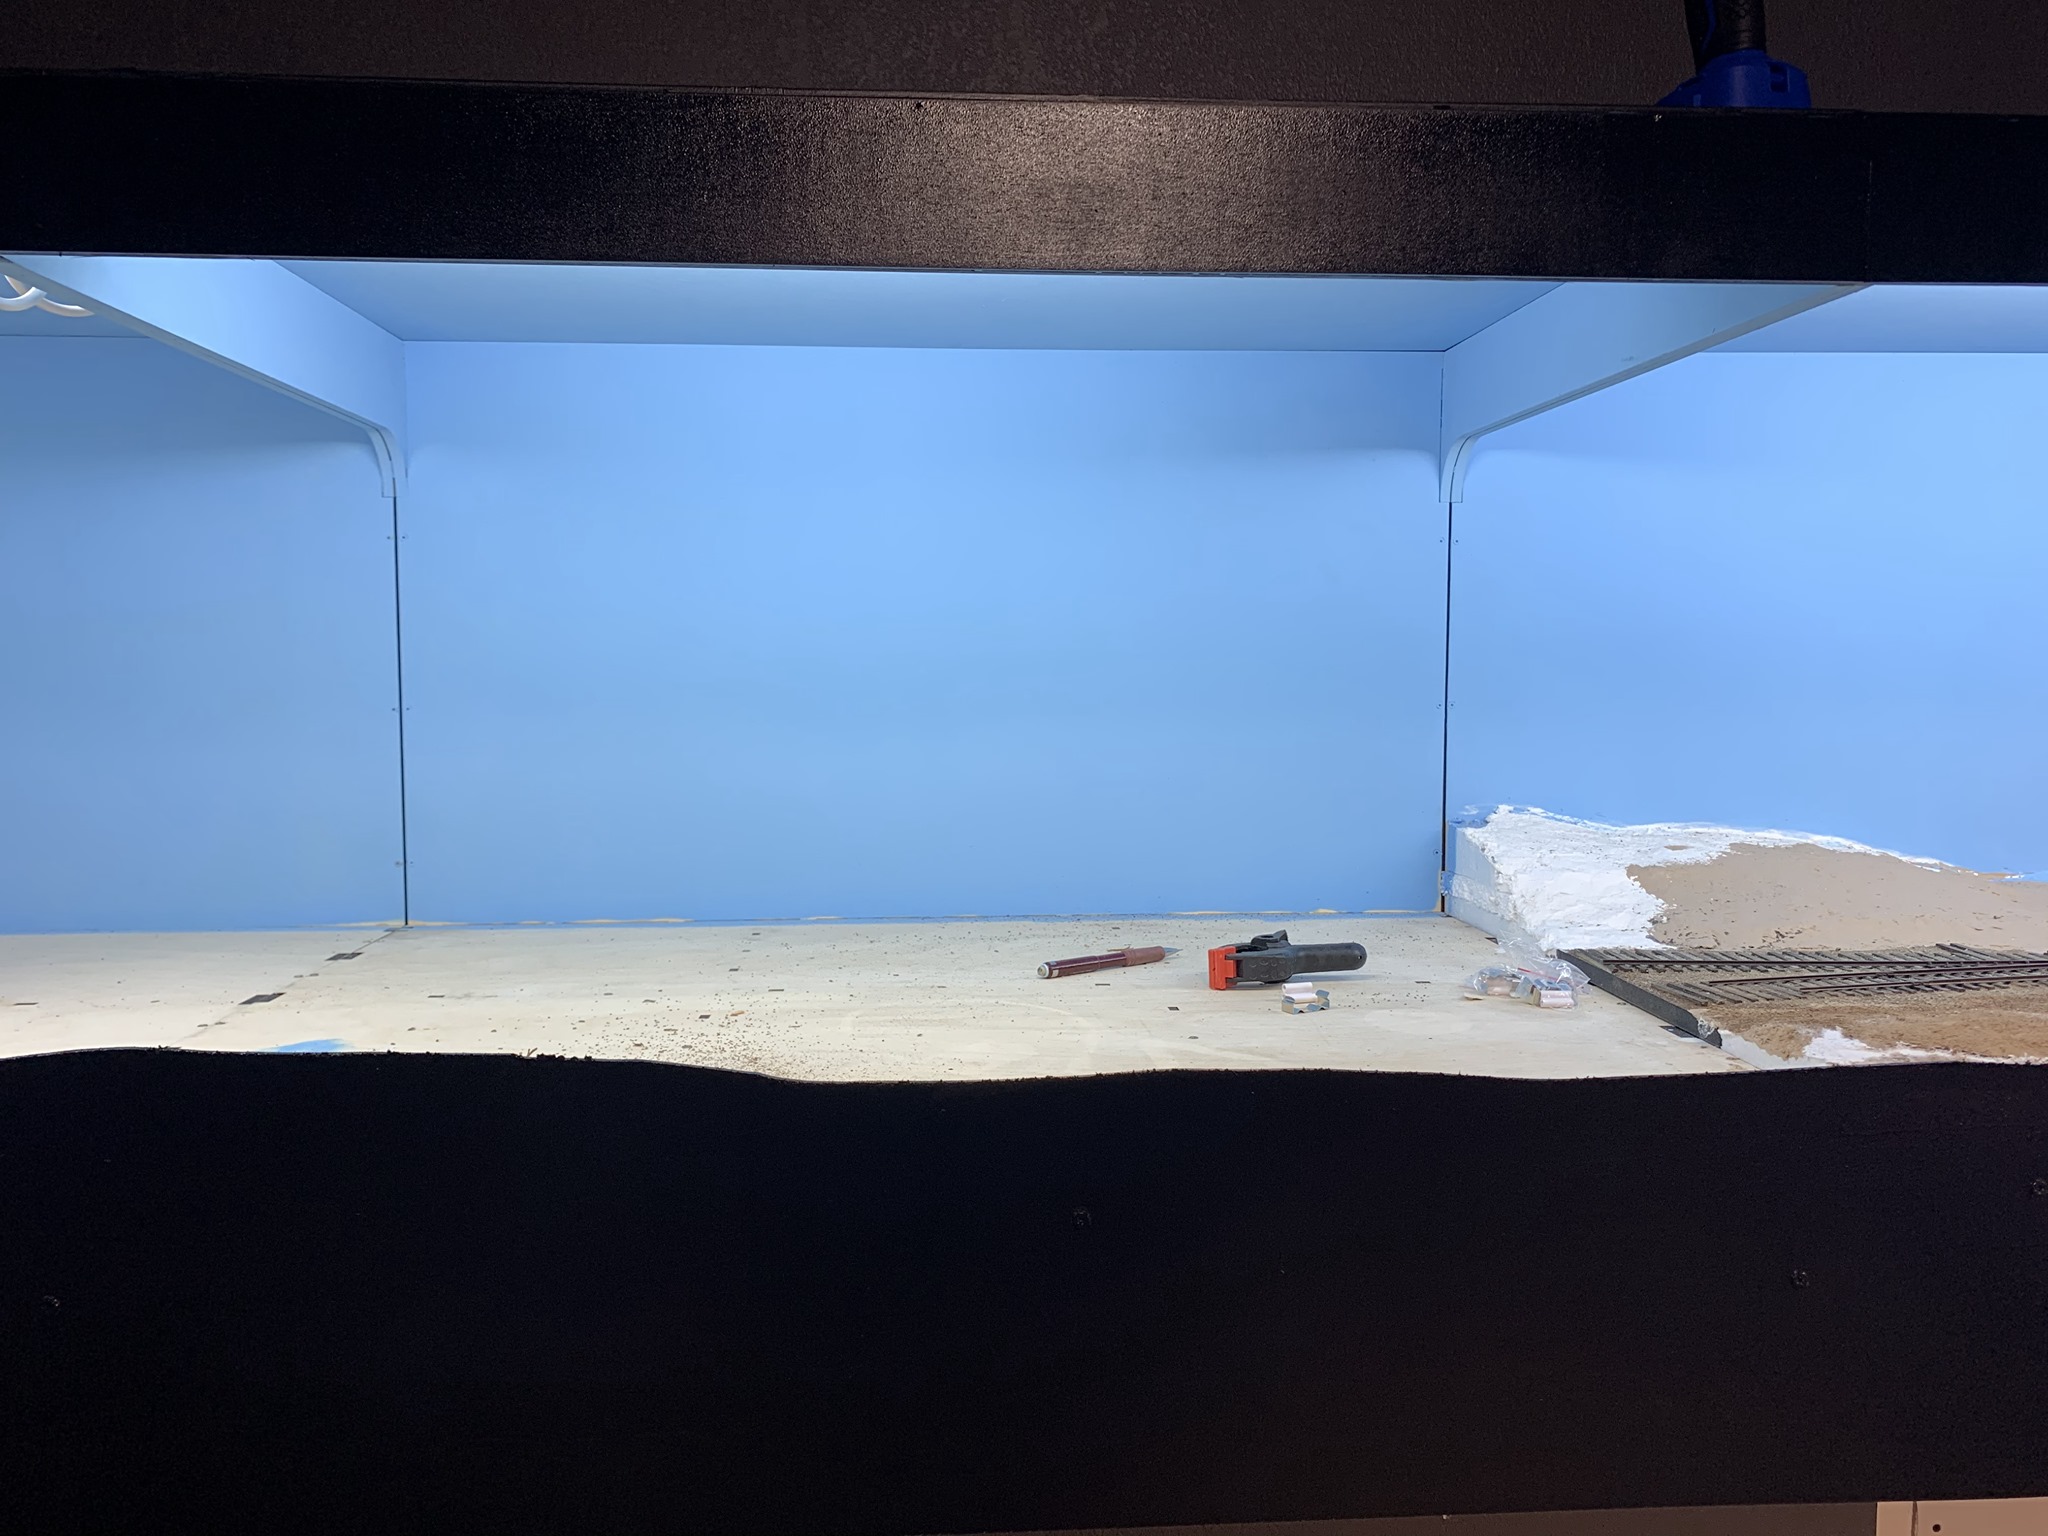
After all modules were secured in place, My son Jacob and I painted the inside of the modules a flat sky color. I am either going to paint the backdrop or use a photo background. I’m still undecided at the time of this writing as to what direction I am going.
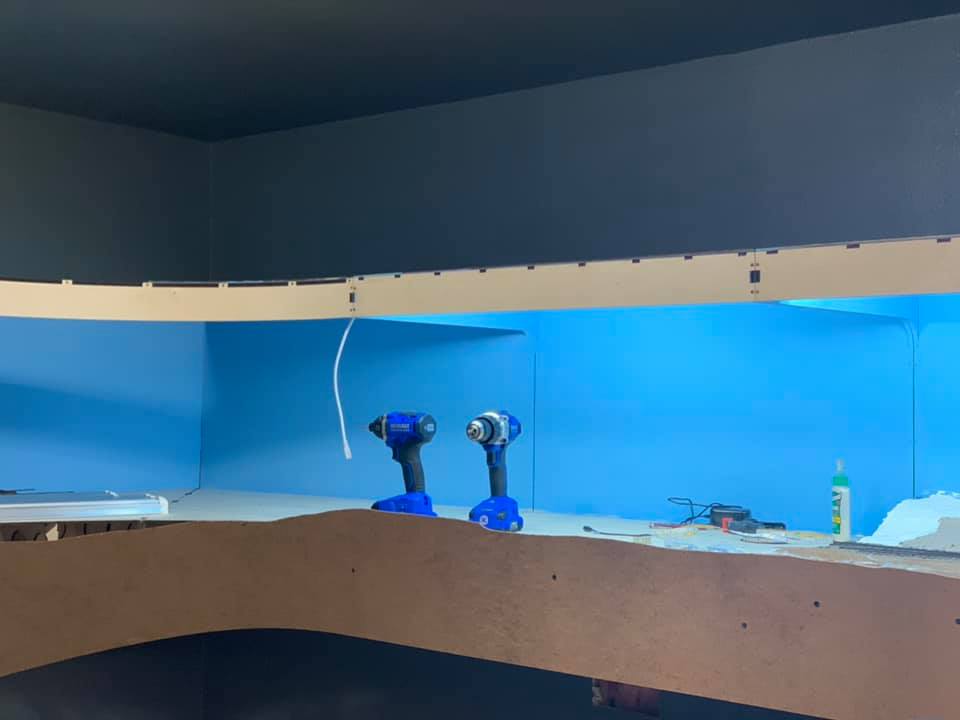
Tim provided 3mm sheets for the fascia and valances, however, I decided to use masonite to give it a smoother finish and hide the module ends. I then painted both black. This is an old theater trick to force the viewers eyes into the scene on stage and works well with model railroads.
Lighting
I added a “ceiling” to my modules using 9mm plywood after I painted the inside the same blue color. I should have applied these before I hung the modules as the corner module is too large for me to reach the back. Luck my youngest son, Jacob, was willing to test the strength of Tims work and nail them in place.
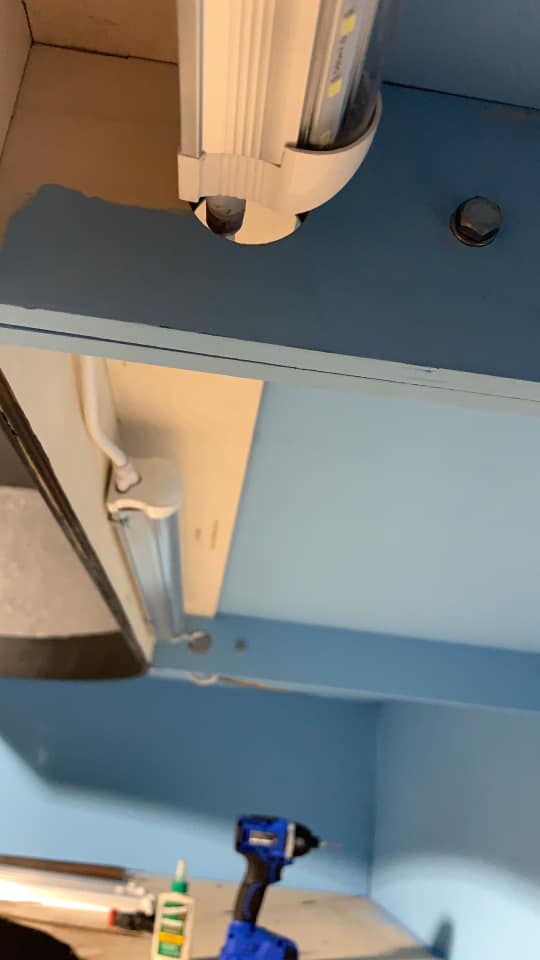
Behind the valance I installed LED light fixtures. These work quite well and put off quite a bit of light. I am also considering adding recessed lighting to each module to help fill the modules with extra lighting. I still have a bit of experimentation to do .
Wrapping Up
I’m waiting on the final module to be finished but while I’m waiting I plan on starting the track for the three modules. Once the final module arrives, I will finish the fascia as well as finalize the lighting arrangement.

Shawn~
I’m impressed with your benchwork and that of Tim Horn’s skills as well. I first learned of Tim’s baseboards about a year ago when a friend gave me one of the UK’s model railroad magazines. With the pandemic hitting our shores about that time, and assuming Tim had more than enough business in the UK to keep him busy, I wasn’t sure he accepted clients from the US, so I let it slide. You’ve encouraged me to put aside my hesitation and contact him. By the way, I enjoy reading all your posts; you are a very talented builder/modeler. Thanks.
~Brian
Brian, thank you for reading and your kind comments. Tim does do very nice work but he is busy. Make sure you leave yourself some time for him to get to your modules. That said, I was surprised how fast shipping was to the States.
Shawn, it’s hard to believe it’s been almost two months since our first correspondence. In the Covid era, the passage of time has seemed to accelerate. Anyway . . . thanks to you, I made contact with Tim Horn, he put together a module package for me, along with pricing, etc., so we are good to go, once he sends me an invoice. But it has taken until today to get to this point, and that is due to his busyness.
As an aside, we all approach layout presentation in our own way. I’m 68 years old and have built a fair amount of benchwork over the years. I have the tools and just enough knowhow to be dangerous. But being retired, and my wife and I living in a smaller house, building a modest-sized shelf layout (or perhaps operational diorama is a better term) that has a finished furniture look to it is very appealing to me at this stage in my life.
I look forward to hearing more of your progress (and perhaps sharing with you some of mine). Thanks again.
~Brian
Great to hear from you Brian! Patience with Tim is important. I do know he is overwhelmed but will get to your modules as soon as he is able. That said, I am really looking forward to following along with your build as well.
I’m impressed with the strength shown. Now Jacob is no Shawn but that’s still a lot of weight. Obviously, the right person for the job. I’m also sure having you, or me, doing the same task probably wouldn’t have had the same success. It is cool you got one of the boys to work on it with you. Enough of that. I like what you’re doing bud.
Thank you Jay! I really do enjoy any time I get to spend with my boys. Jacob is a trooper!