I have always found dioramas to be both important and rewarding to my model building. They allow me to branch out from my normal routine. Let’s face it, not all of us are born able to make stunning pieces of artwork with our modeling. Dioramas offer a way for us to practice, perfect our skills and try new techniques before we attempt them on our model railroads. Most of my early years as a model builder were spent building small projects; learning to work with new materials, paint and scenery. They challenge me to pay attention to details that I may overlook on a larger layout since they are intended to be viewed at a much closer distance. This makes for a fun and very rewarding project.
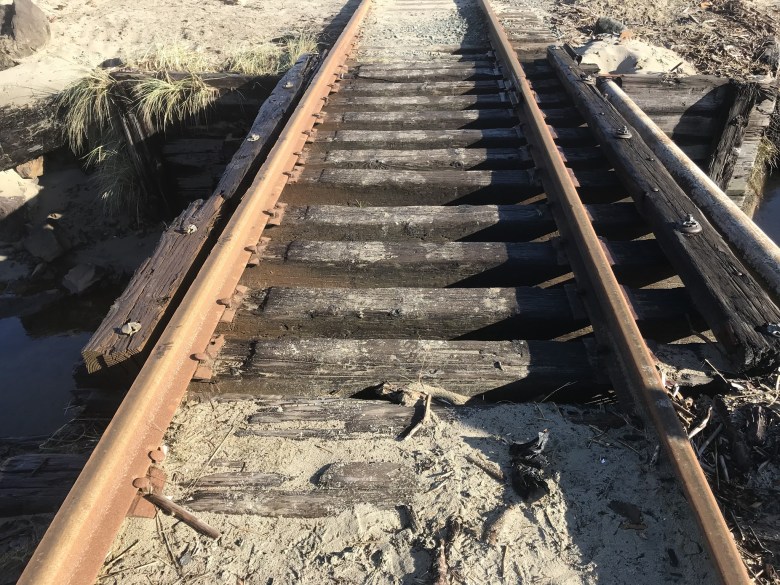
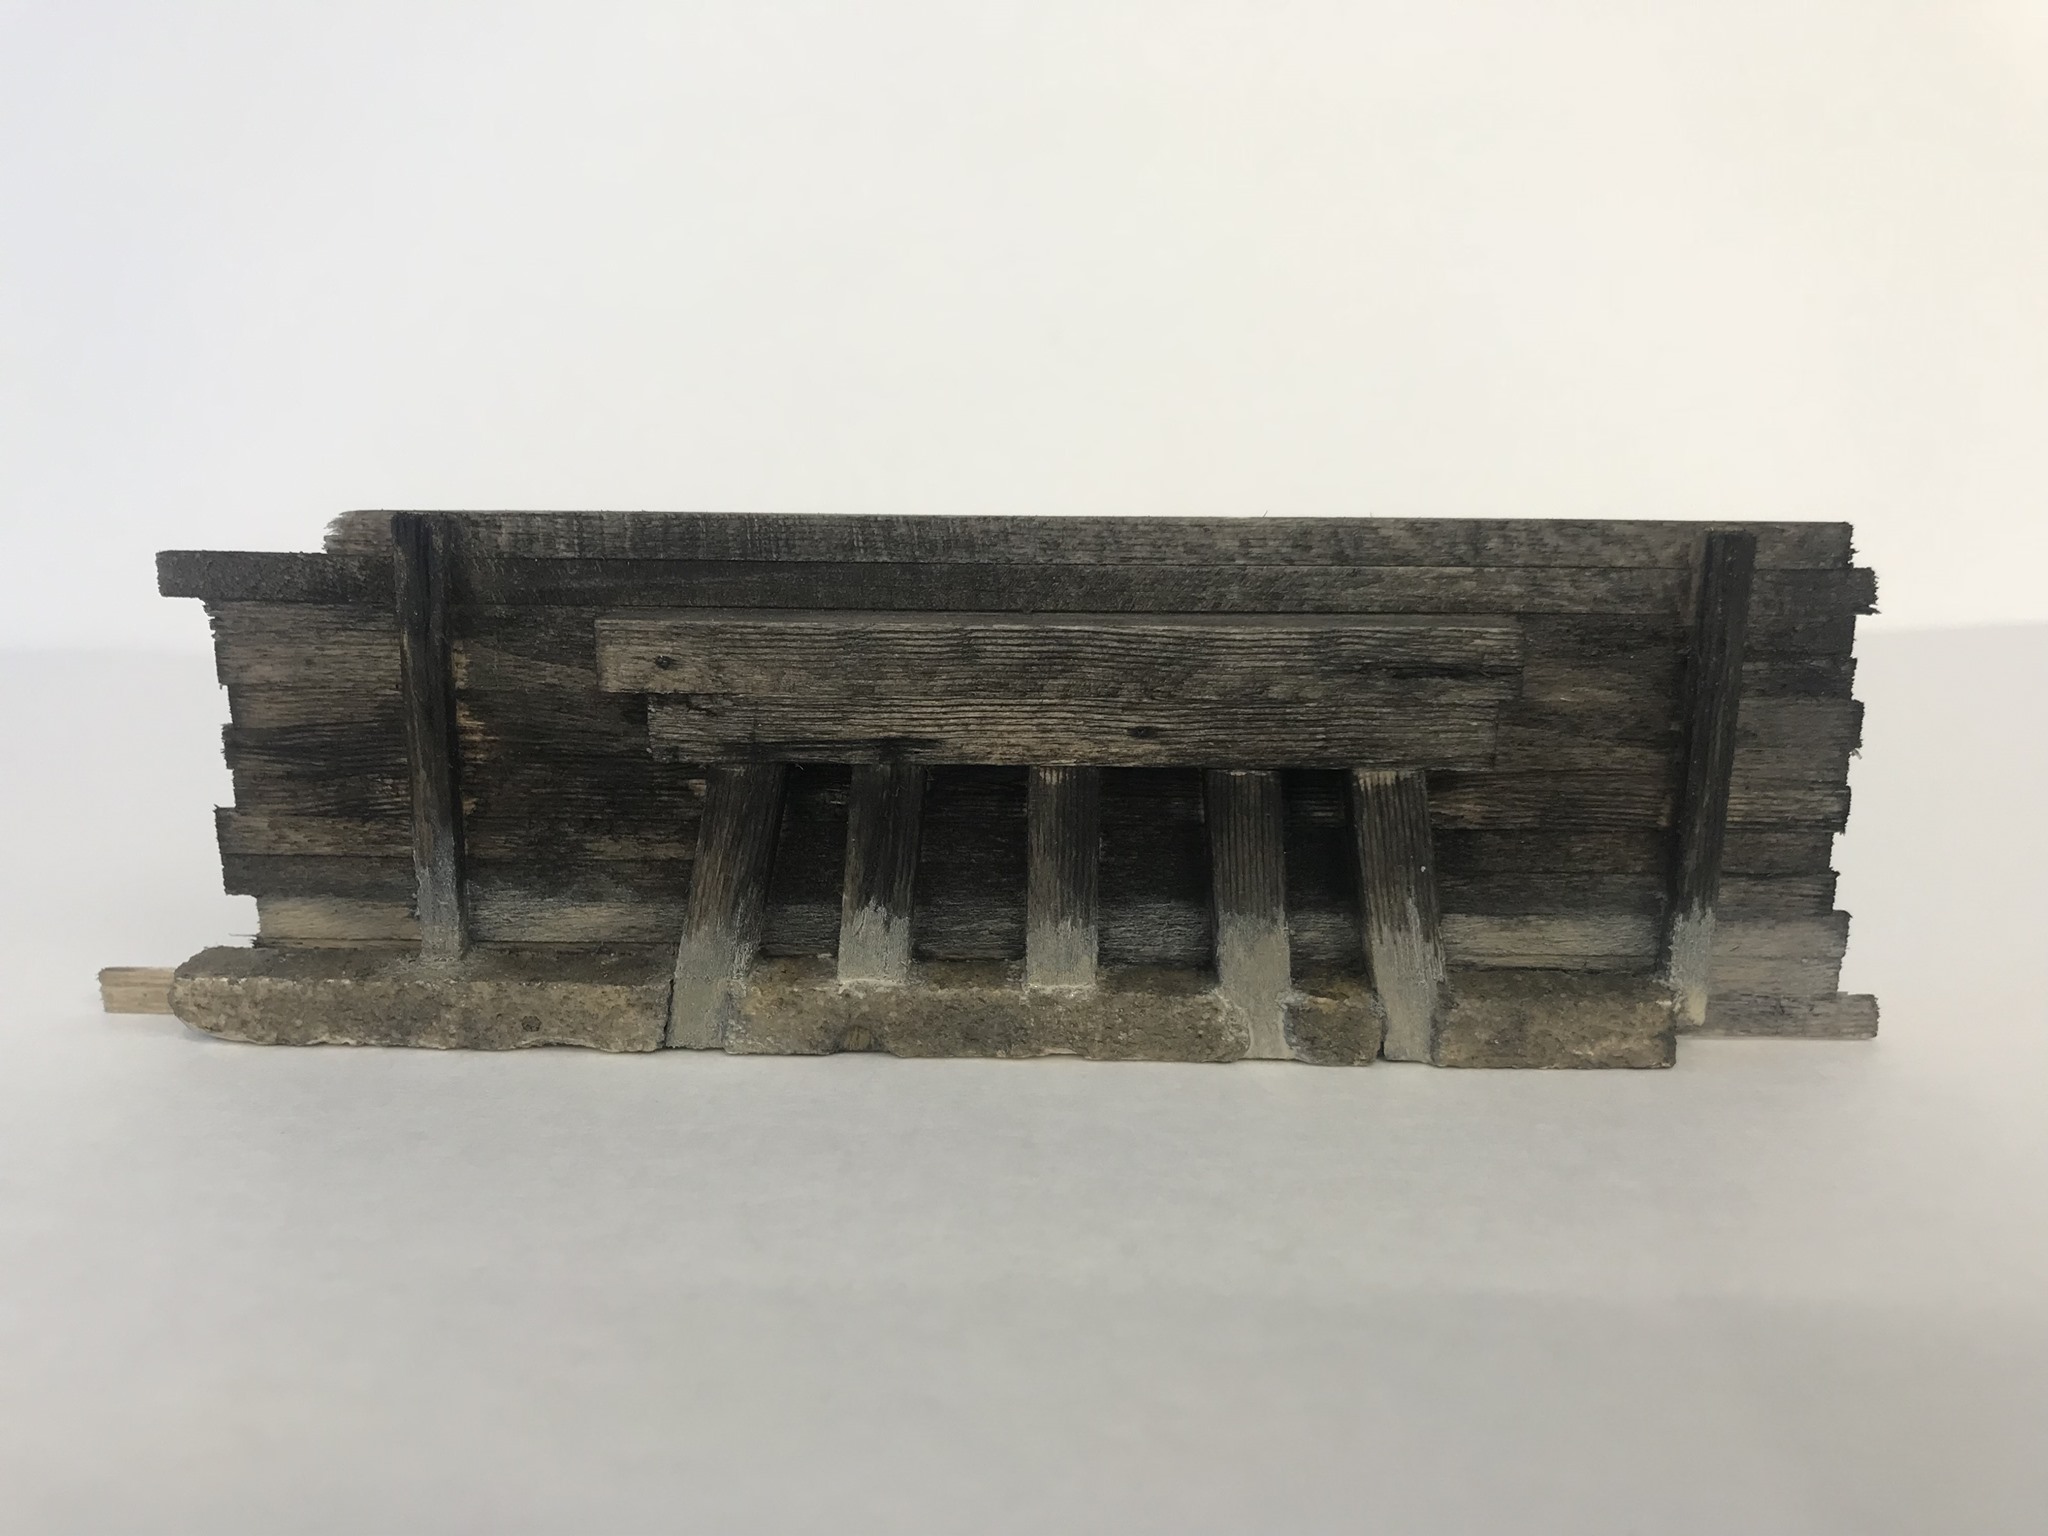
While on the Oregon coast, I stumbled upon a small bridge that, I thought, would make a great scratch building project. However, like a lot of the structures I photograph, it won’t fit into any of the scenes on either one of my layouts. The bridge was small, full of charm and I really wanted to build it so I decided to build a small diorama to display in my home office.
Bill of materials
Stringers: 8” x 18”
Legs: 12” x 12”
Bulkhead Boards: 3” x 8”
Bulkhead Bracing: 5” x 7”
Timber Guards: 5” x 7”
Bridge Ties: 8” x 8” x 10’
Grandtline NBW
Tichy Train Group Rivets
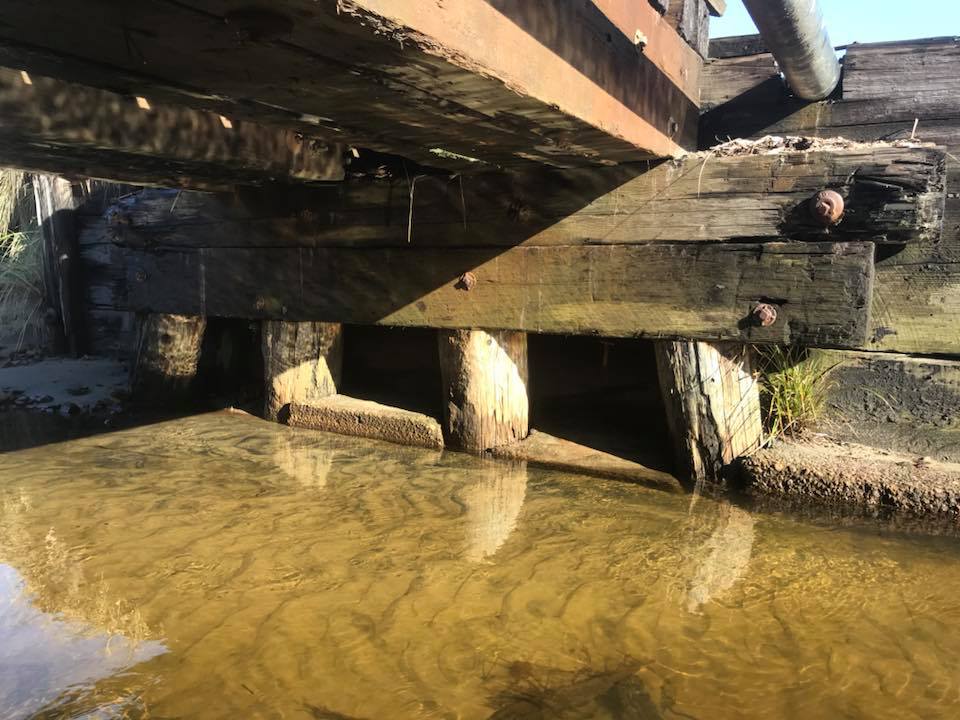
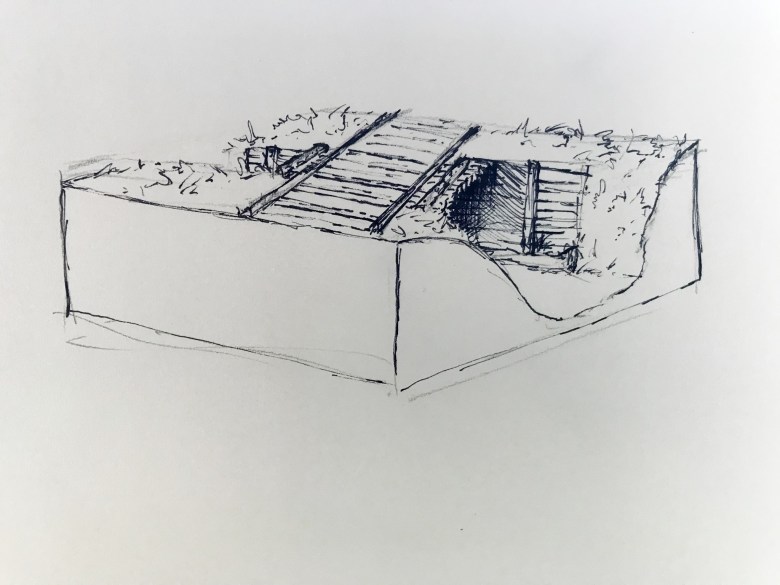
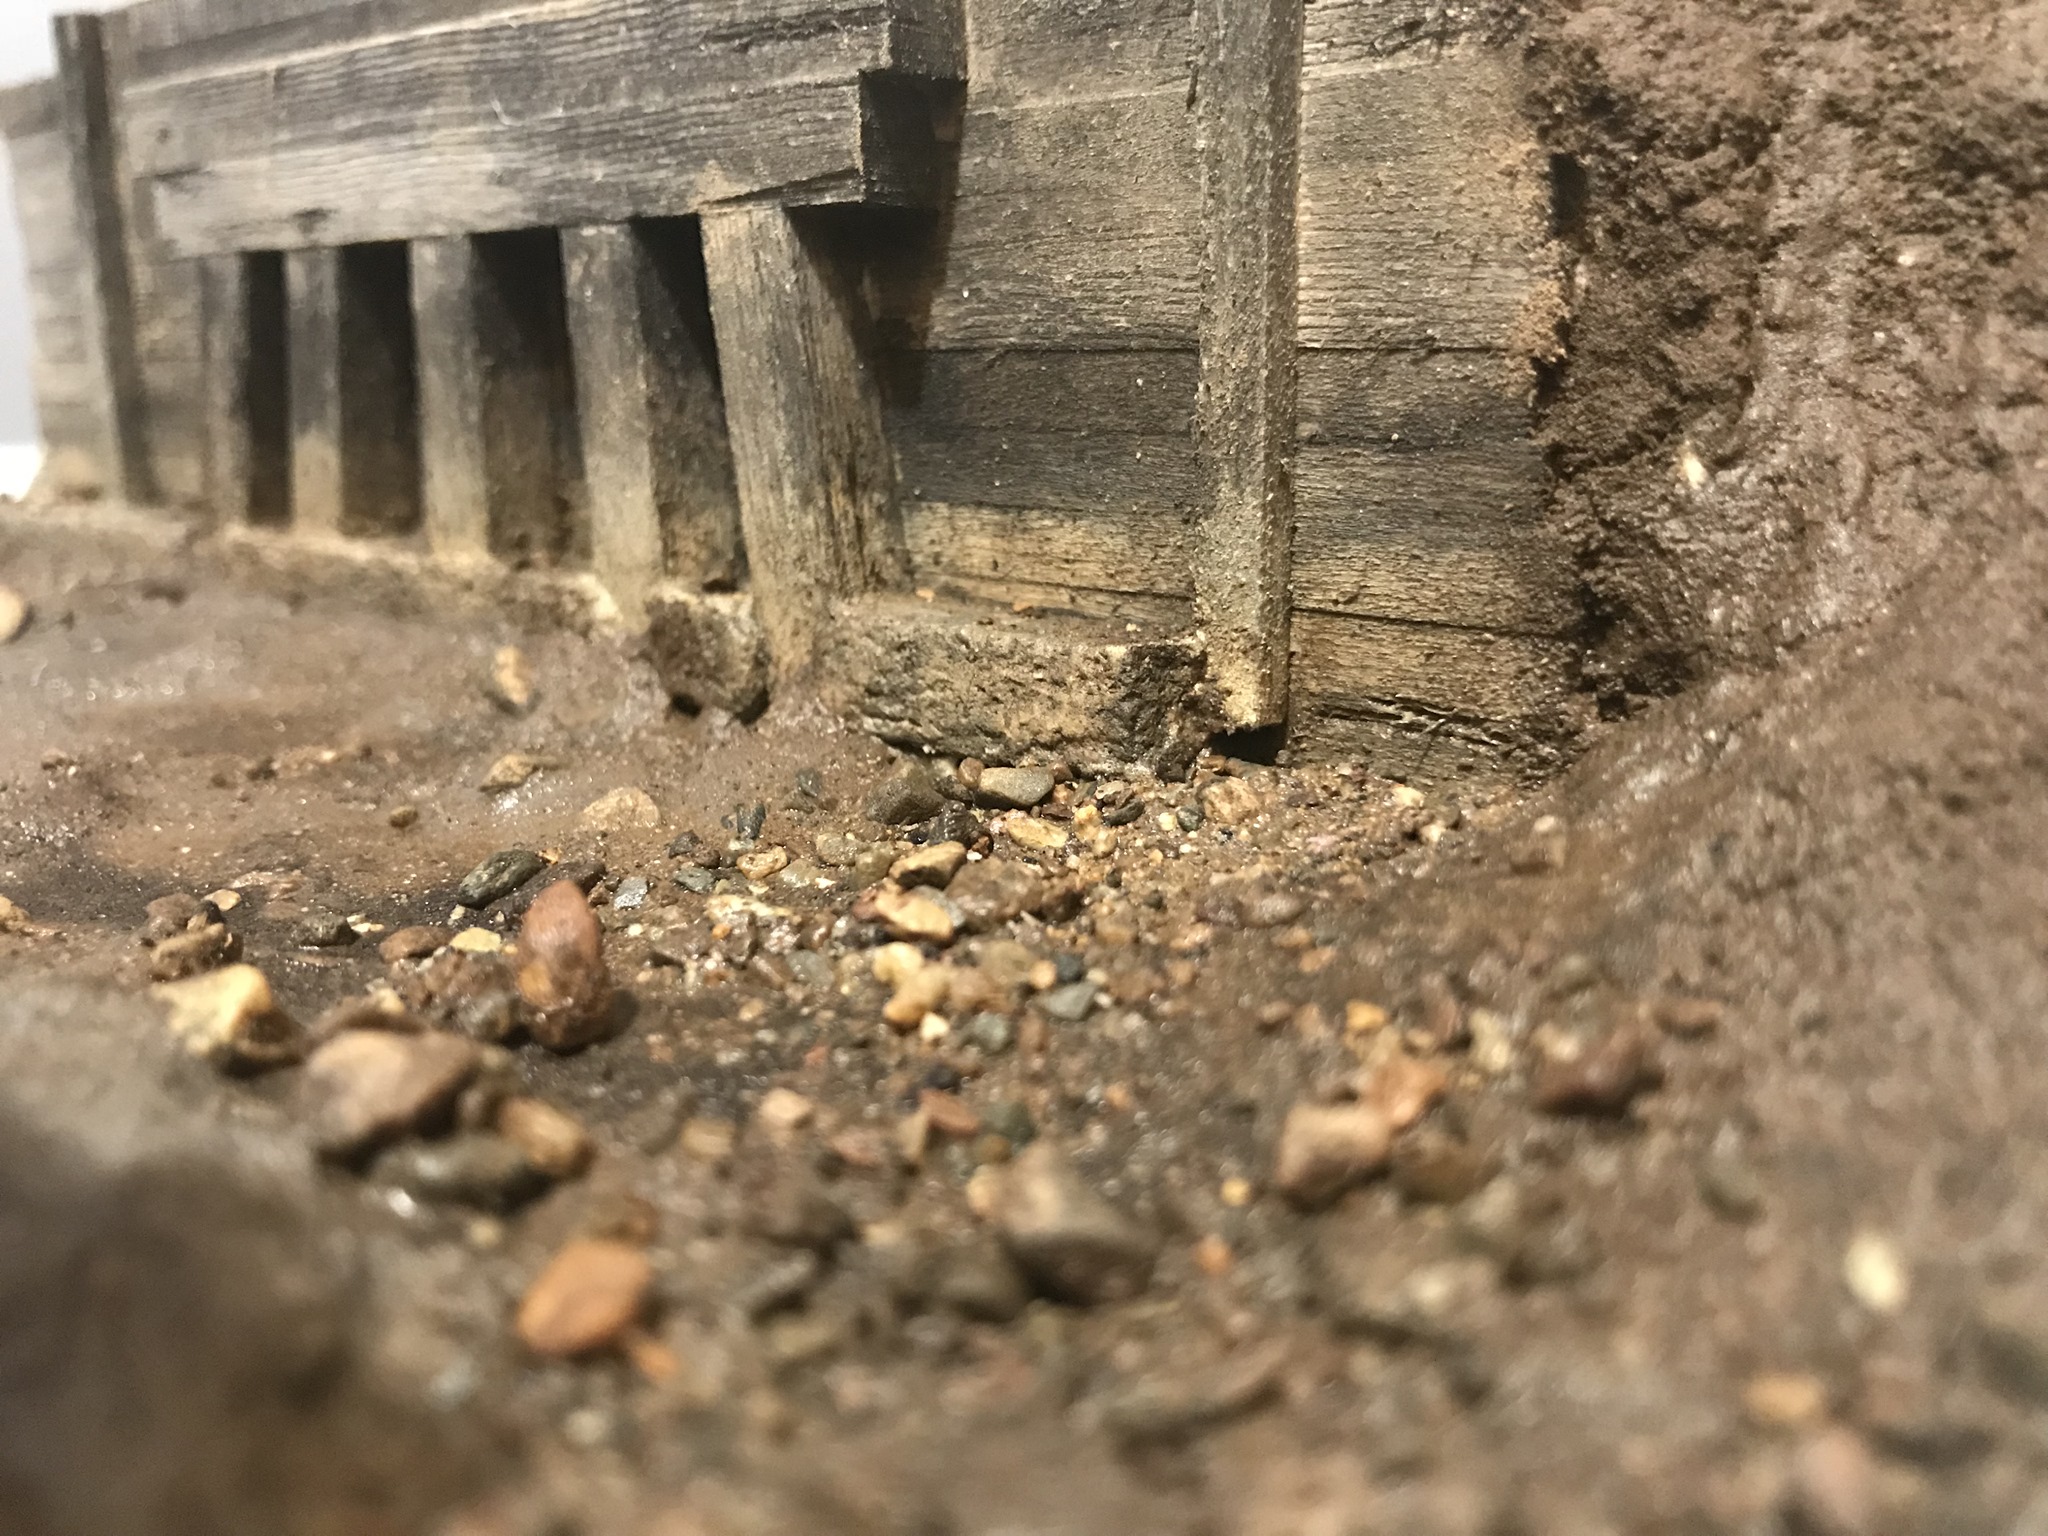
With a basic idea in mind, I began to sketch my ideas for a simple scene with the bridge as my focal point. The model will be a scale 13 feet long and 8 feet tall and like the prototype, concrete would form footings around the wood bents that will show signs of heavy wear and mud. The concrete would be cracking and chipping away from the wood, slightly submerged in standing water, providing a challenge for my weathering skills. Since I primarily model 1:48 scale, I designed the bridge to be built to Proto48 standards.
Building the bridge
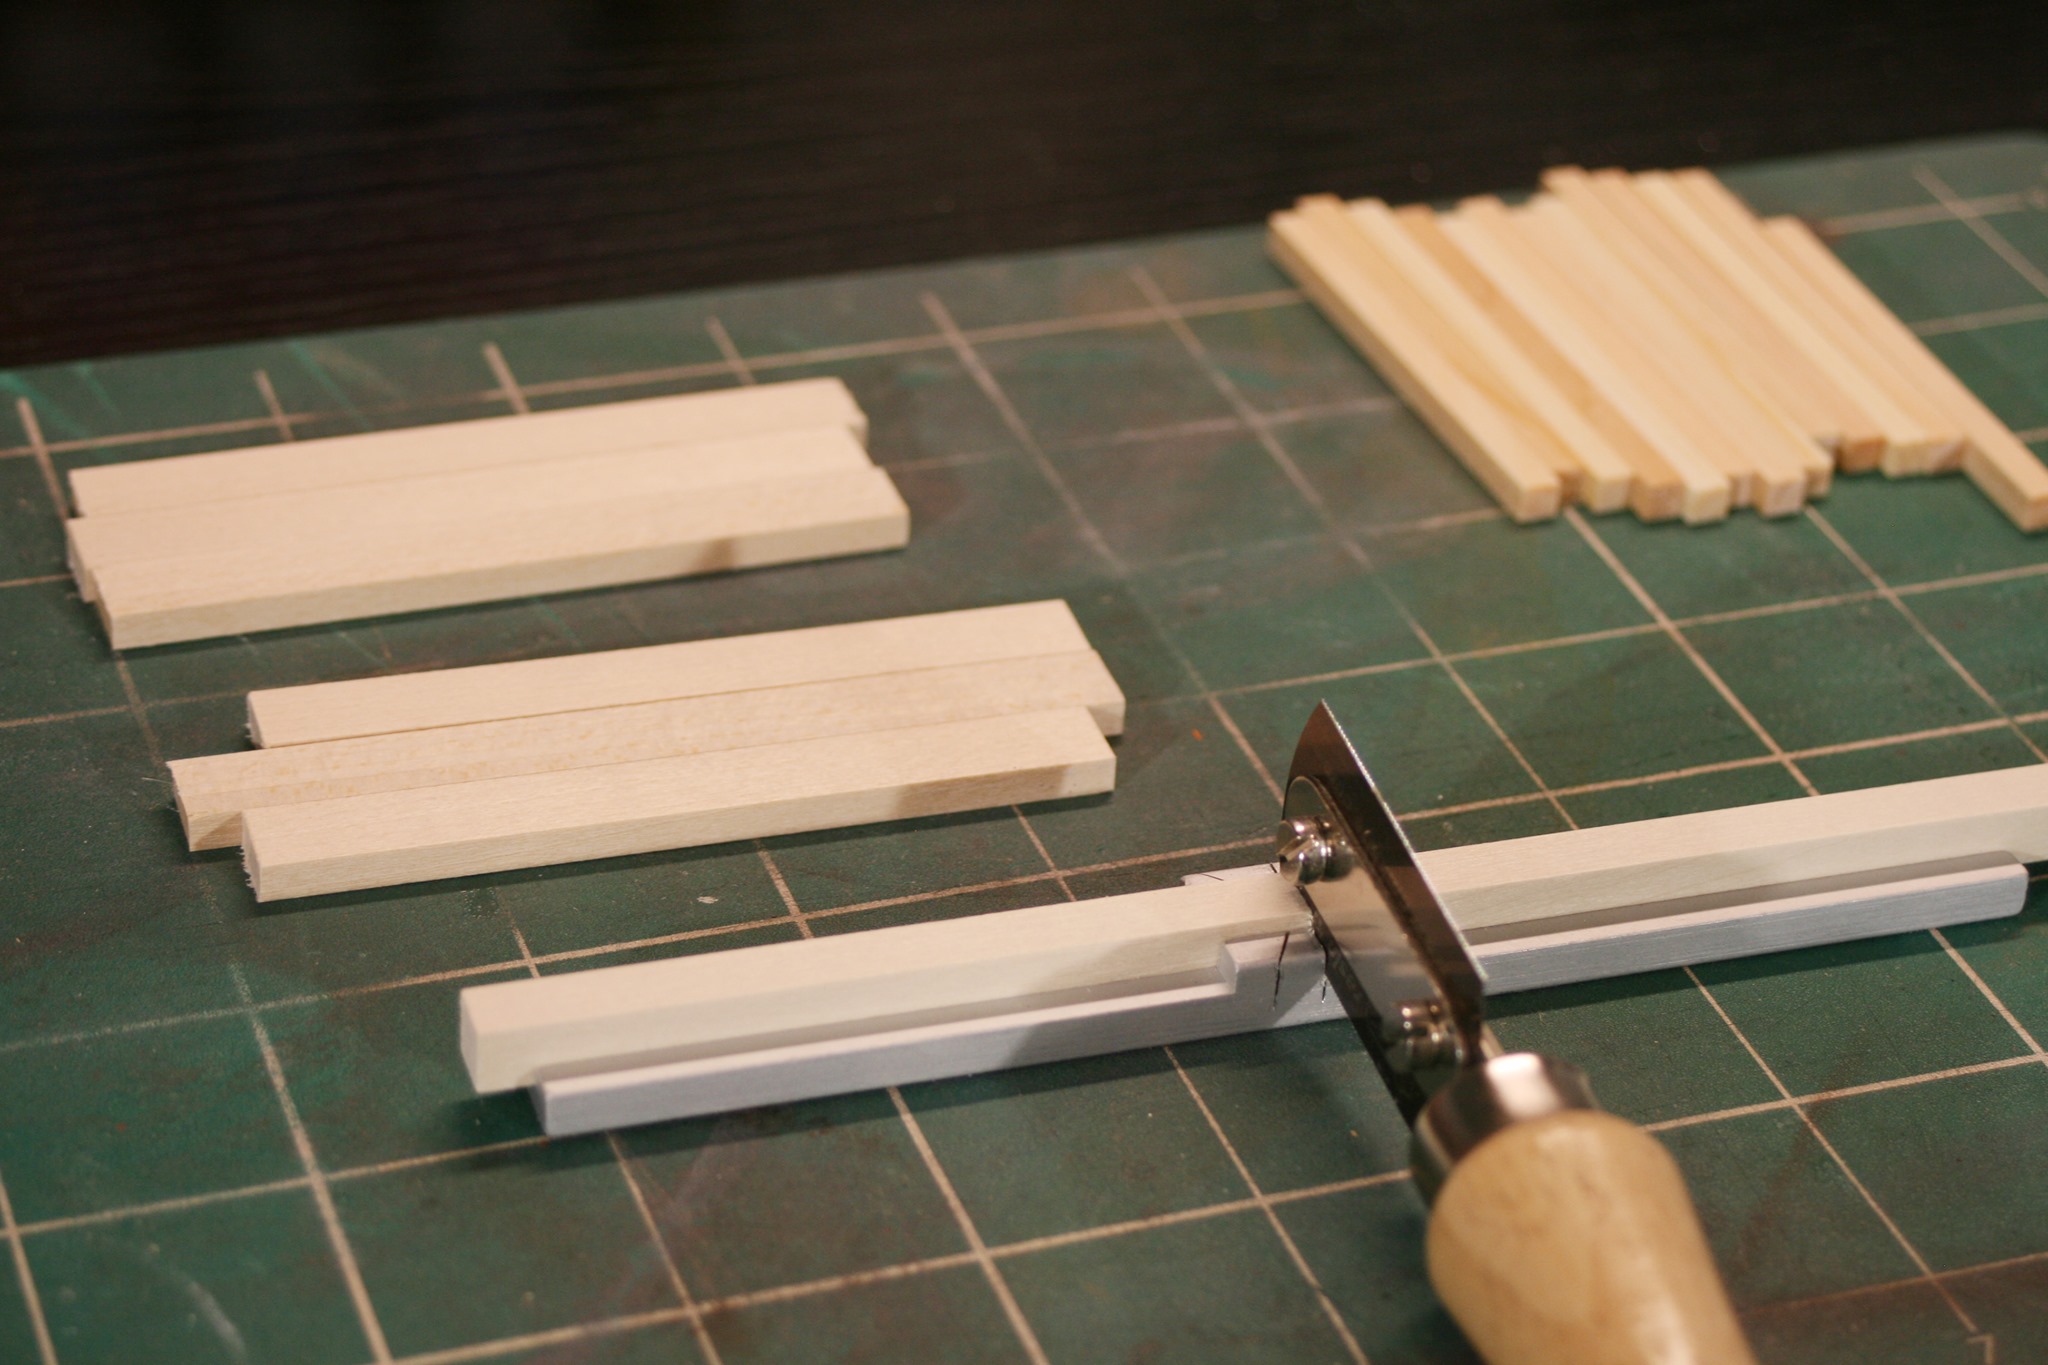
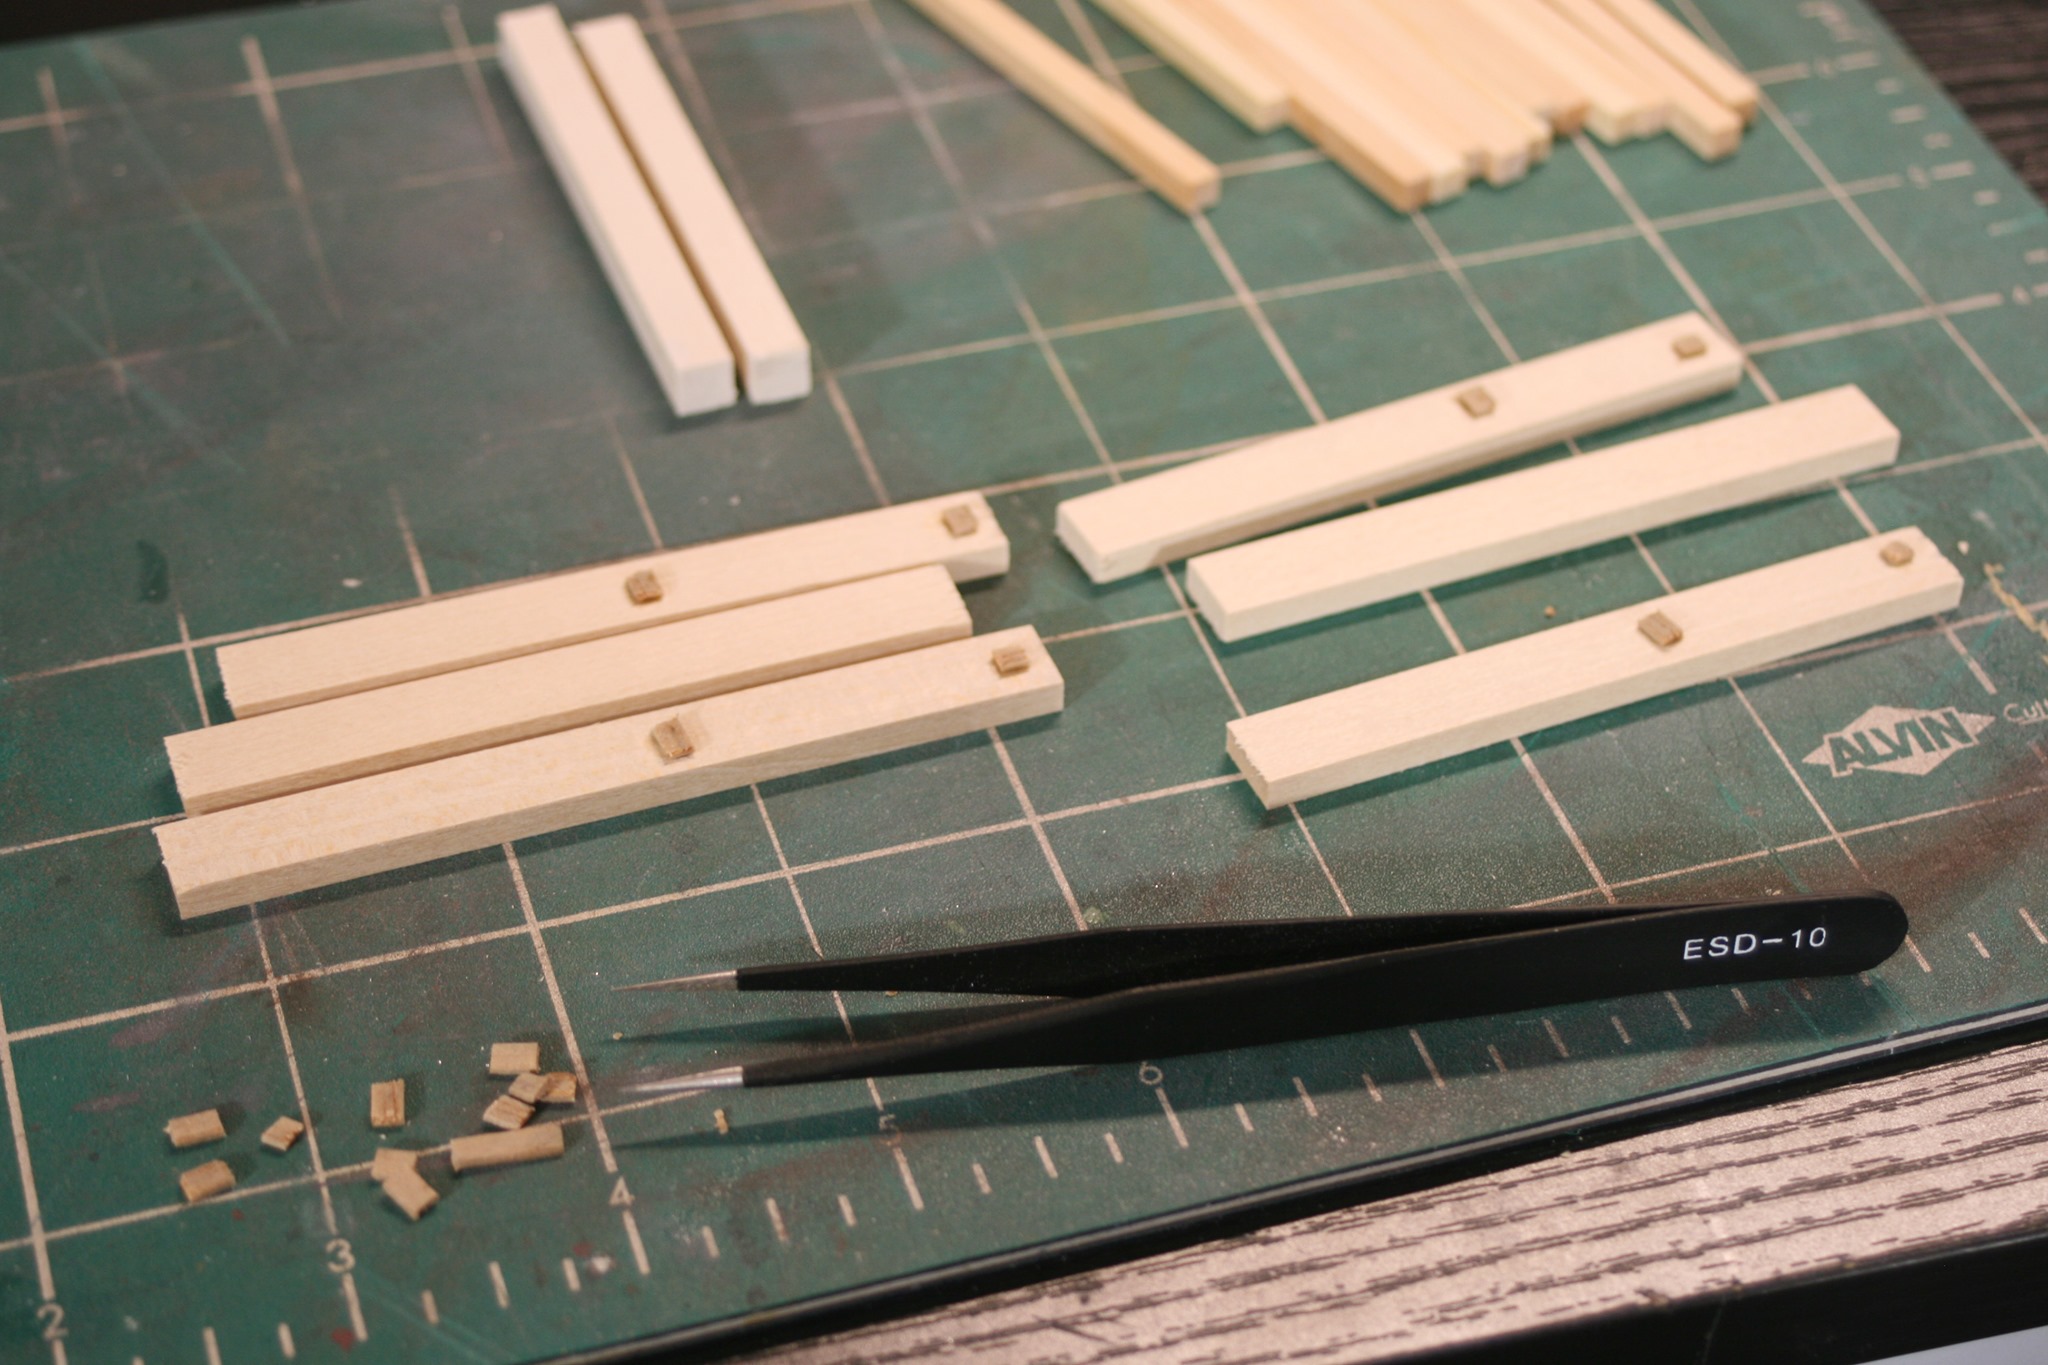
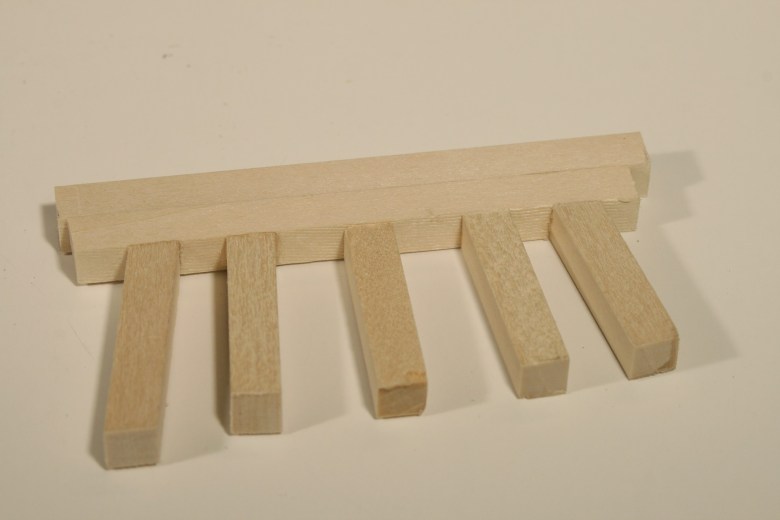
All stripwood was precut with a razor saw before assembly. I cut six stringers a little larger than I needed and used my razor saw to lightly roughen the wood.
Thin strip wood from my scrap box were used to space the stringers. I then glued the stringers together and let them dry.
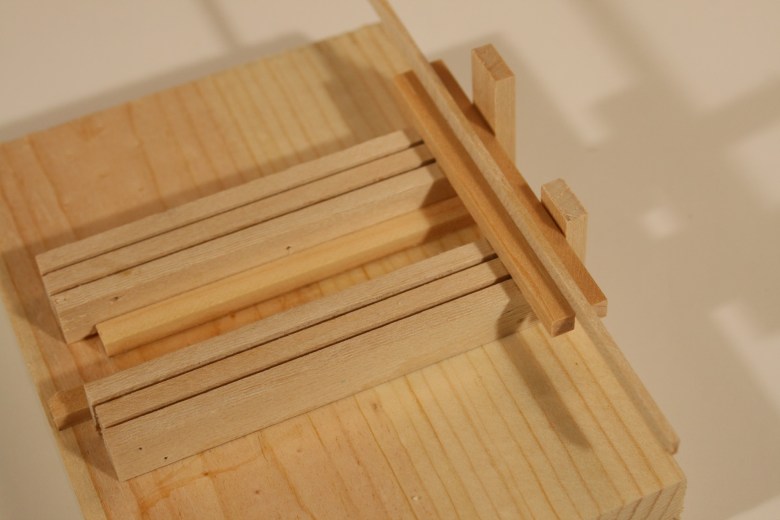
A small jig was created by gluing old scrap strip wood to a small piece of 1” x 2” lumber to keep the stringers square while I glued the ties in place. I set the first tie in place and let it dry. Then I used a piece of 3” scale strip wood to space the rest of the ties as I glued them in place. The stringers were then sanded flush to the last tie. I used my razor saw to roughen the ties on top and bottom.
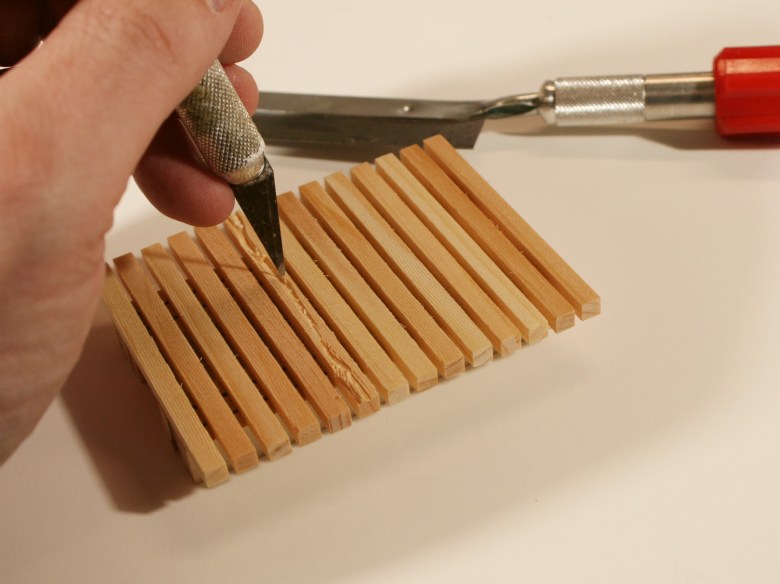
To further the appearance of worn and cracked wood on the ties, I used my hobby knife to create deep gashes in some of the wood. Fine sandpaper is then used to remove any access burrs in the wood.
The timber guards on the prototype were heavily weather beaten, short and showing signs of rot on the ends. I cut the 4 timber guards to length and used my saw to roughen the timbers. They were then glued in place, slightly off-centered from one another. Further, one side was a bit further out on the ties than the other. I then used my hobby knife to gouge the ends to represent the heavy wear on the prototype.
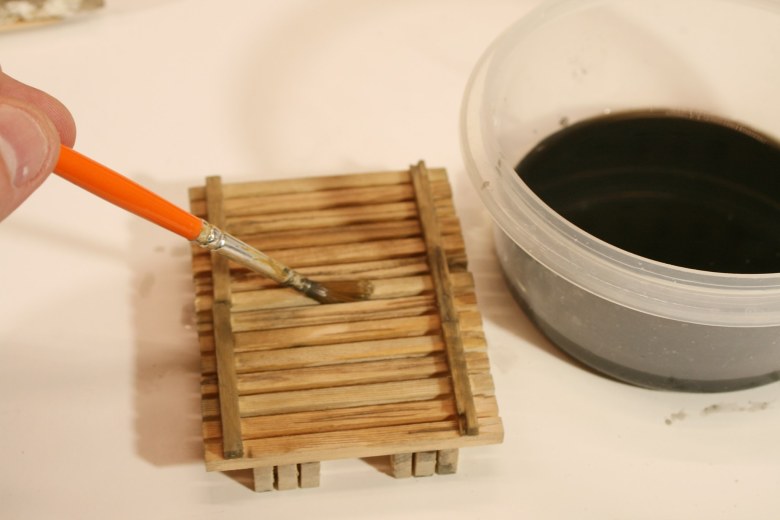
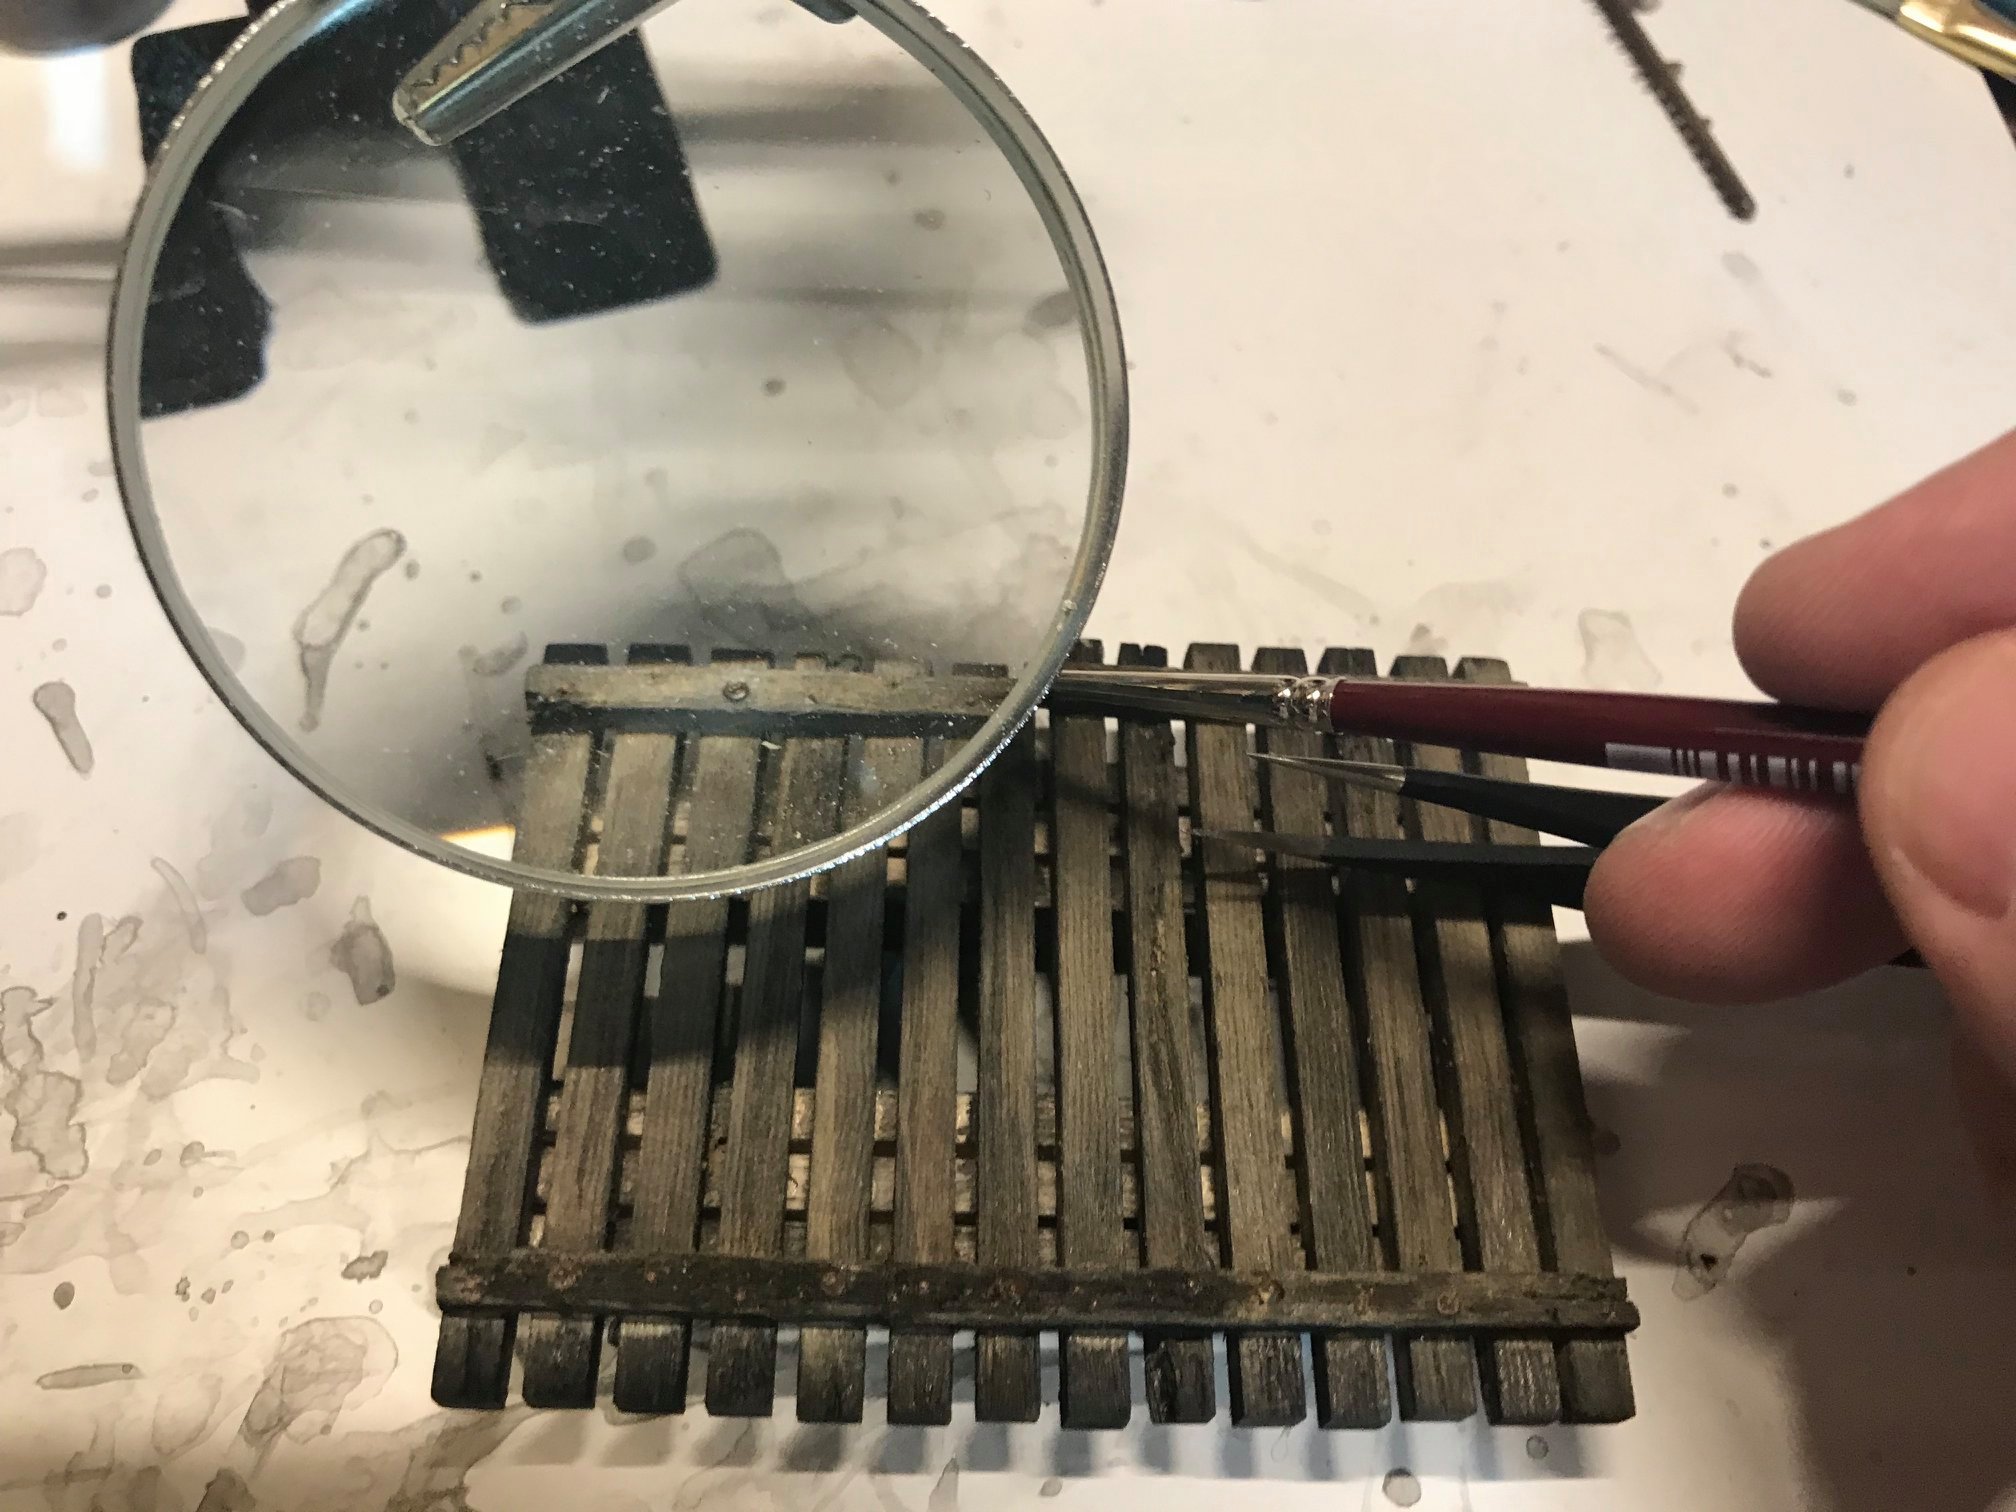
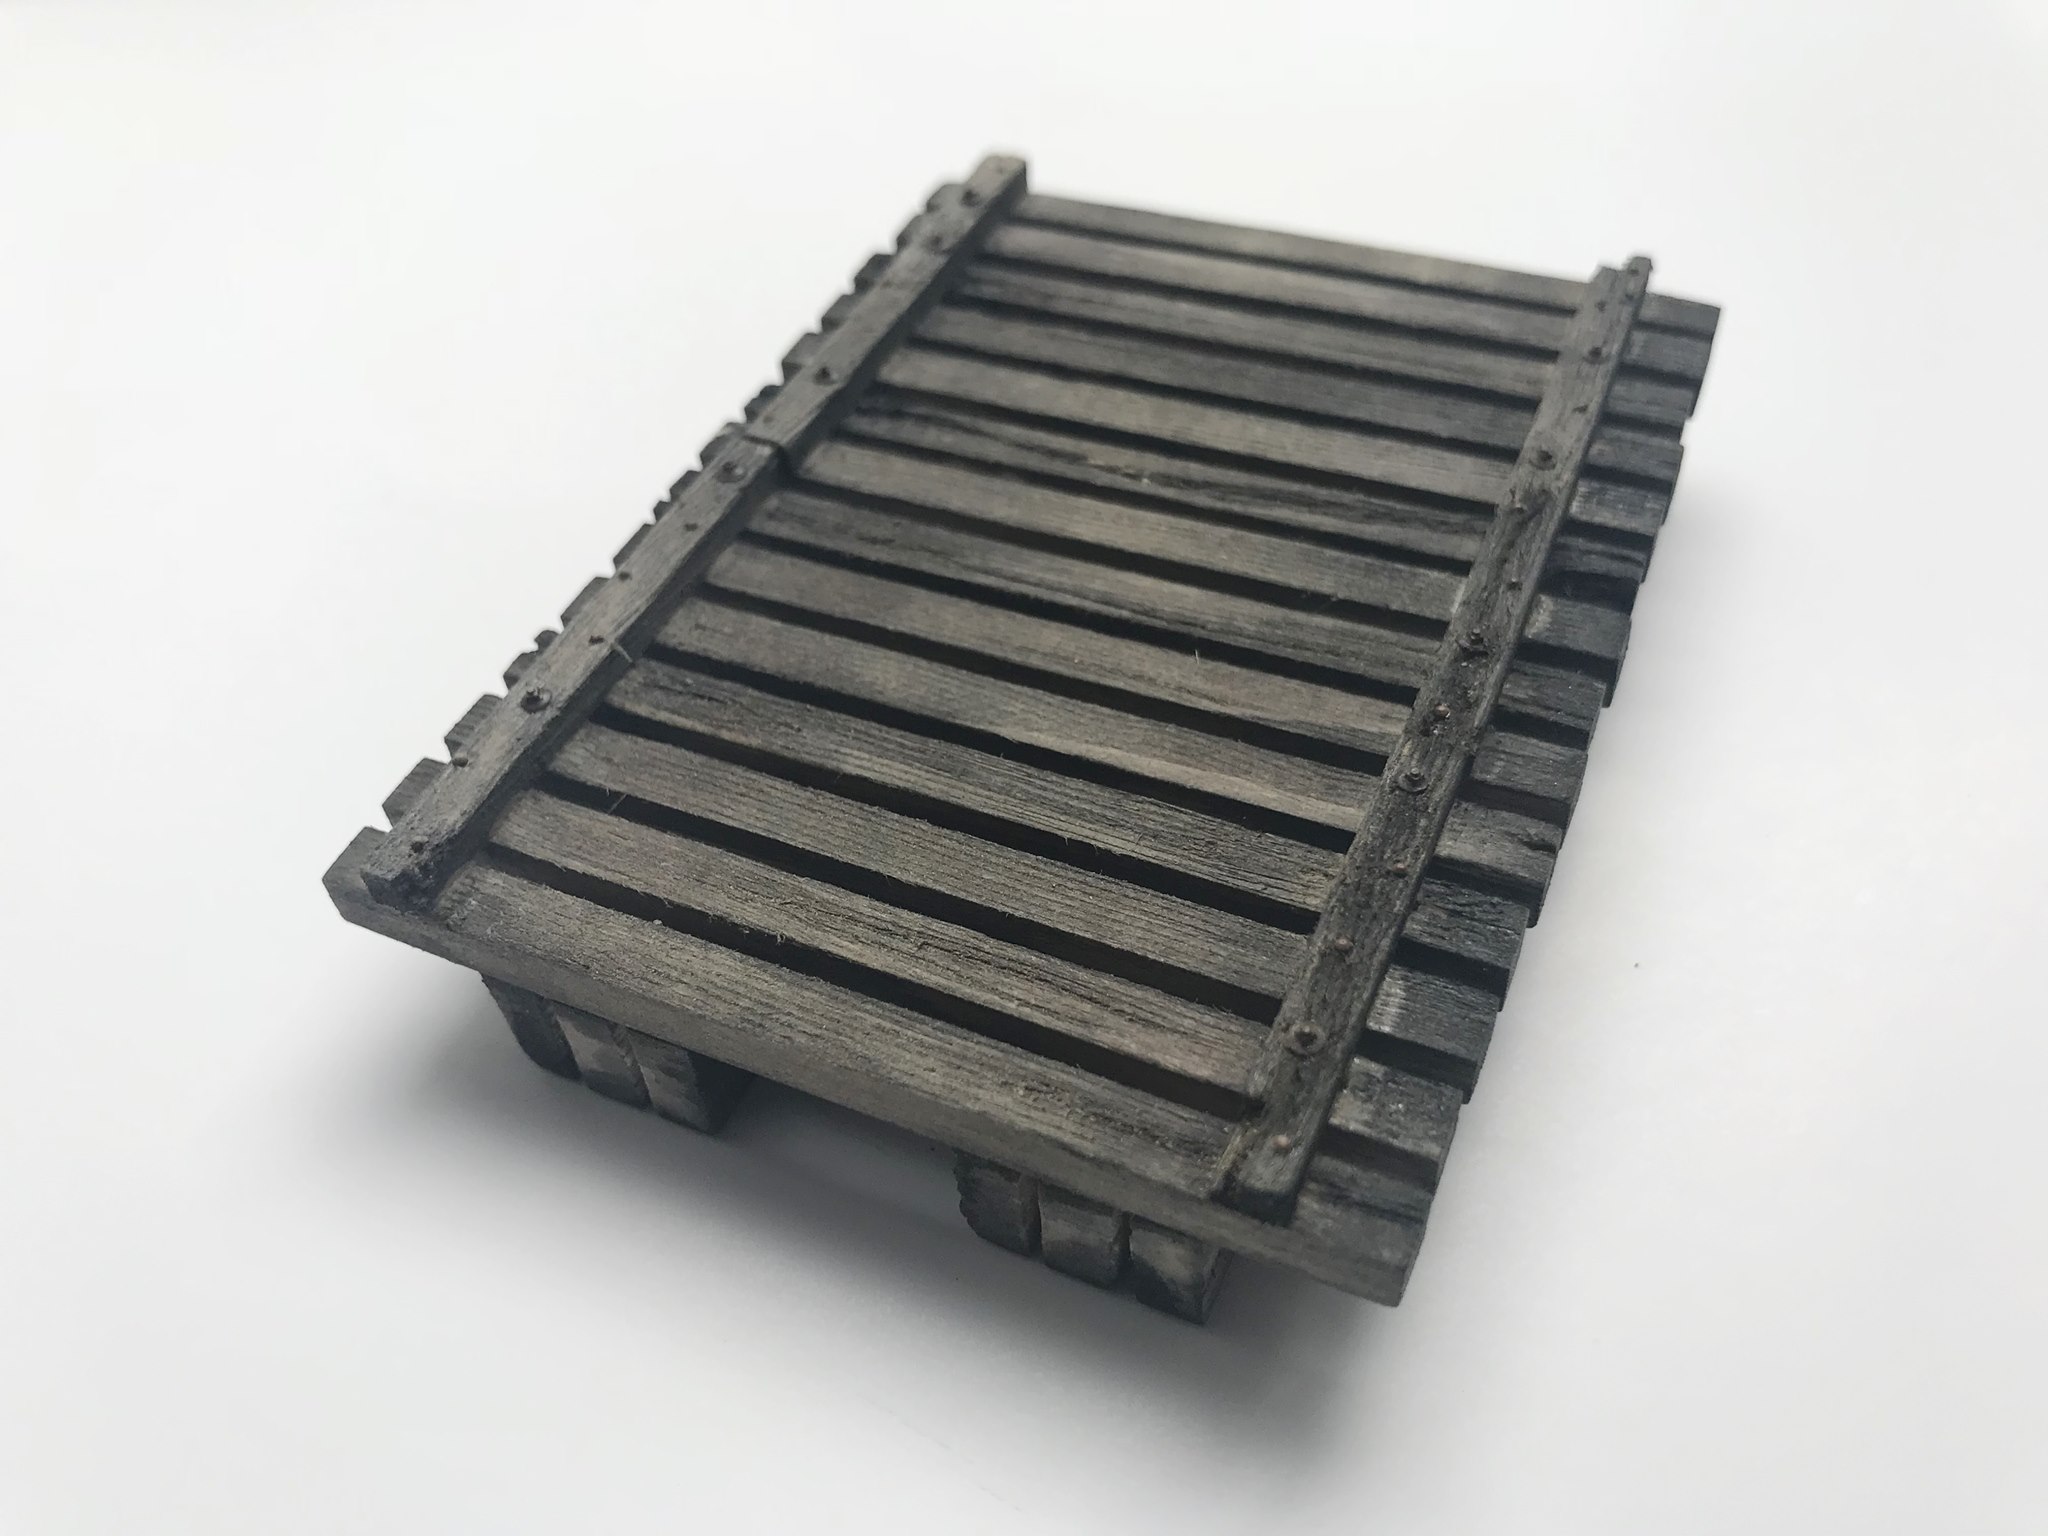
I use India ink and water to stain my timbers once everything is dry. I add light washes with my brush and let each coat dry before I add the next. This allows me to control the amount of color. In some cases, I lightly sand some of the timbers to remove some color and vary the bleaching effect on the creosote treated wood.
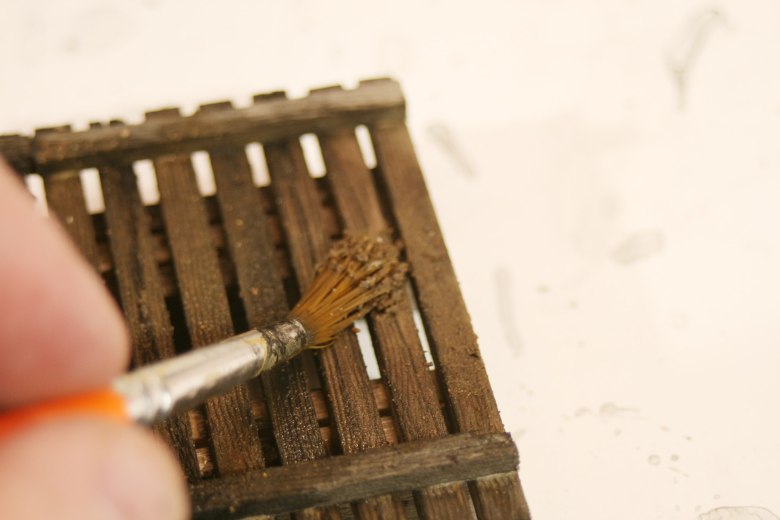
Finally, real dirt is brushed on the top of the deck to tie the color together and mute the weathering. Let the dirt dry and brush off the access. A flat varnish can be used to seal the dirt at this point but not necessary. I use Grandtline NBW details in the stringers and on the timber guards. The prototype had two bolts on each timber guard with nails holding the rest of the ties. I represent the nails by using Tichy Train Group round-head rivets. These were staggered as the prototype.
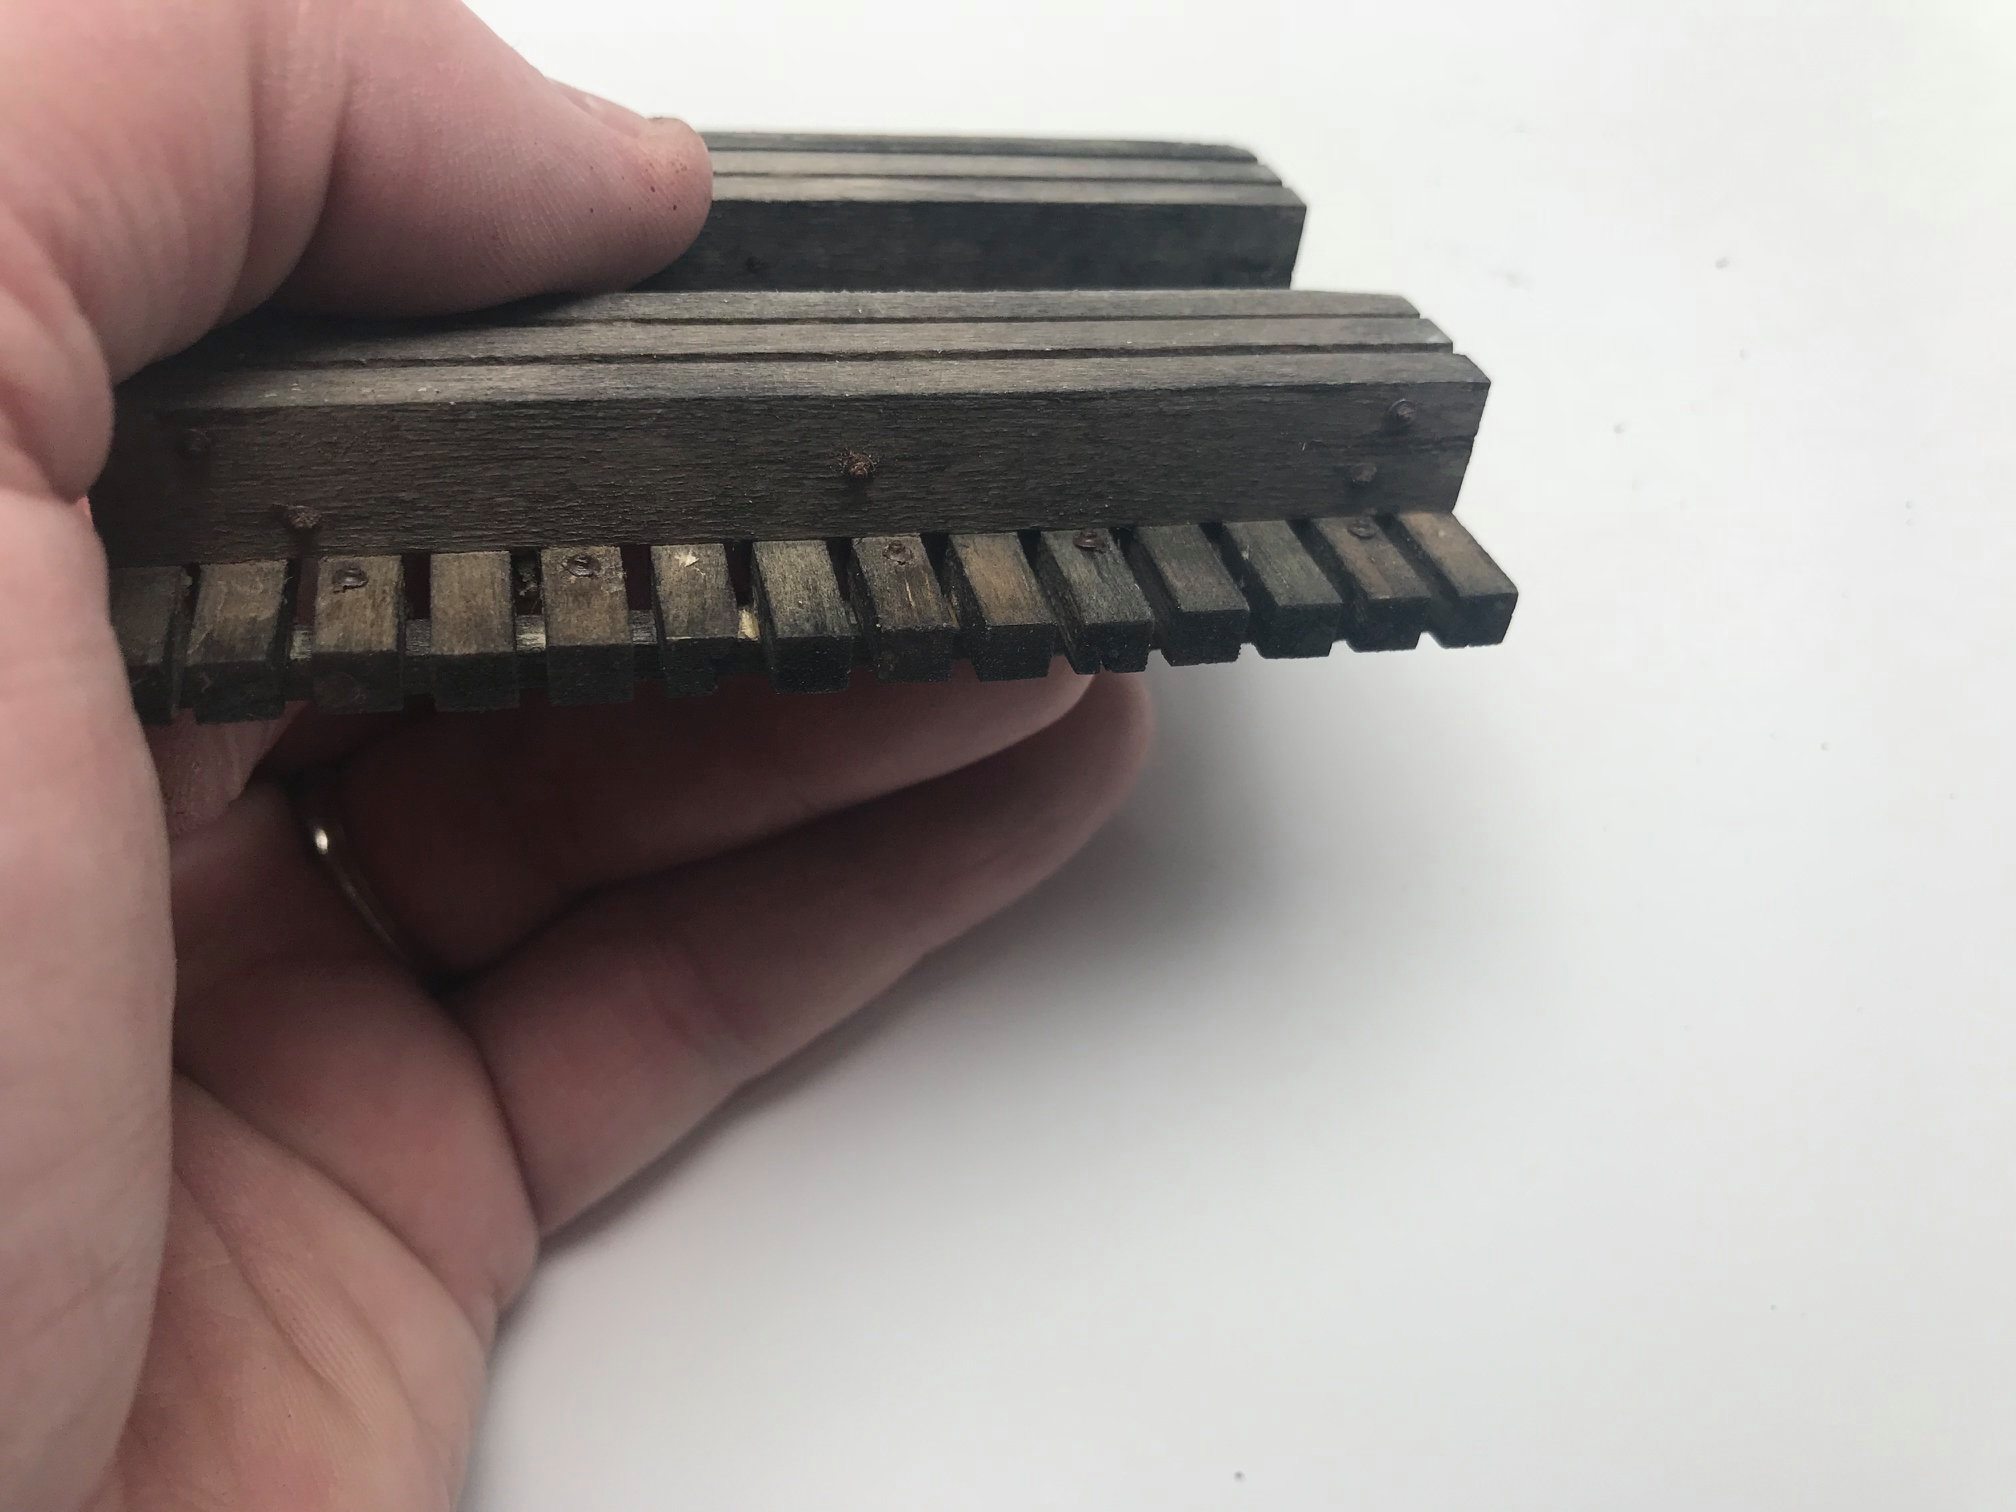
All of the bolt details were painted with Vallejo’s acrylic gray primer followed by dark rust acrylic paint from AK-Interactive. I did add the rail to the deck at this point as well. This will help me set the bent heights when gluing them onto the base later. Code 100, steel rail from Right-O’-Way was used along with their tie plates and joint bars. I’m using Walthers code 83 spikes, with each rail receiving four spikes as the prototype. Automotive primer was sprayed onto the rails before attaching them to the ties.
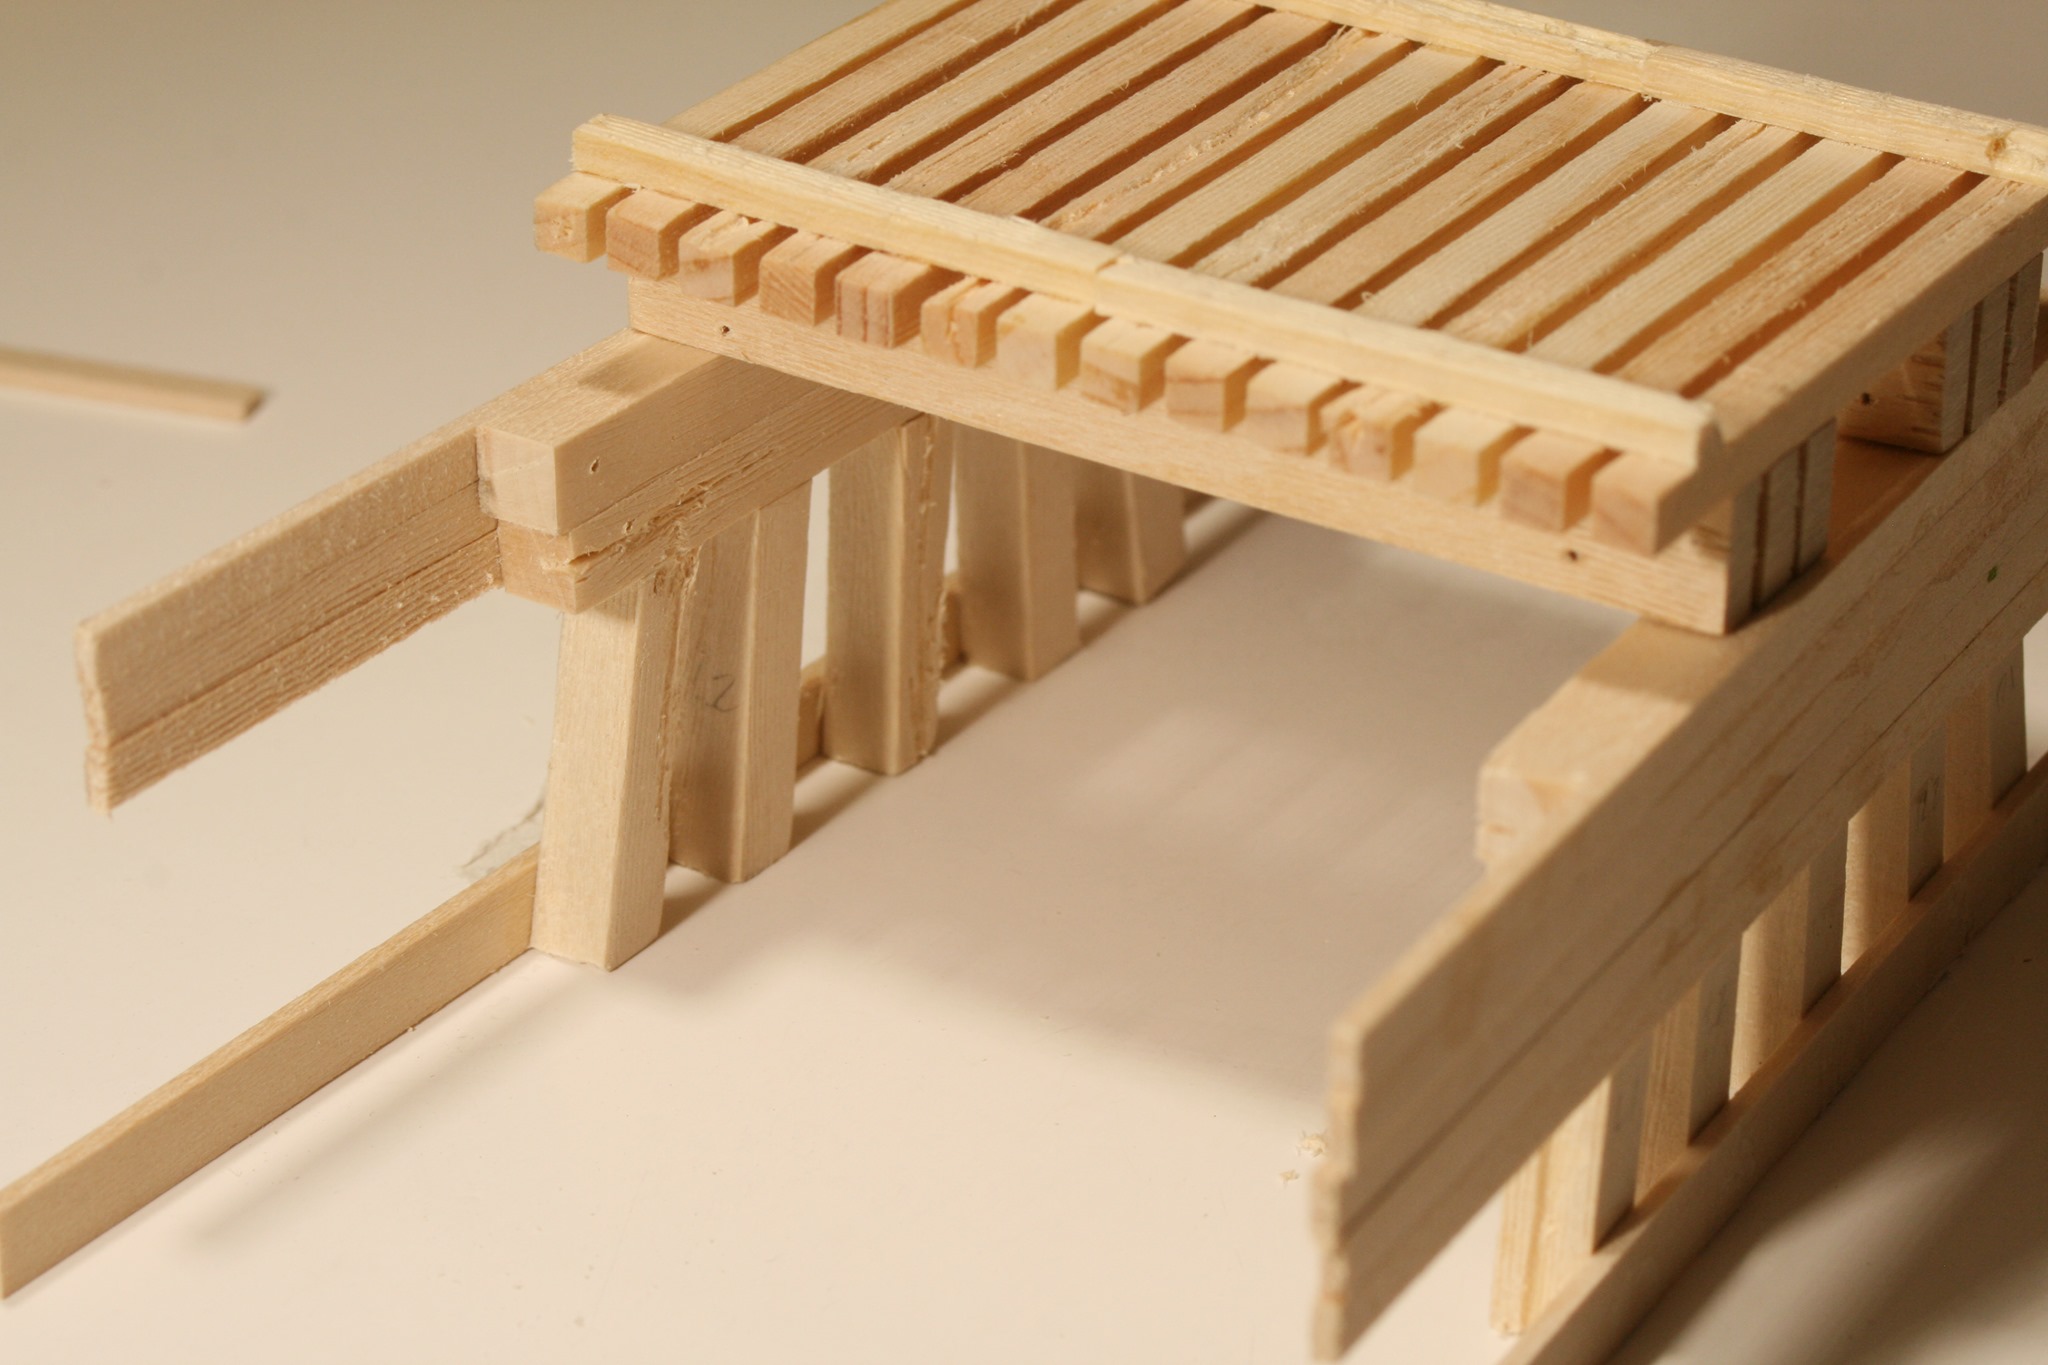
I then turned to the bents. I cut the legs and caps from 12” x 12” lumber. The prototype doubled the caps which were each different lengths. I cut my caps in a similar pattern with the shorter lengths on the bottom. Once again I used my razor saw to roughen the timbers and my hobby knife to add deeper gouges to the wood.
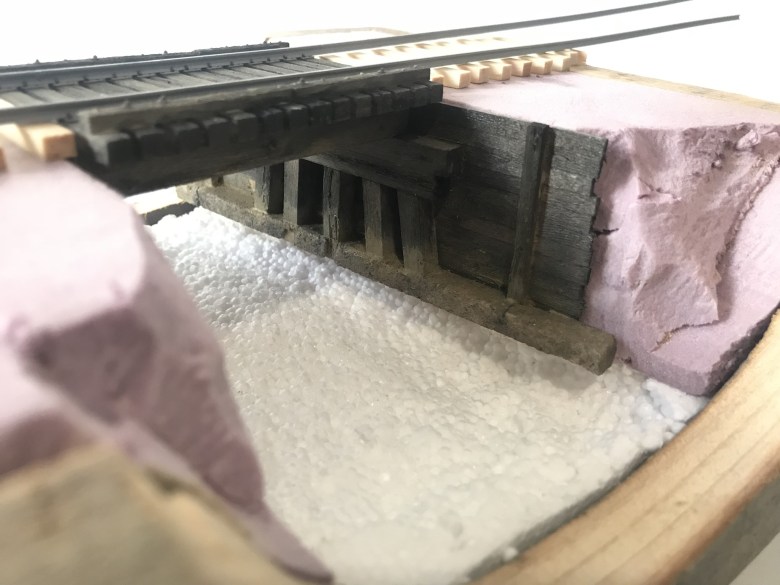
You will notice I’ve began adding a few bulkhead timbers to strengthen the bent legs, however, I left most off to allow me to work with the plaster. I have also temporarily added strip wood to the base of the bents which will act as the back of the mold for the plaster footings.
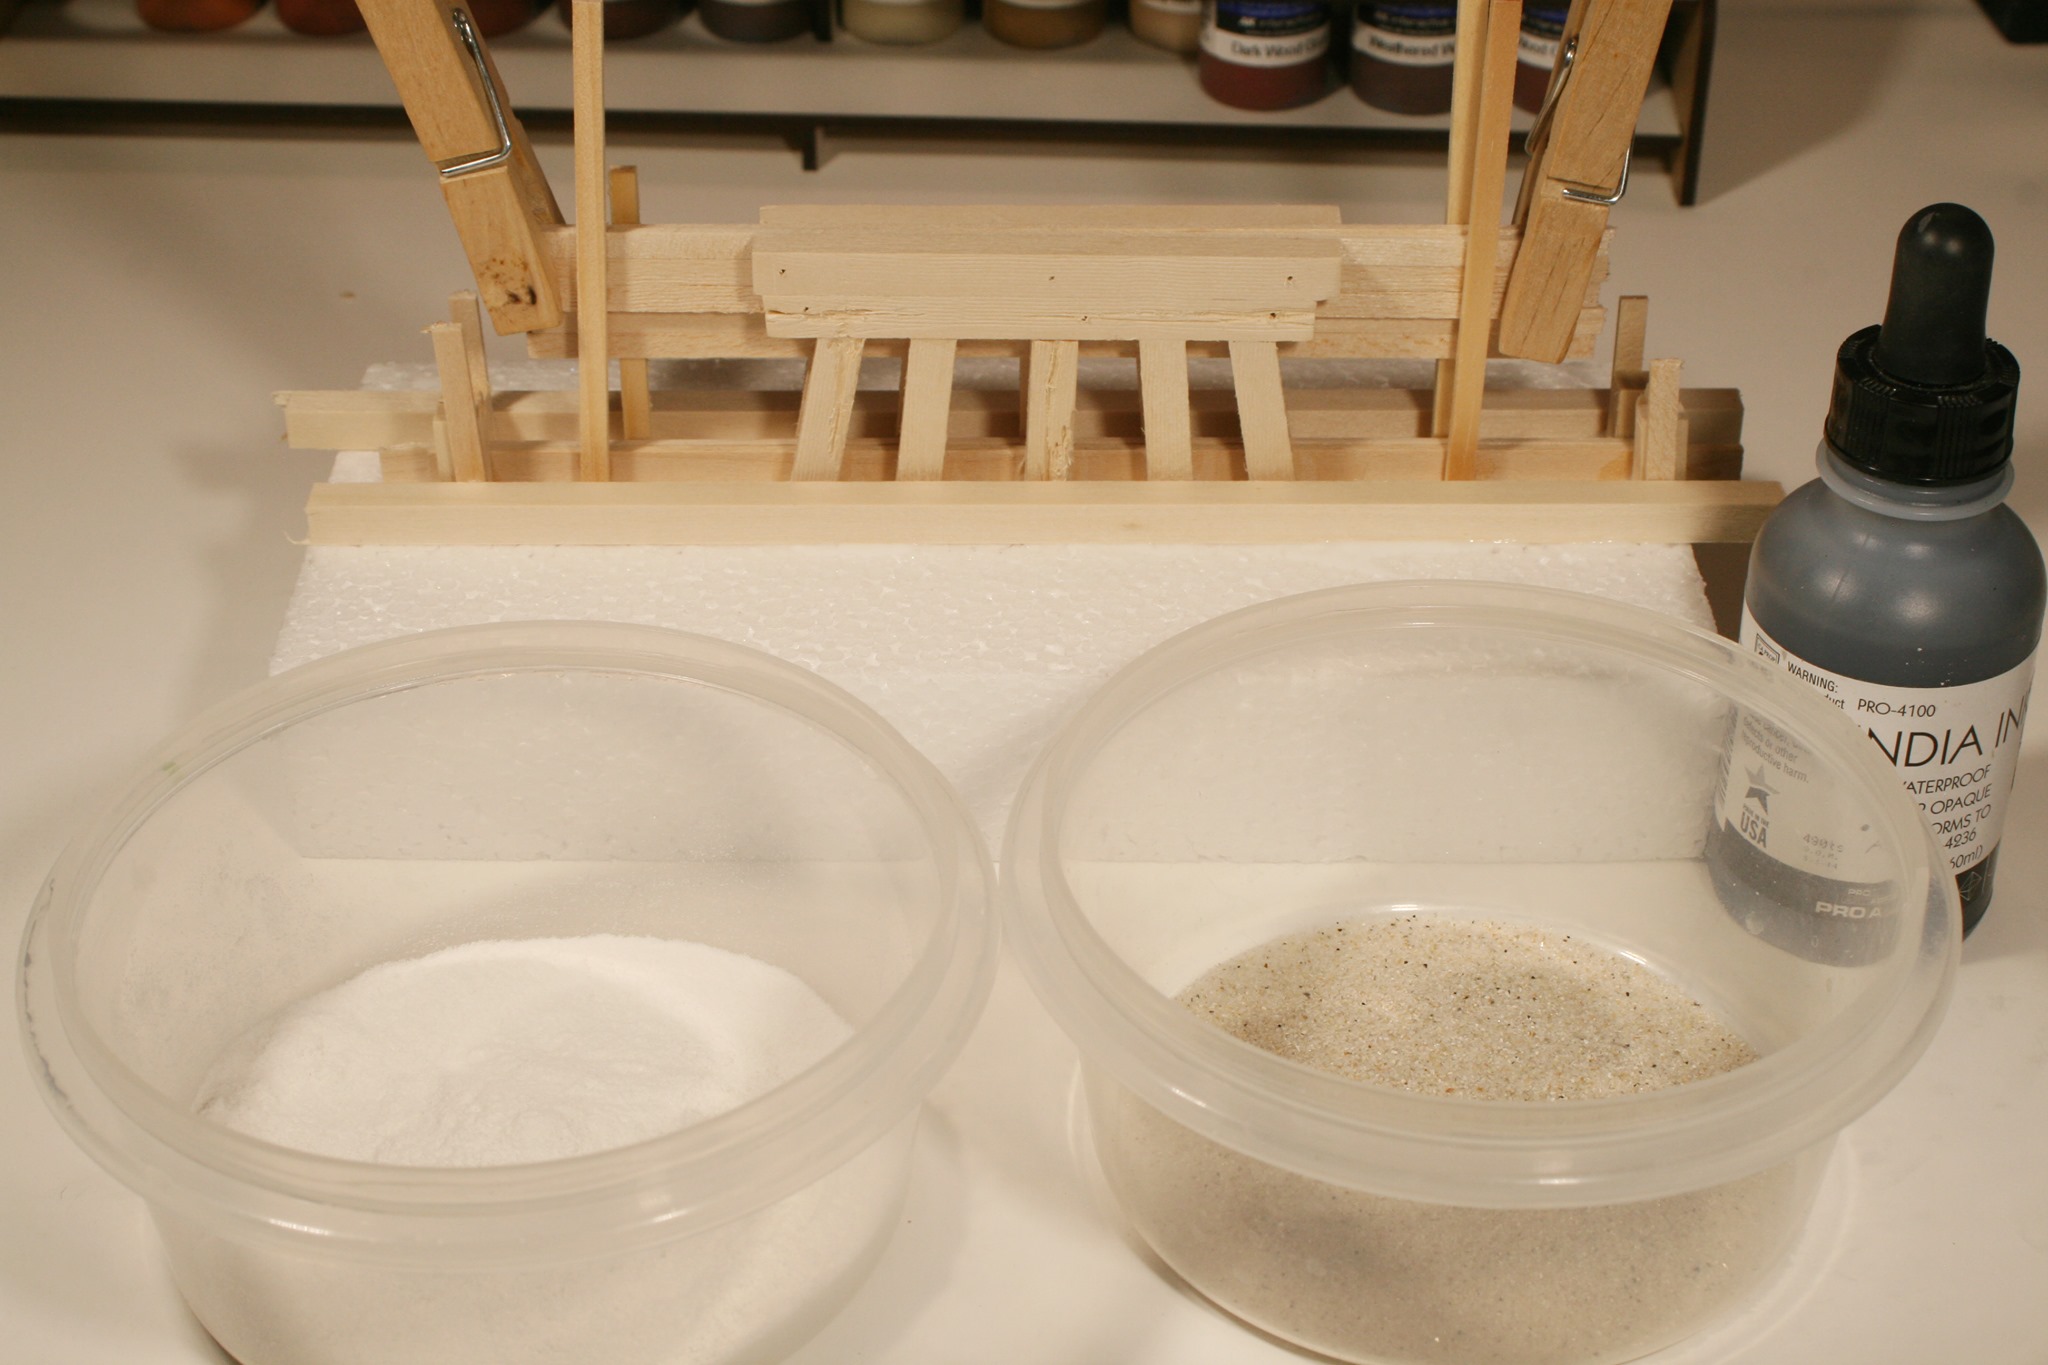
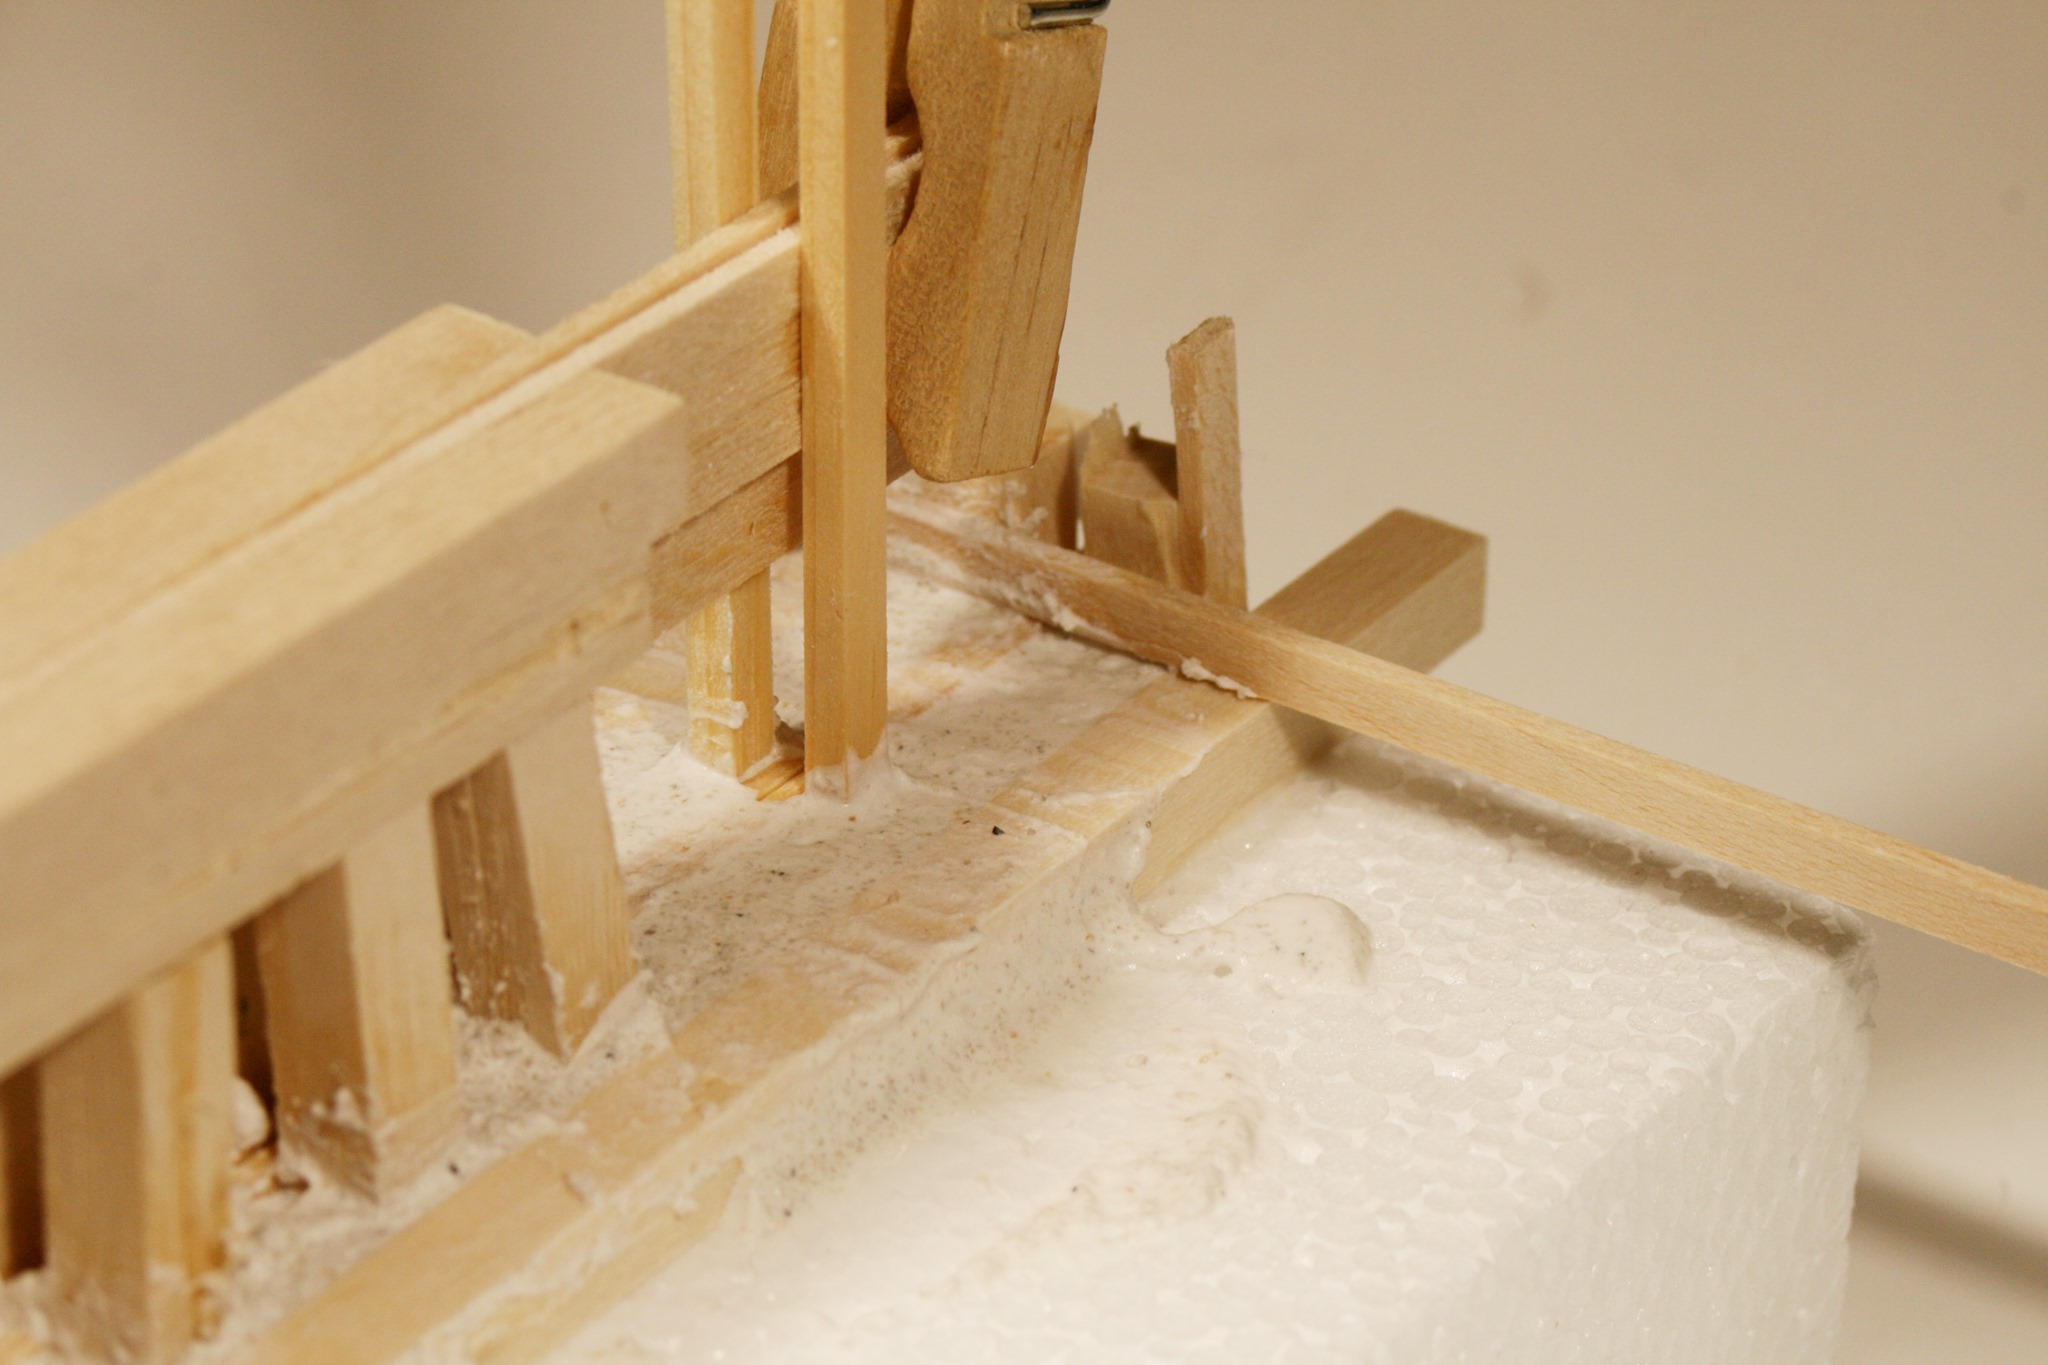
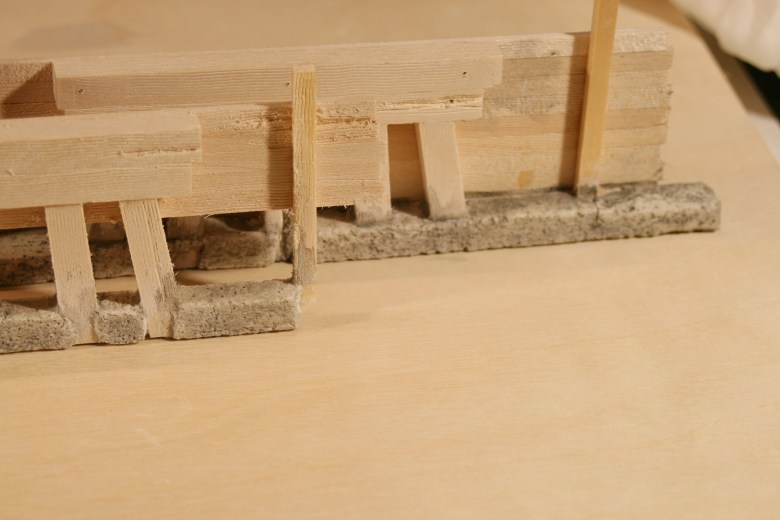
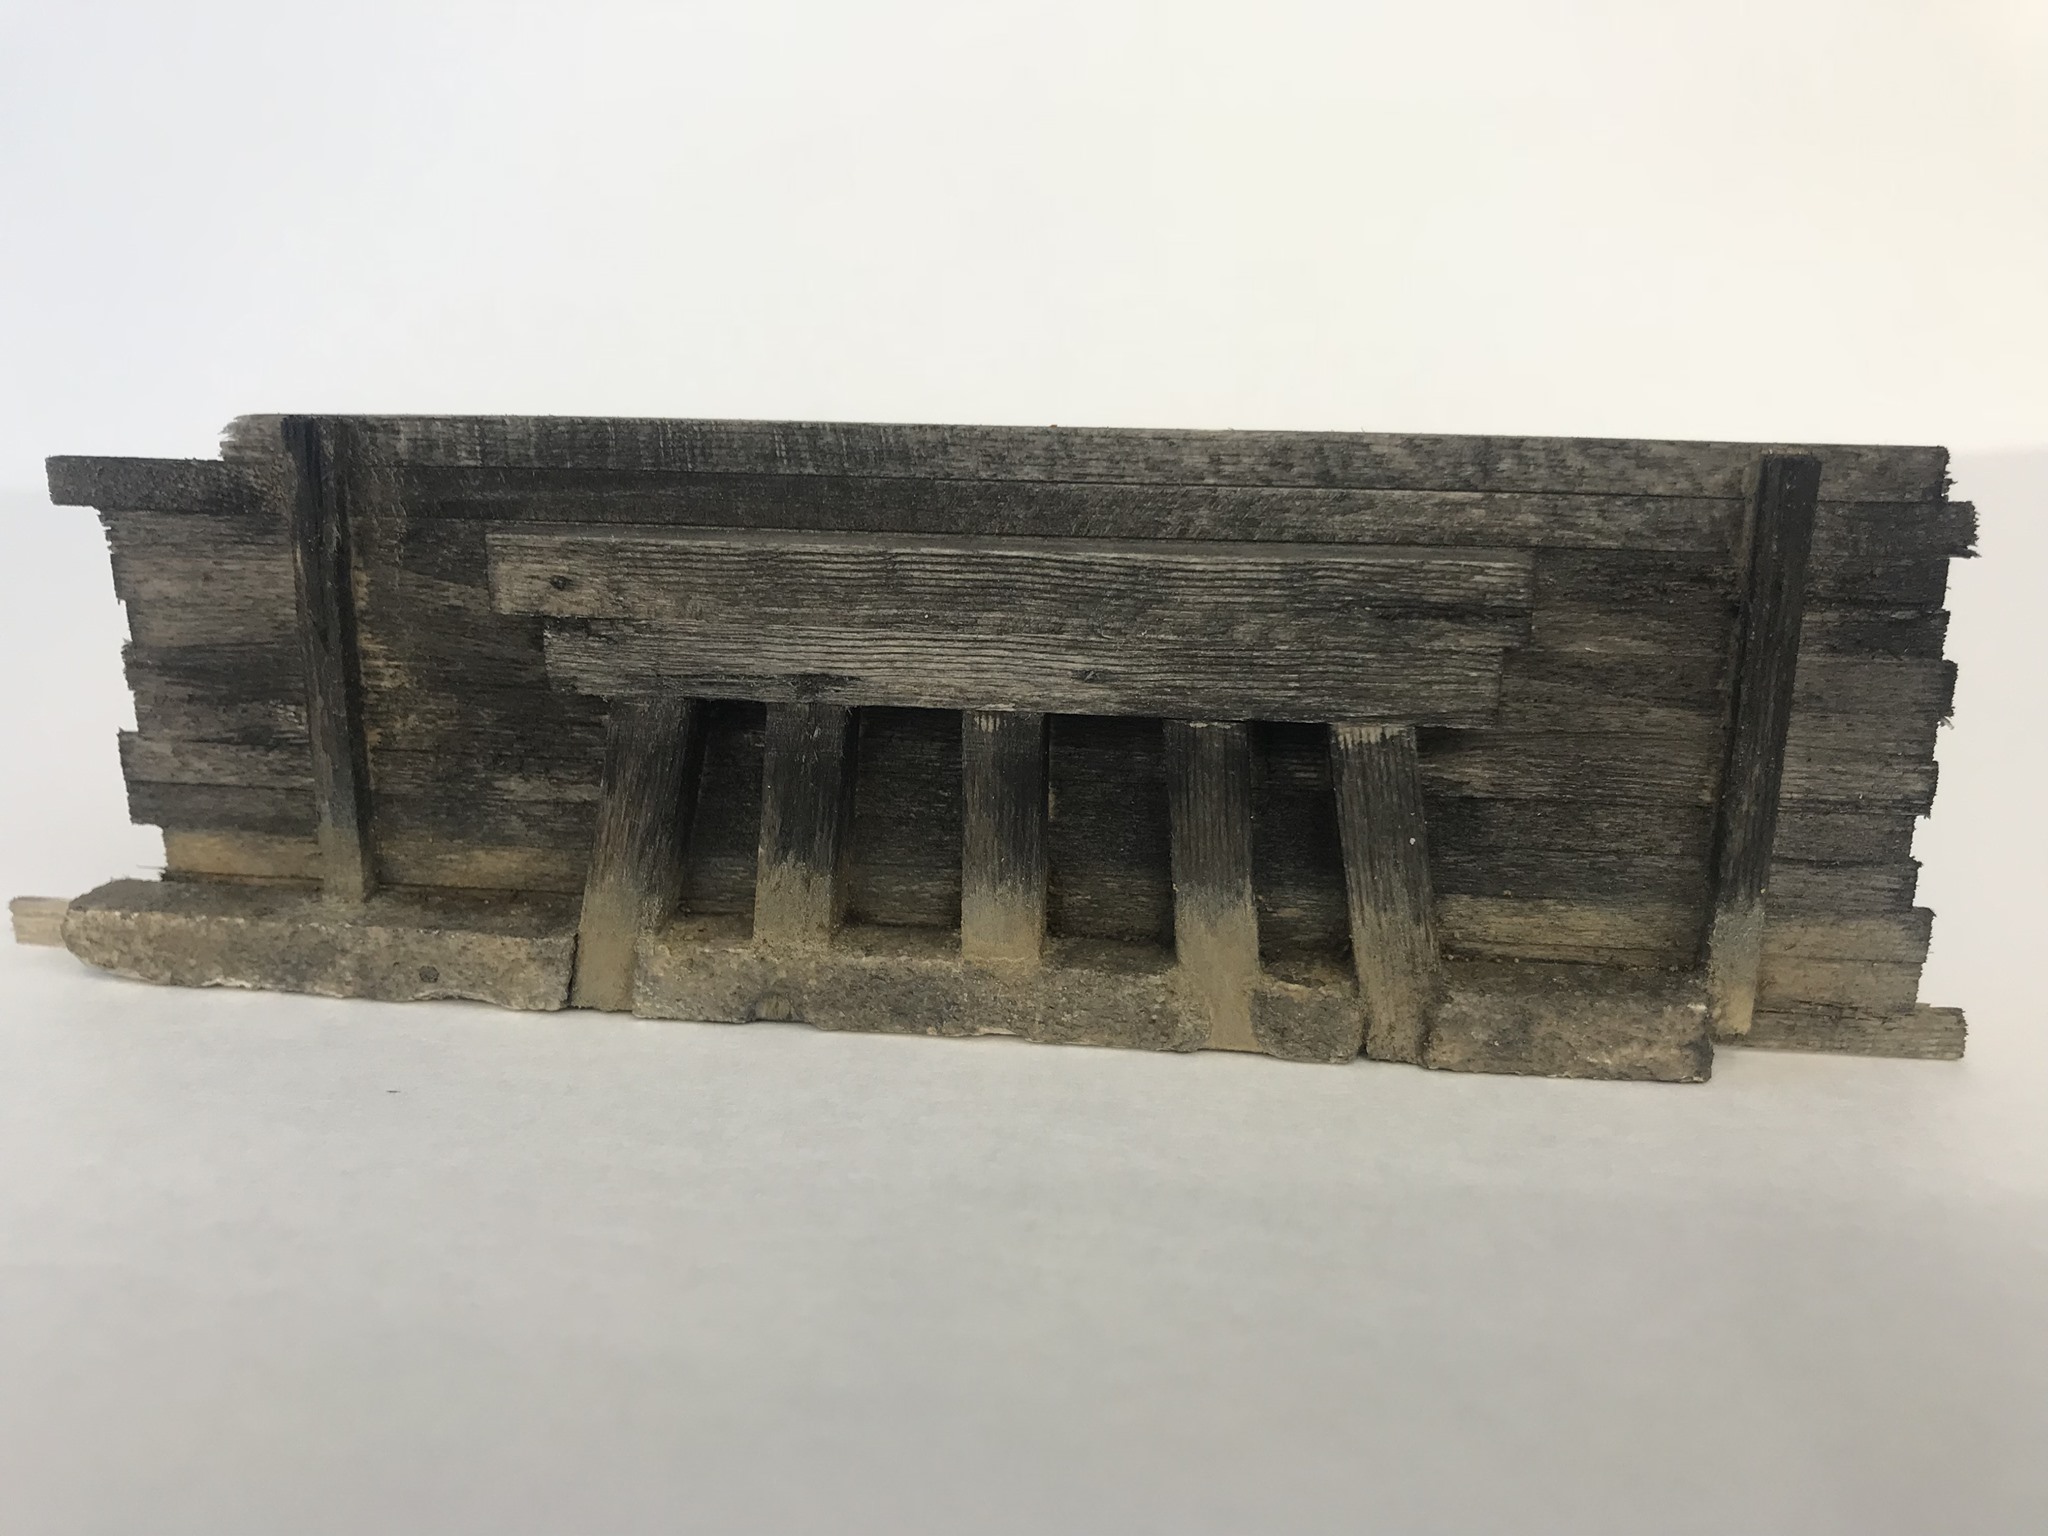
I used Styrofoam as a base for my concrete castings. I glued two bulkhead board to the back of the legs and built up the forms using stripwood. Using white glue, I temporarily attached the forms to the styrofoam base. My concrete mix was poured into the form and allowed to set up but not cure. While still setting, I removed the forms and used a damp makeup sponge to roughen the castings and expose the sand in the plaster.
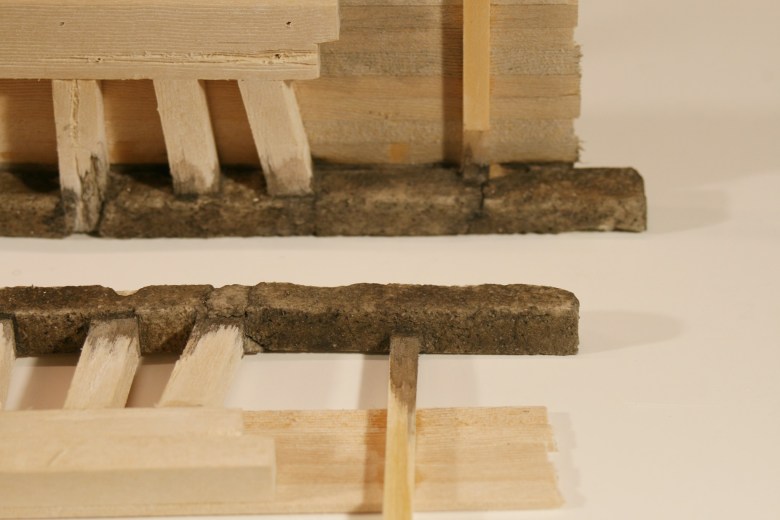
To create the waterline effect on the wood and concrete, I started with a base coat of light-gray acrylic paint from Ak-Interactive. I created a wash by thinning the paint in water and dabbing it onto the legs, concrete footings and bulkhead board with a brush. I let each coat dry until I was satisfied with the look. Then another wash of AK-Interactive earth enamel was made and allows to flow over then light-gray acrylic.
My favorite part of building dioramas is the ability to use almost any material as a base. I’ve seen narrow gauge models build on a rough-cut log, tank models built on ammo boxes, or even submarine models in fishtanks. The possibilities are endless, however, I would use a word of caution; make sure the base complements your models. You want your subject to be the star, not the base.
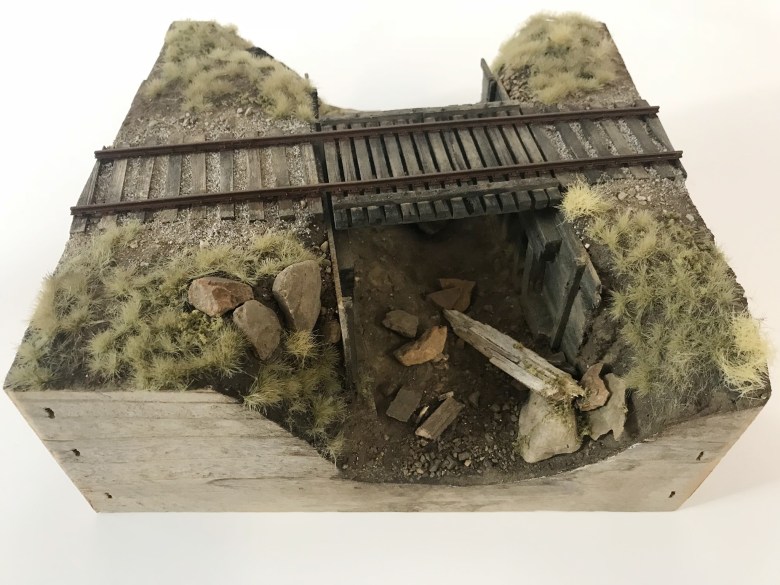
A while back I found a wonderful shadowbox frame that was made to represent old barn wood. I thought this would make a perfect complement to my weathered bridge. The frame measured nine-square inches and would fit the scene perfectly.
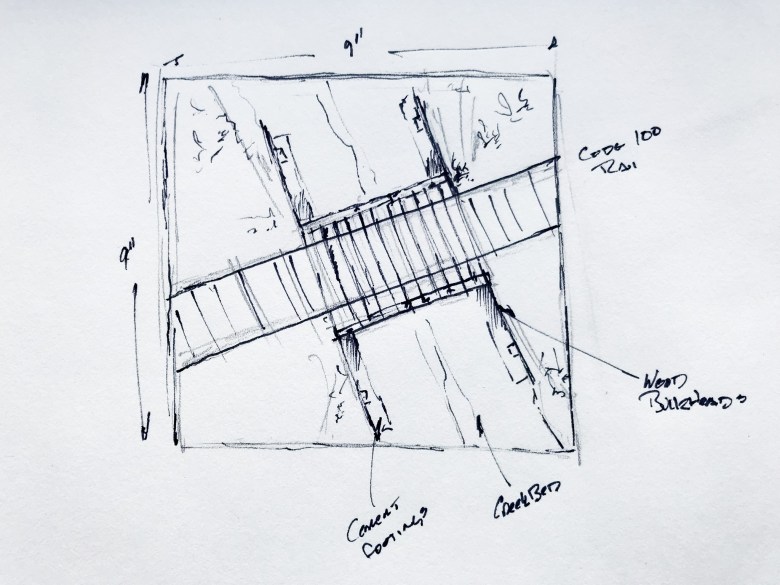
You will notice in the original sketch, the bridge is a bit off-centered and the track is angled slightly. It’s a technique I like to use in my scenes, both in dioramas and on my layouts, to look less symmetrical and visually more interesting.
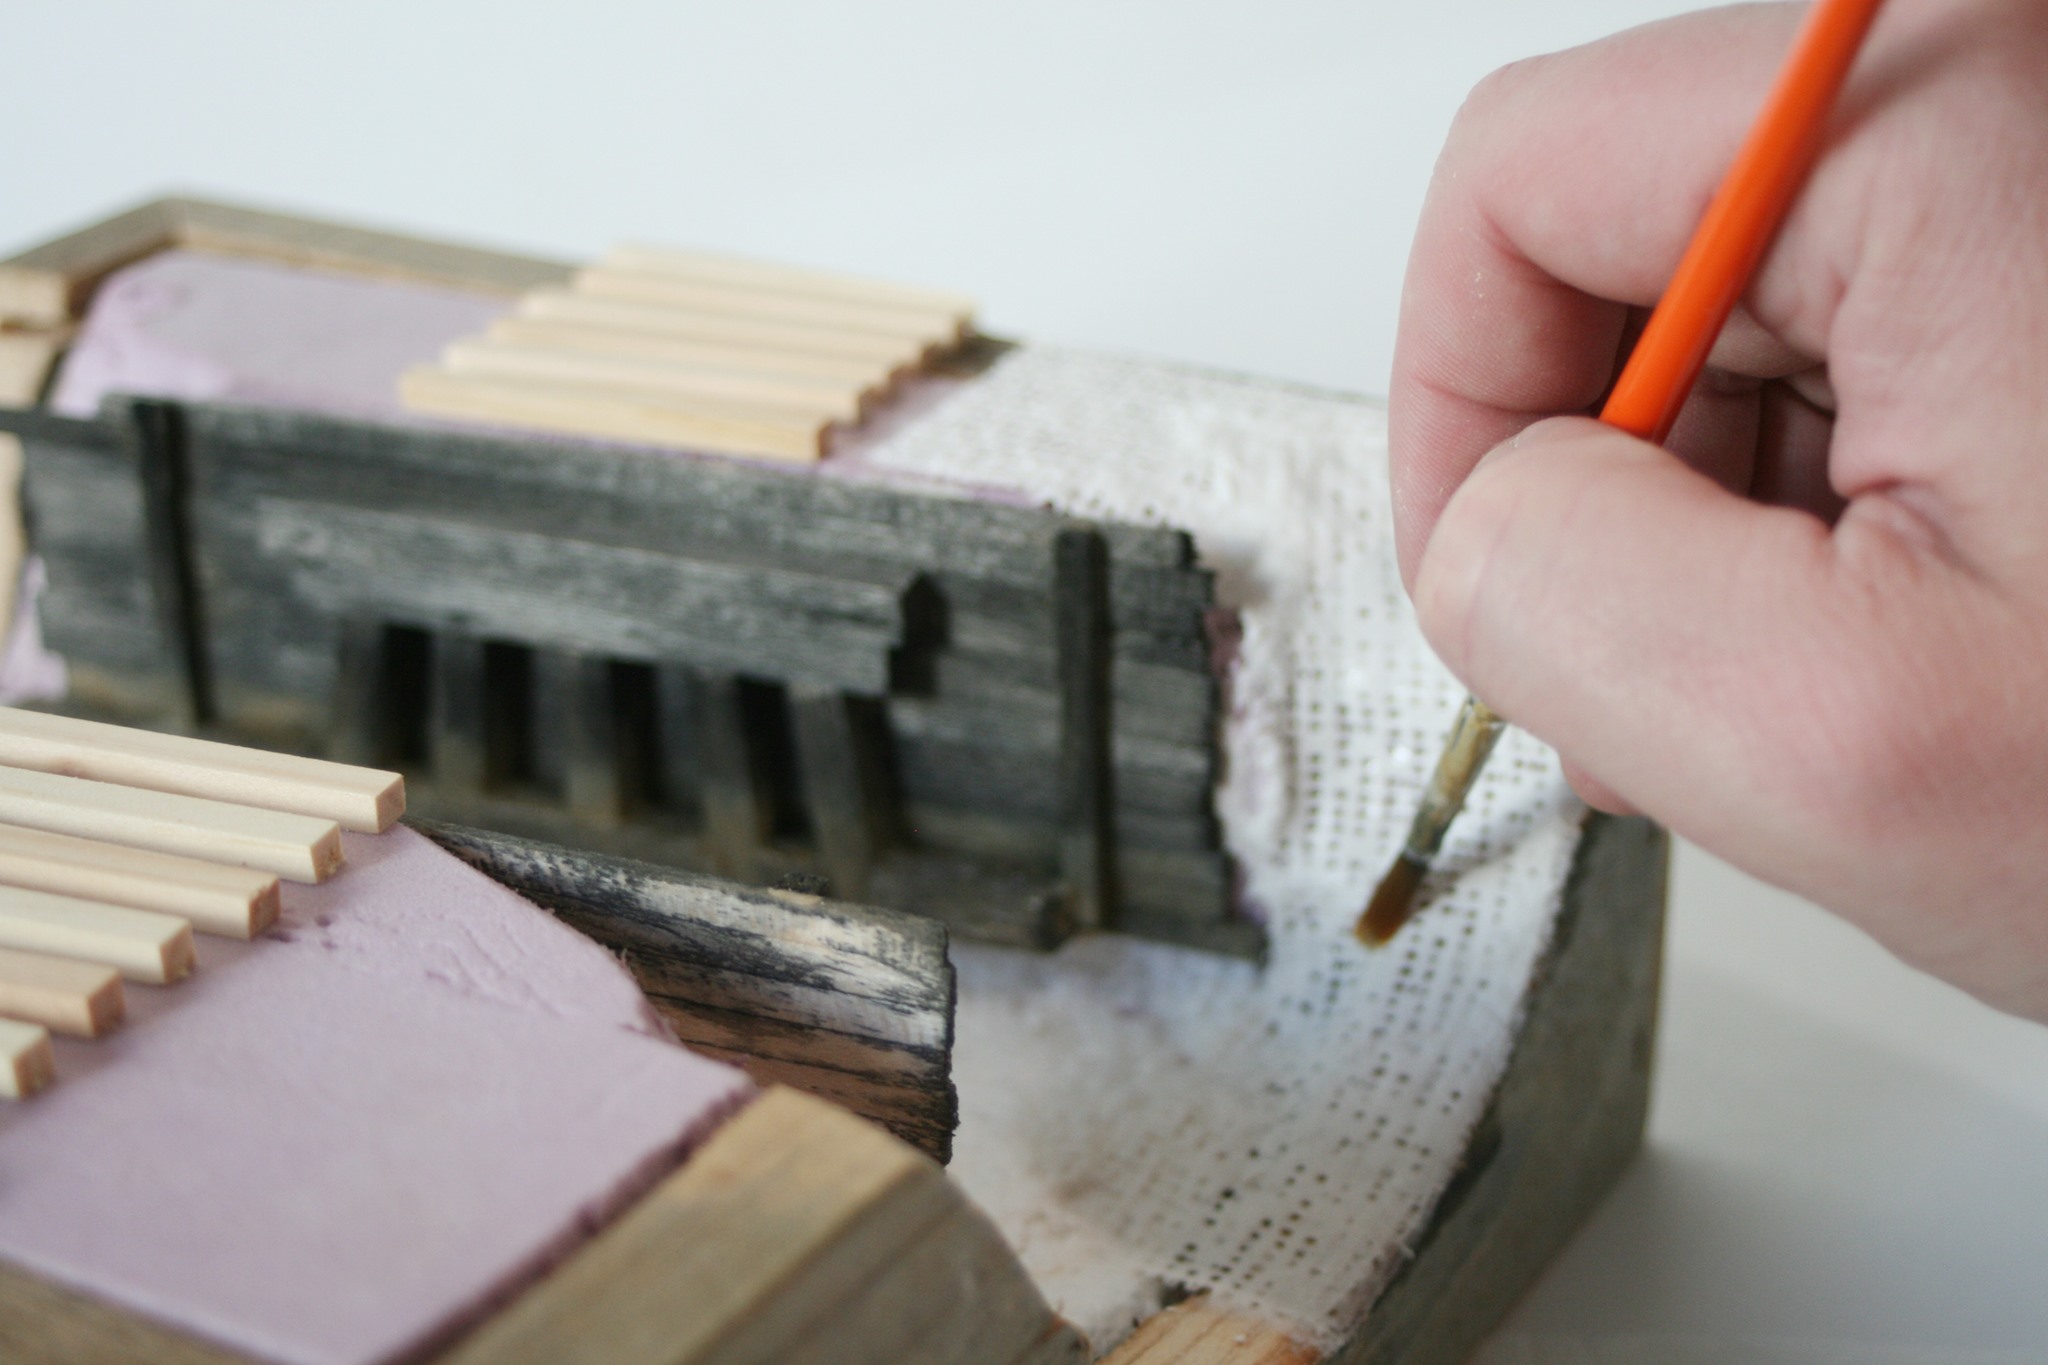
I use plaster cloth from Woodland Scenics to cover the Styrofoam and edged of the wood. I cut thin strips from the roll of cloth and laid it in place. Using an old soft brush, I brush water onto the cloth to keep the mess to a minimum and control where the plaster sets. Once the cloth has set, I use Woodland Scenics terrain acrylic paint to cover the plaster cloth to hide the white.
The ties were added next. I glued the ties in place then used my razor saw to roughen the surface. My hobby knife was used to create deeper holes in the ties then cleaned up with fine sandpaper.
The dirt is from the Pacific Northwest and is a good representation of the area I am trying to model. Using cheap pantyhose, I sifted dirt onto the entire surface then soaked with water. Using an eyedropper, I flooded the dirt with Woodland Scenics scenic cement, followed by another dusting of finely sifted dirt.
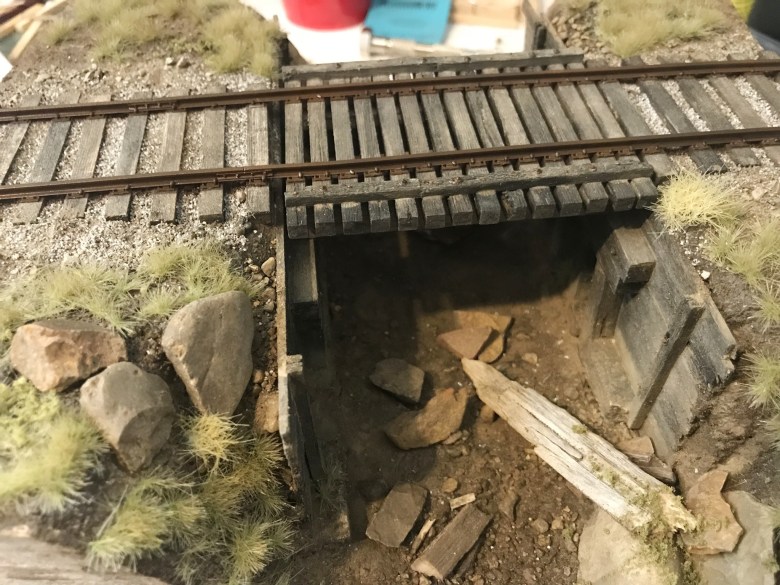
India ink and water washes were brushed onto the ties, letter each coat dry before adding the next, similar to the bridge structure. I let them dry then finished adding the dirt and ballast. The ballast is a mixture of sifted rock from a dirt road mixed with Woodland Scenics gray blend ballast. I mixed that with some of the dirt I had sifted to give the roadbed a worn, neglected look. Woodland Scenics scenic cement what again applied between the ties using an eyedropper to secure it in place. Small stones were glued in place using white glue around the bridge and creek bed.
To glue the grass from Martin Welberg Scenic Studios, I lightly diluted white glue and brushed it onto the dirt then stuck the grass in place. I used the scenic cement to ass ground foam to some of the grass to represent weeds. Longer static grass was glued into areas to represent taller, dead grass and weeds. The prototype bridge had weeds growing from the cracks in the cement so grass tufts were glued into a few of the cracks. Finally, I used the dilute scenic cement to cover some of the rocks and driftwood and sprinkled foam onto it to represent moss growth.
Once complete, I attached the deck to the piles. Once the rails were in place, I masked the ties with painters tape and, using my airbrush, sprained on AK-Interactive’s chipping color. That was followed by medium rust. I let the acrylic paint dry and then applied a wash of light rust. Finally, a light dusting of medium rust pigment was applied and sealed with dull-coat.
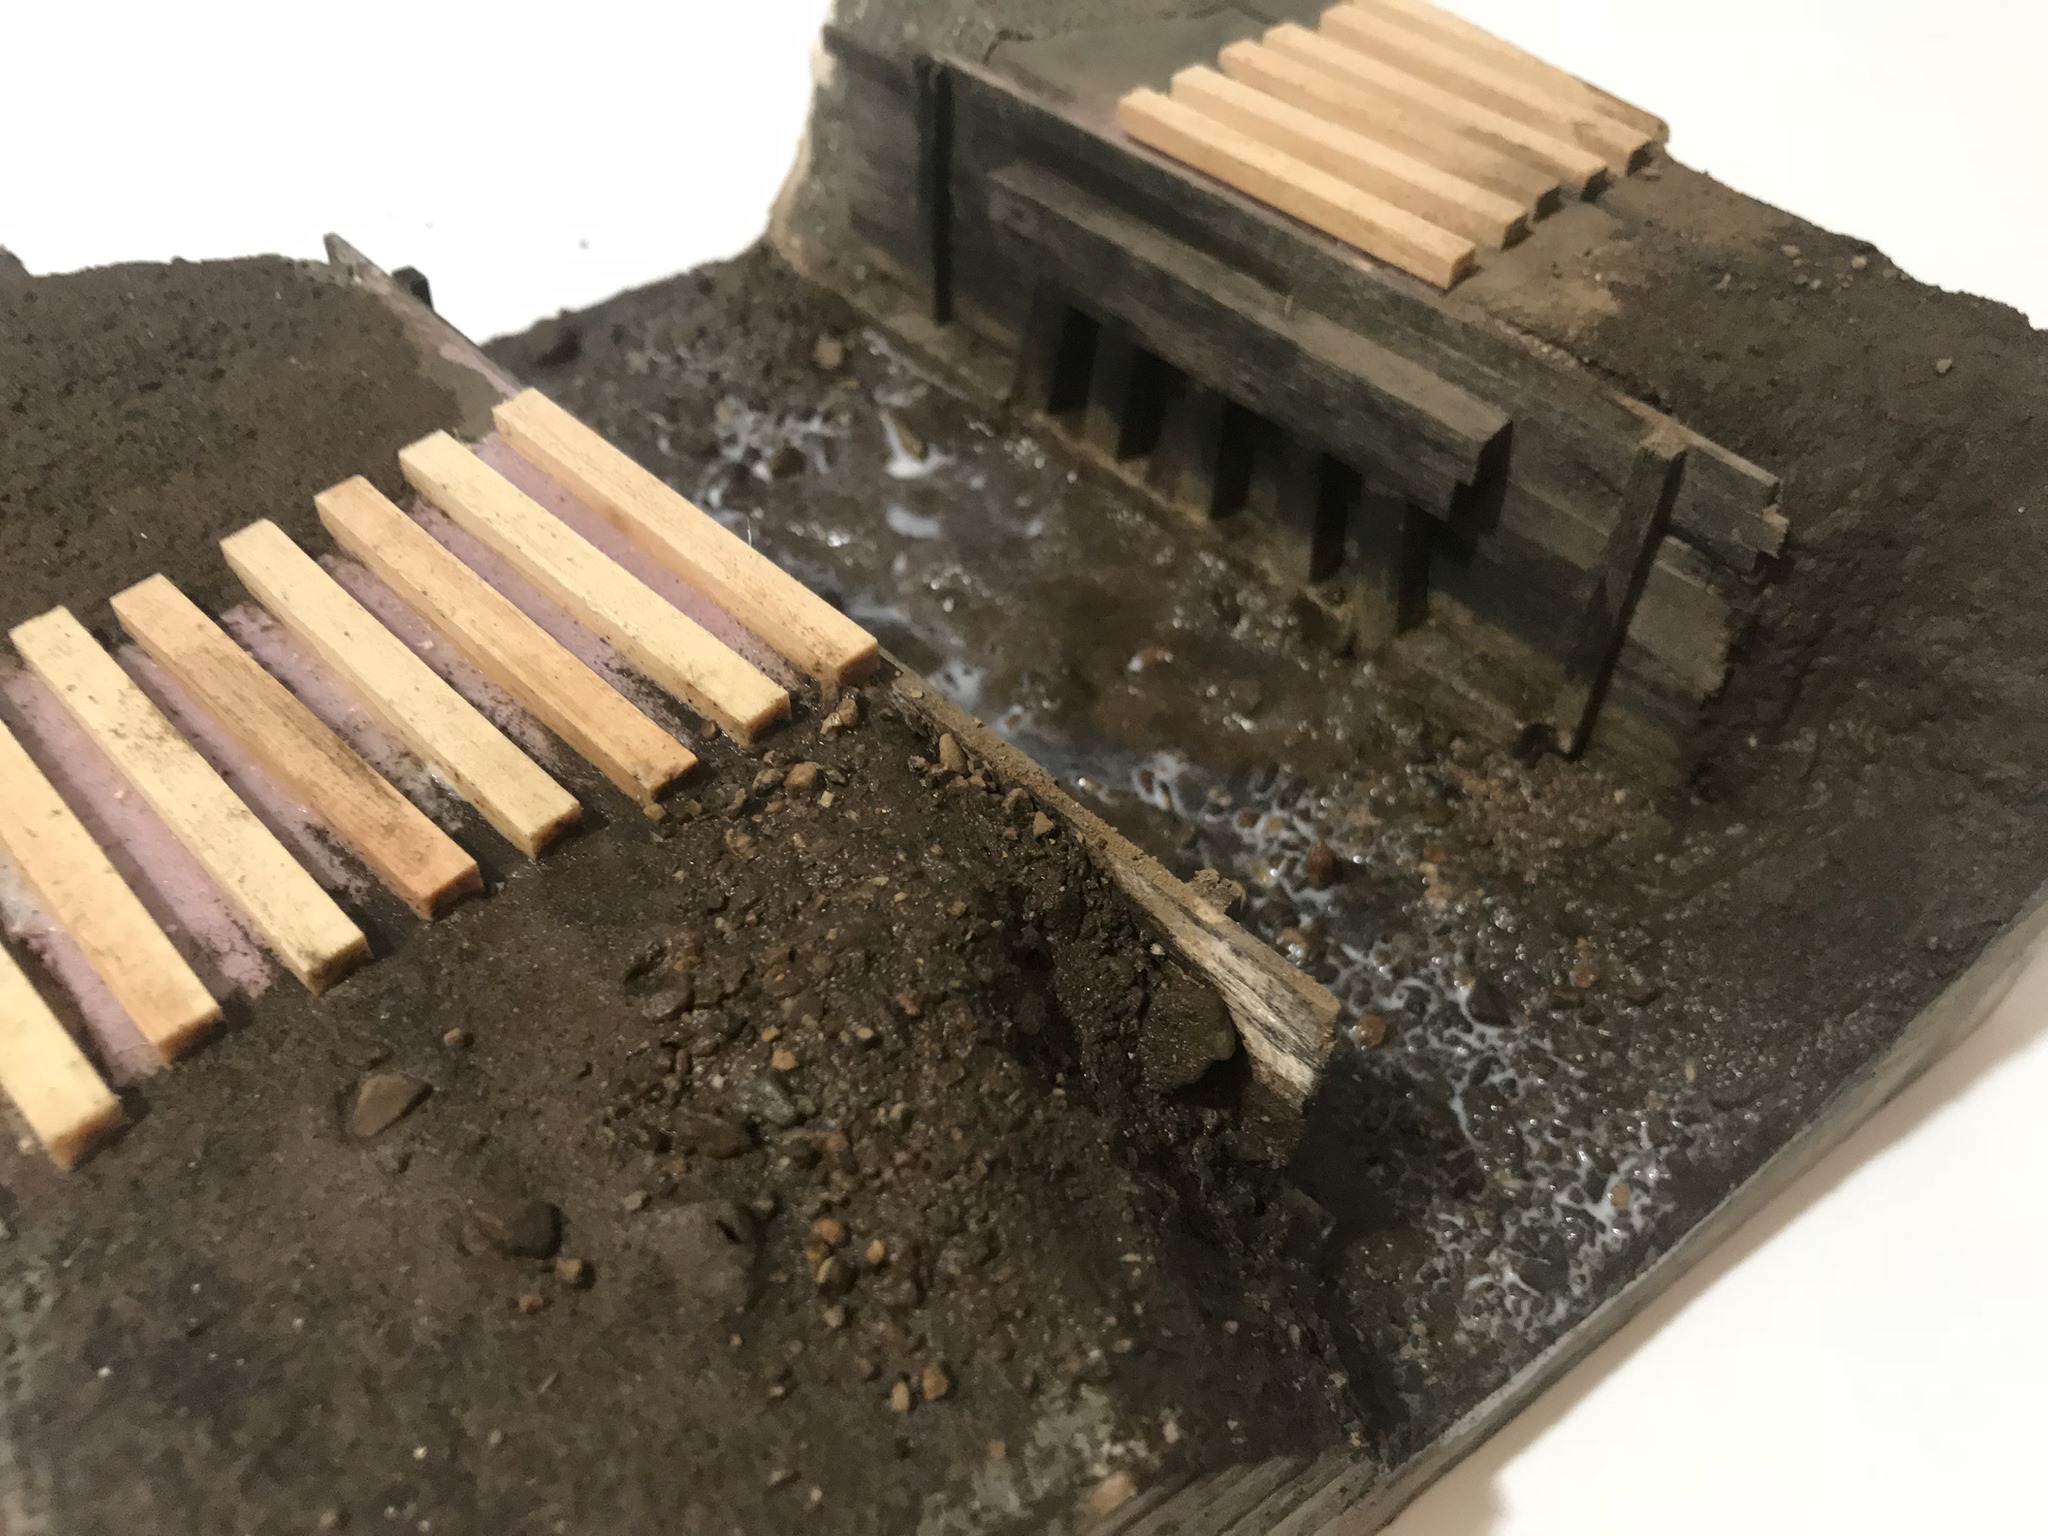
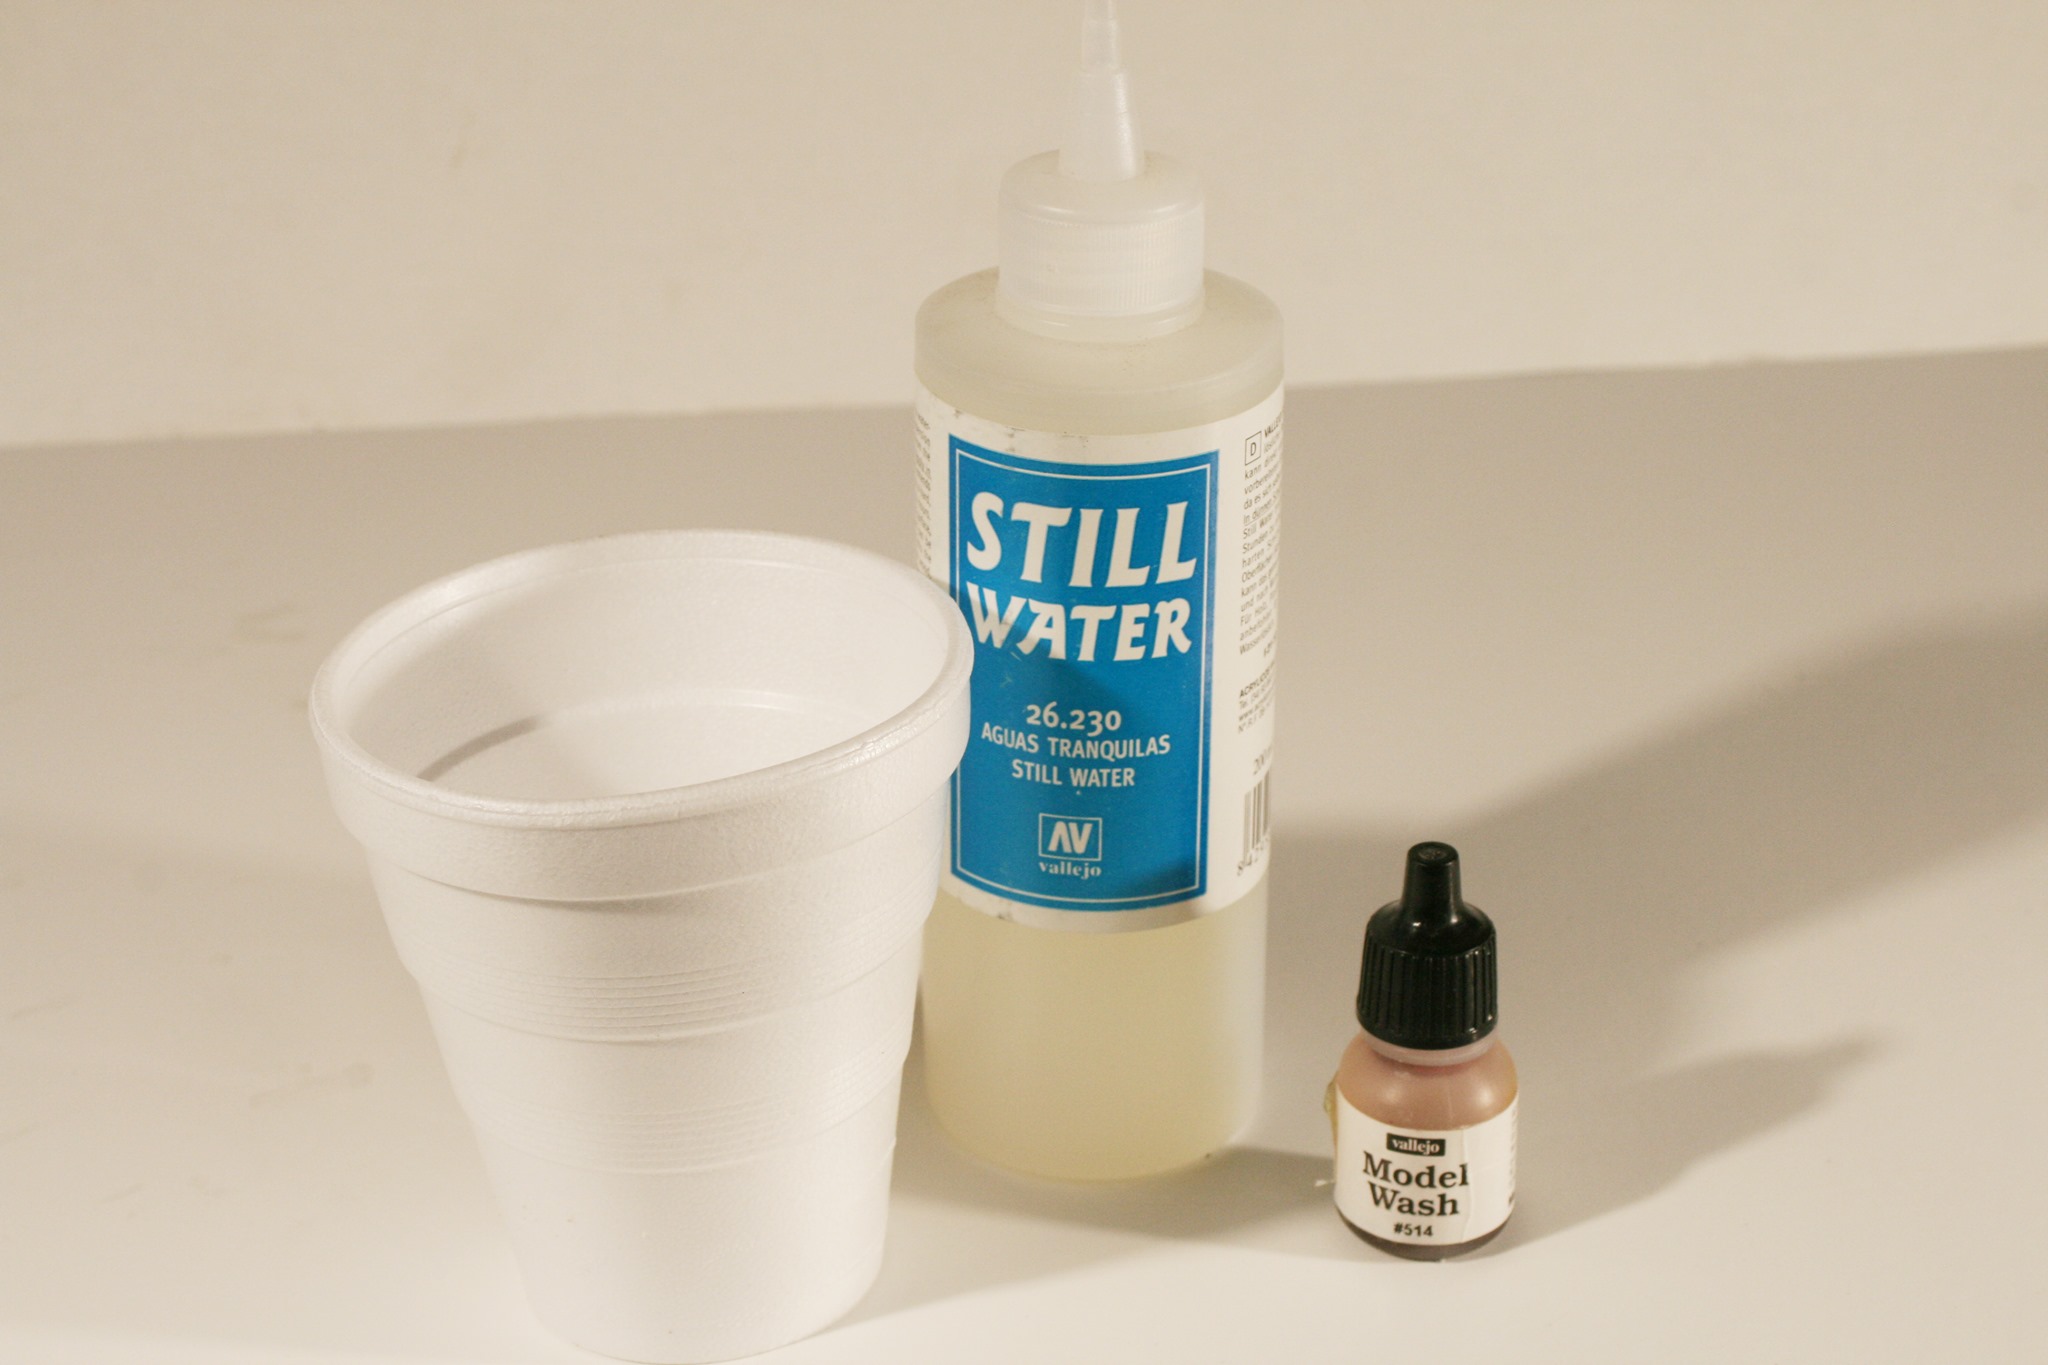
Water can be tricky, at least for me. In the past I was content painting river or lake beds to represent depth, however, I was never pleased with how it looked. A technique I have exterminated with in the past has yielded good results and can be combined with painting to add greater depth to your water. For my diorama I’m using Vallejo’s still water which works well for smaller projects like this.
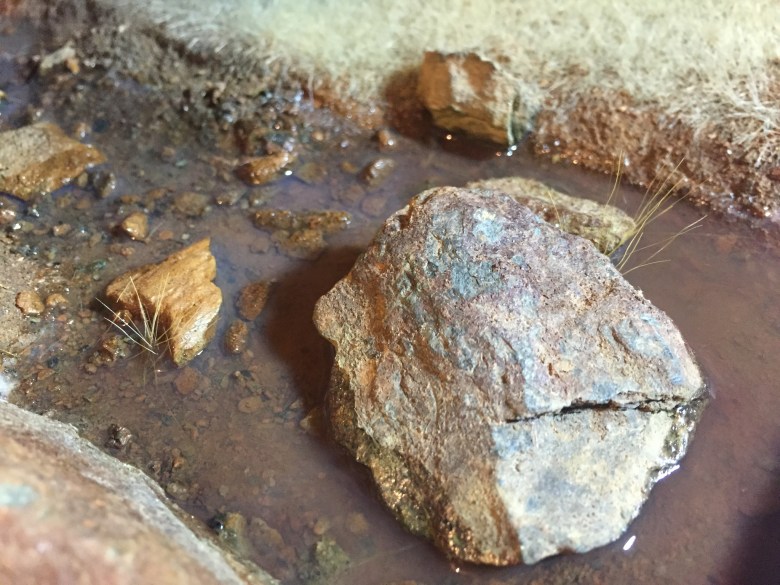
I begin by mixing a small amount of still water with brown. The first layer should be the darkest and I will lighten the opacity with each layer after; the last one is clear. I pour a thin layer across the bottom of the creek bed making sure to fill the deeper areas of the creek first.

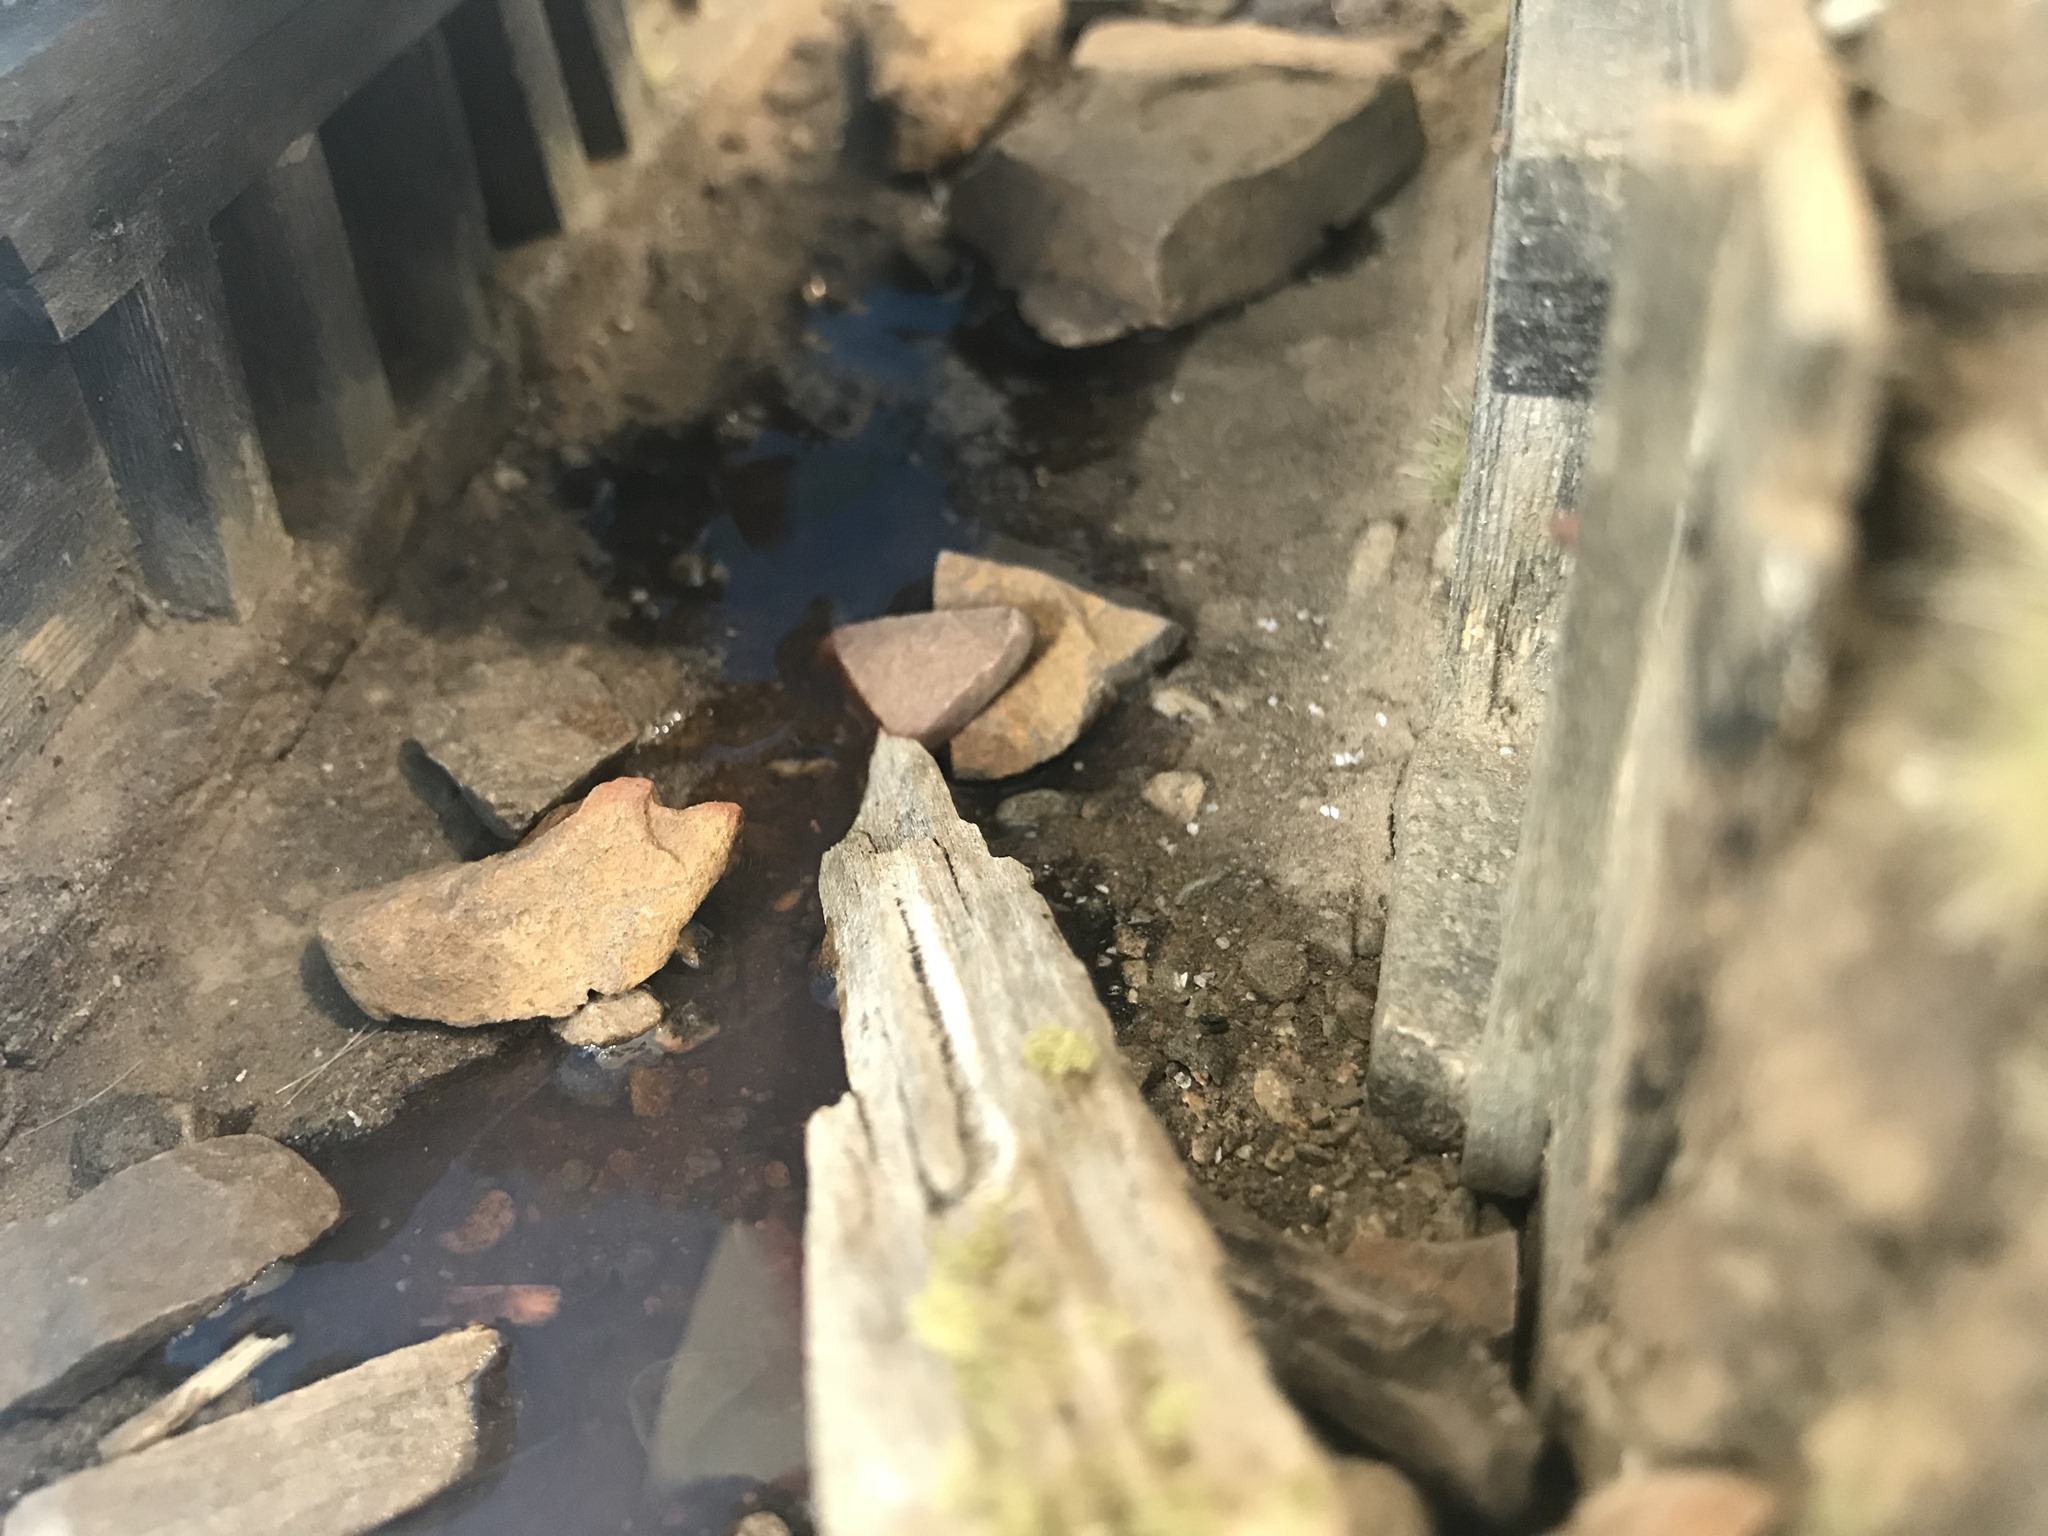
Let each layer dry overnight. The deeper you want your water, the more layers you will want to pour. Each layer should receive less color as you mix it. This will give the illusion of deeper water. If you would like to simulate moving water, you can combine Woodland Scenics water effects to represent moving water or rapids.
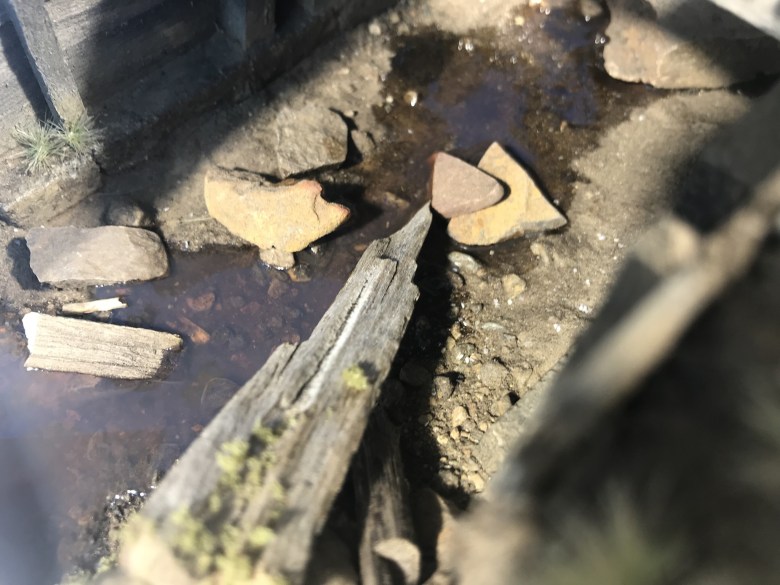
With that, I’m calling this project complete. This diorama was a lot of fun and challenged me to look at weathering a bit different than I have ever attempted. I’m happy with the results and can’t wait to build another small project.

Good suggestion for modelers to try their hand at a diorama.
I think they should follow your lead to keep the scene simple with a single focal point.
I have learned so much through out the years from building dioramas. I remember when I was younger reading fantastic articles in the Narrow Gauge and Shortline Gazette from you and Bob Brown that got me started.
Thank you. That was far far away in an another galaxy
Great little mini project. Since I’m not at the scenery stage on my layout, a small diorama is a great way to get to play in that area of the hobby. I think it’s time to build a small diorama for my office.
You will learn a lot from building them. They are not daunting like a larger layout. I personally have found that I fear mistakes less when I’m working on a smaller footprint. It’s quite liberating!
[…] the glue had dried on the ties for the second switch and siding, I staines the ties with my typical India Ink and water and brushed it onto the wood ties in several light coats. I follow that up with dirt I collected in […]