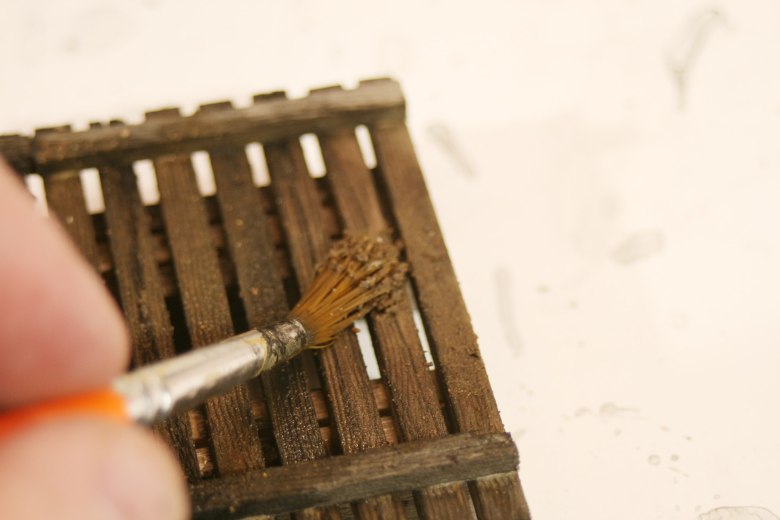
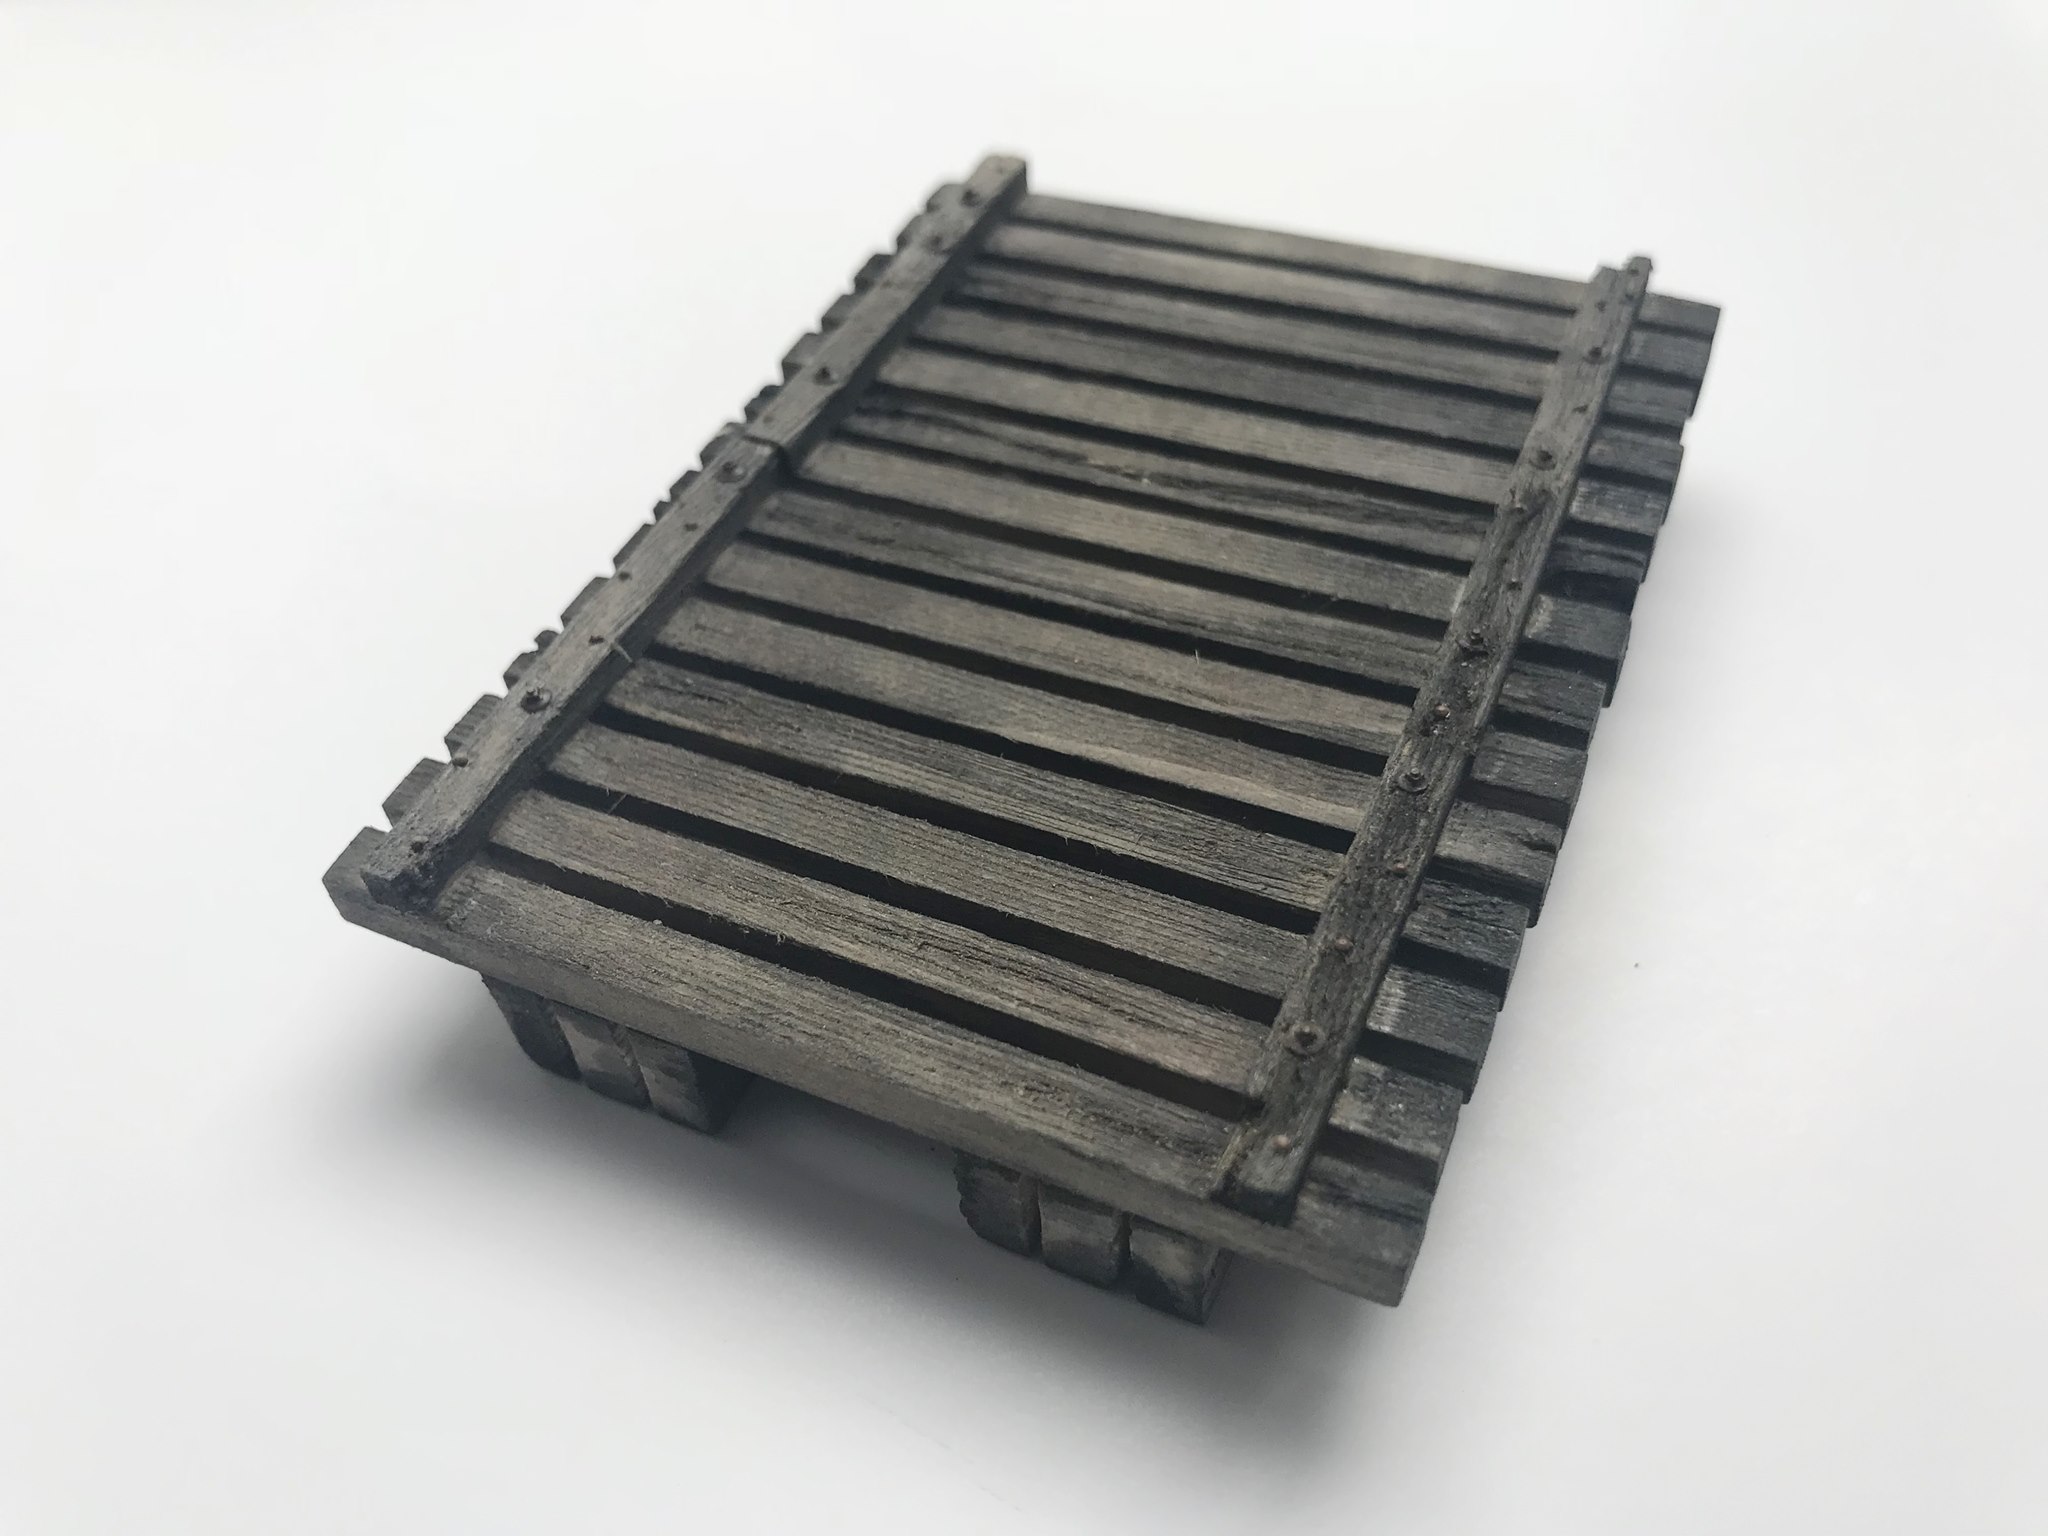
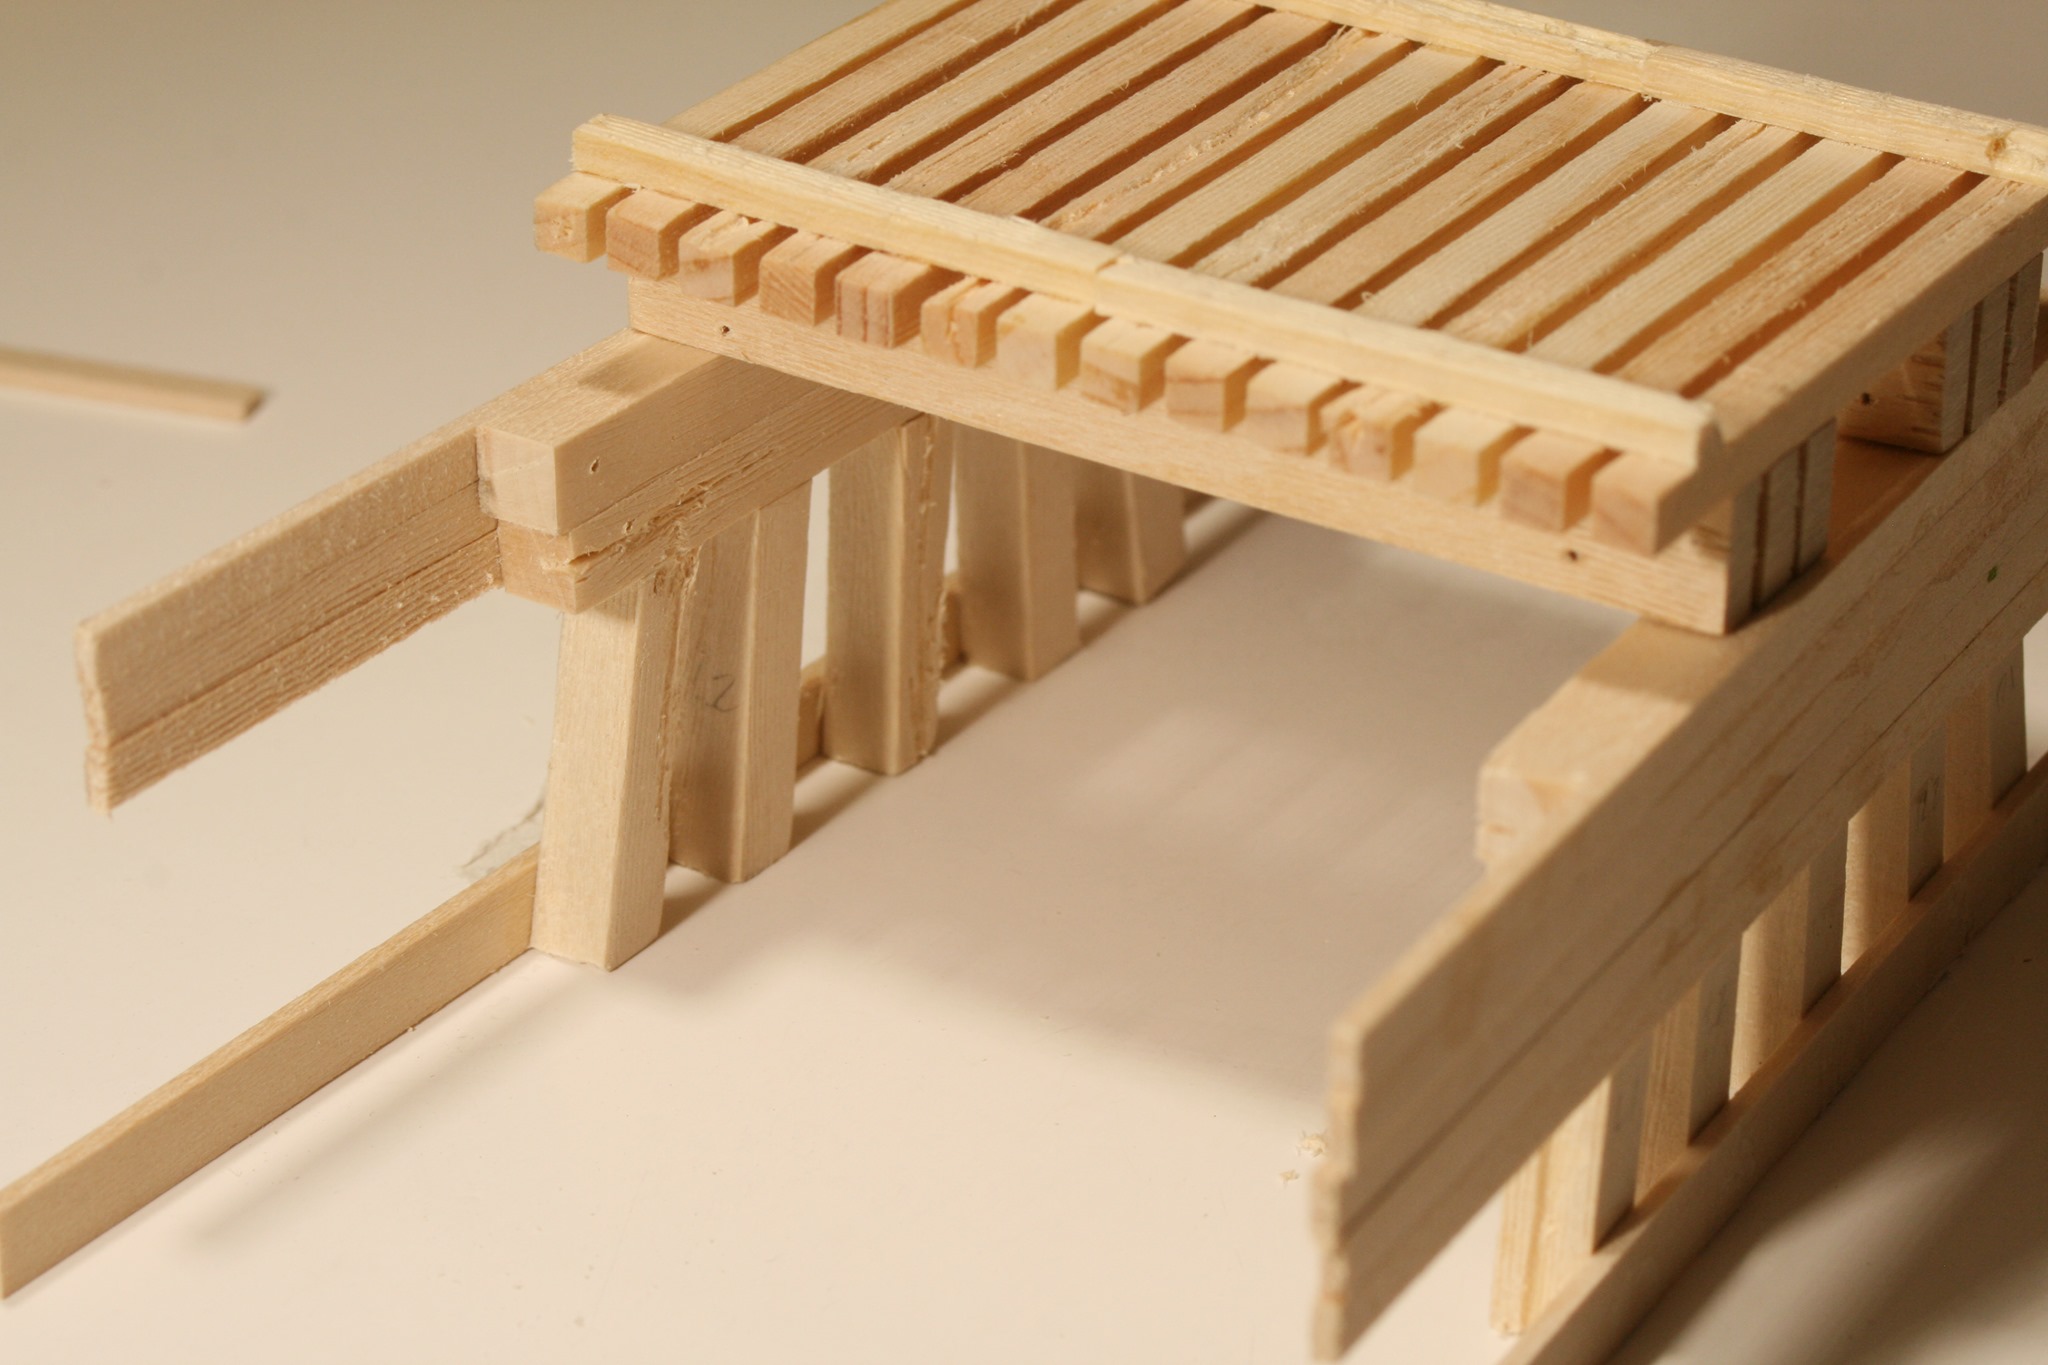
Finally, real dirt is brushed on the top of the deck to tie the color together and mute the weathering. Let the dirt dry and brush off the access. A flat varnish can be used to seal the dirt at this point but not necessary. I use Grandtline NBW details in the stringers and on the timber guards. The prototype had two bolts on each timber guard with nails holding the rest of the ties. I represent the nails by using Tichy Train Group round-head rivets. These were staggered as the prototype.
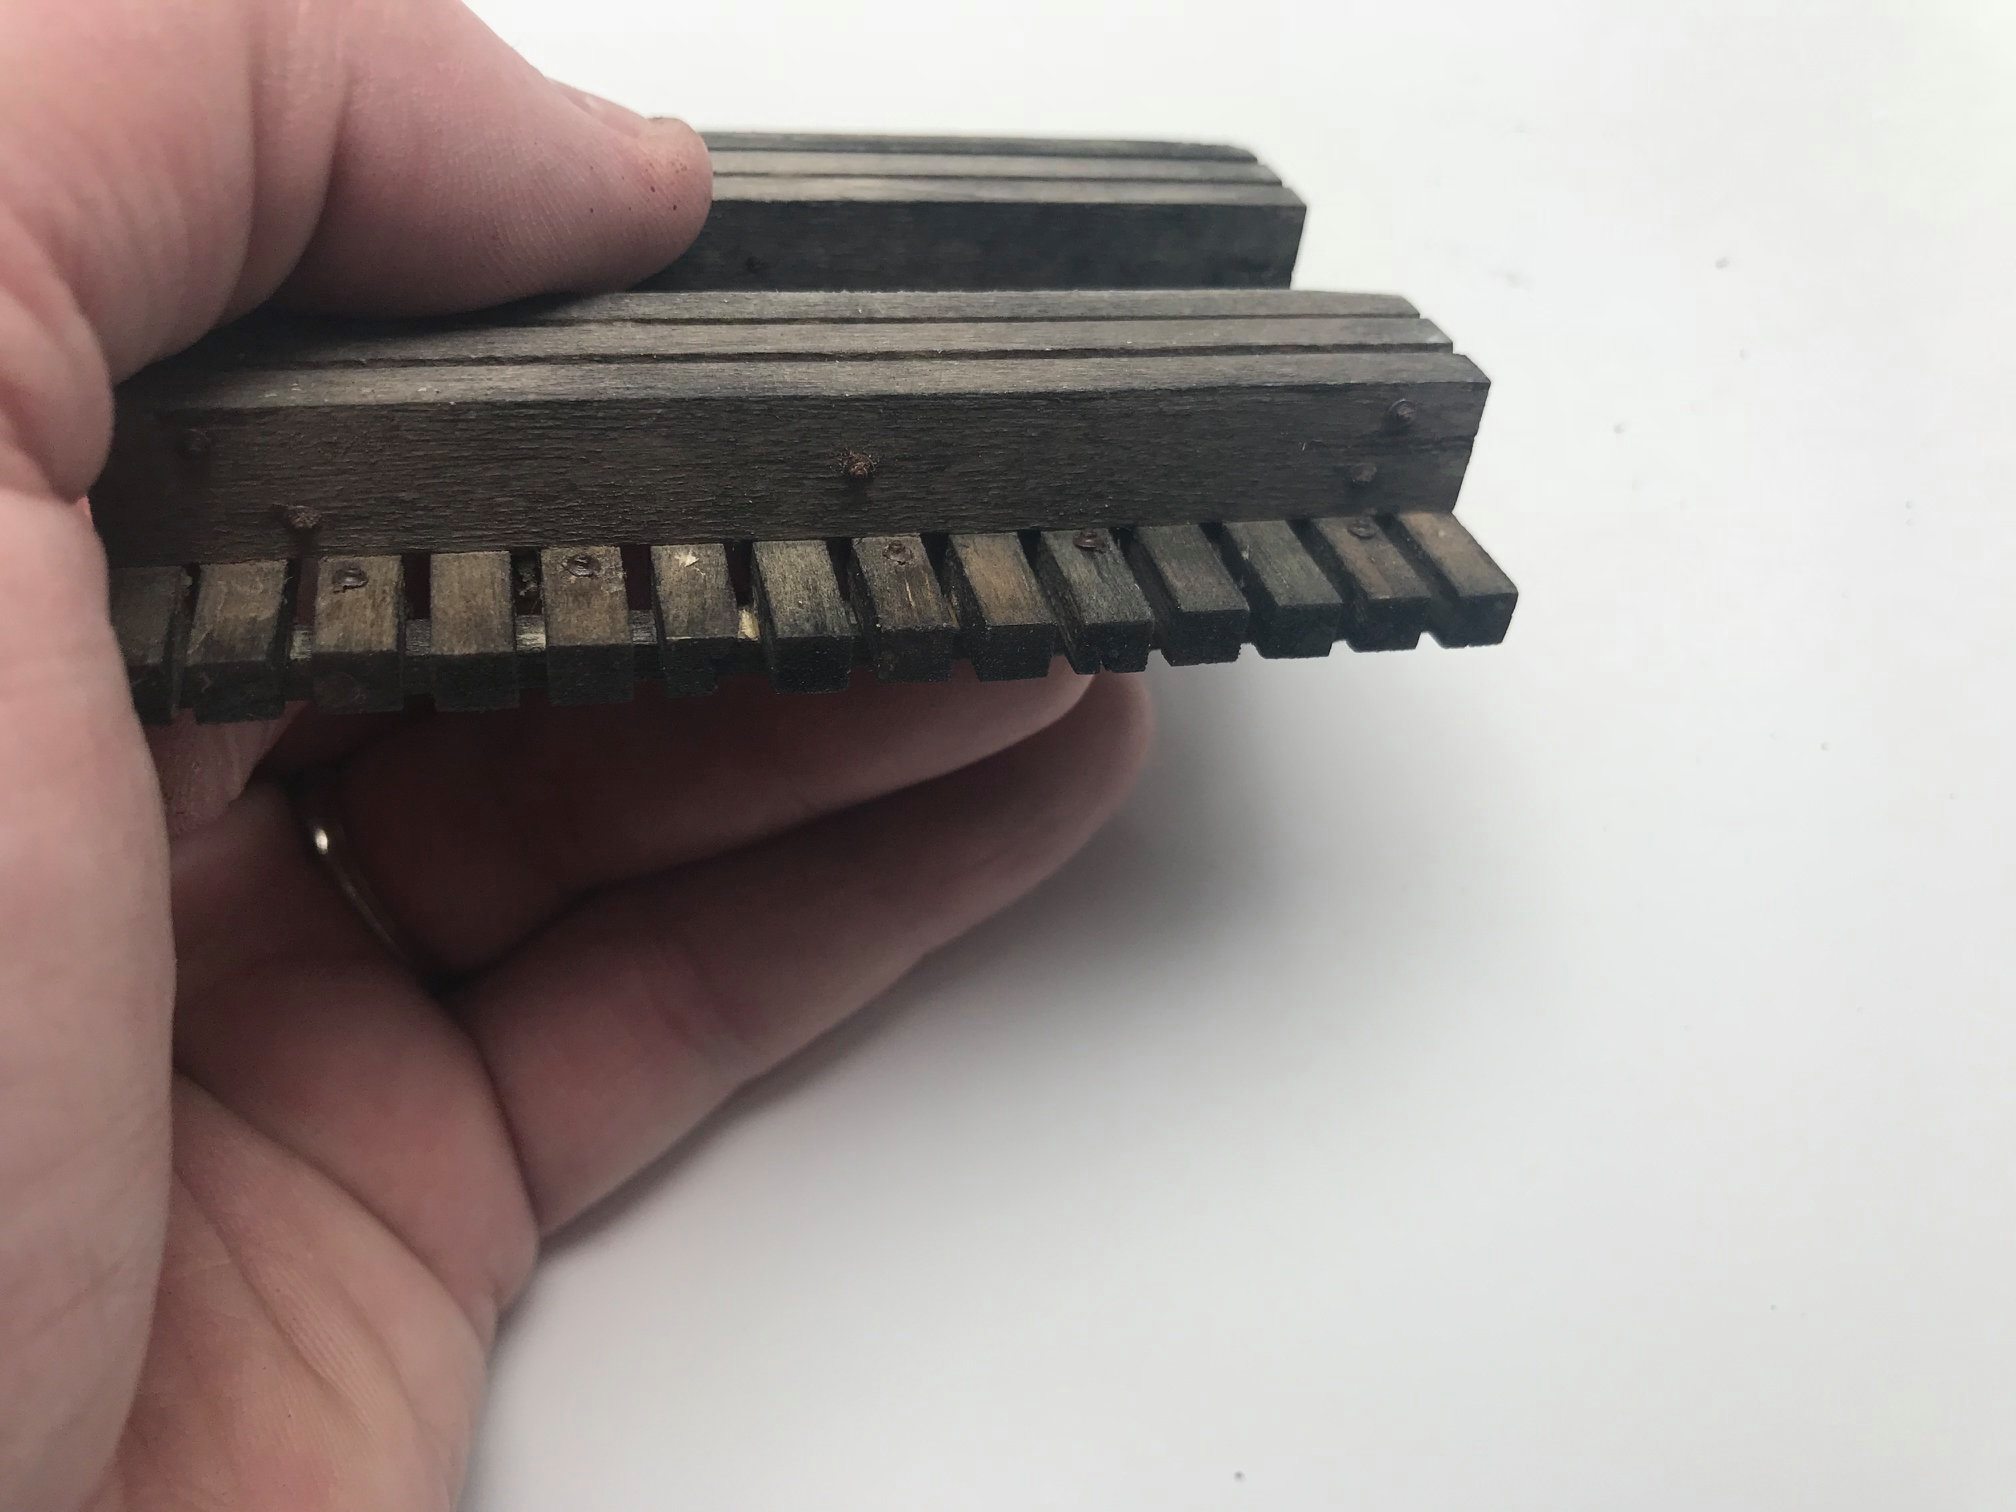
All of the bolt details were painted with Vallejo’s acrylic gray primer followed by dark rust acrylic paint from AK-Interactive. I did add the rail to the deck at this point as well. This will help me set the bent heights when gluing them onto the base later. Code 100, steel rail from Right-O’-Way was used along with their tie plates and joint bars. I’m using Walthers code 83 spikes, with each rail receiving four spikes as the prototype. Automotive primer was sprayed onto the rails before attaching them to the ties.
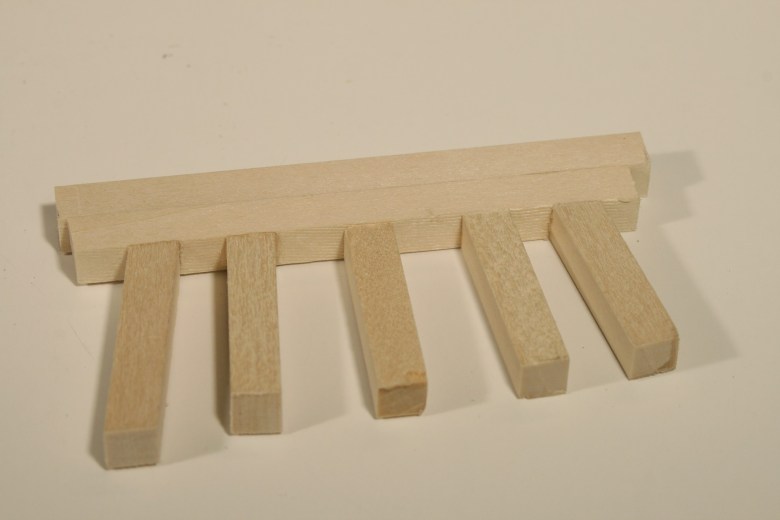
I then turned to the bents. I cut the legs and caps from 12” x 12” lumber. The prototype doubled the caps which were each different lengths. I cut my caps in a similar pattern with the shorter lengths on the bottom. Once again I used my razor saw to roughen the timbers and my hobby knife to add deeper gouges to the wood.
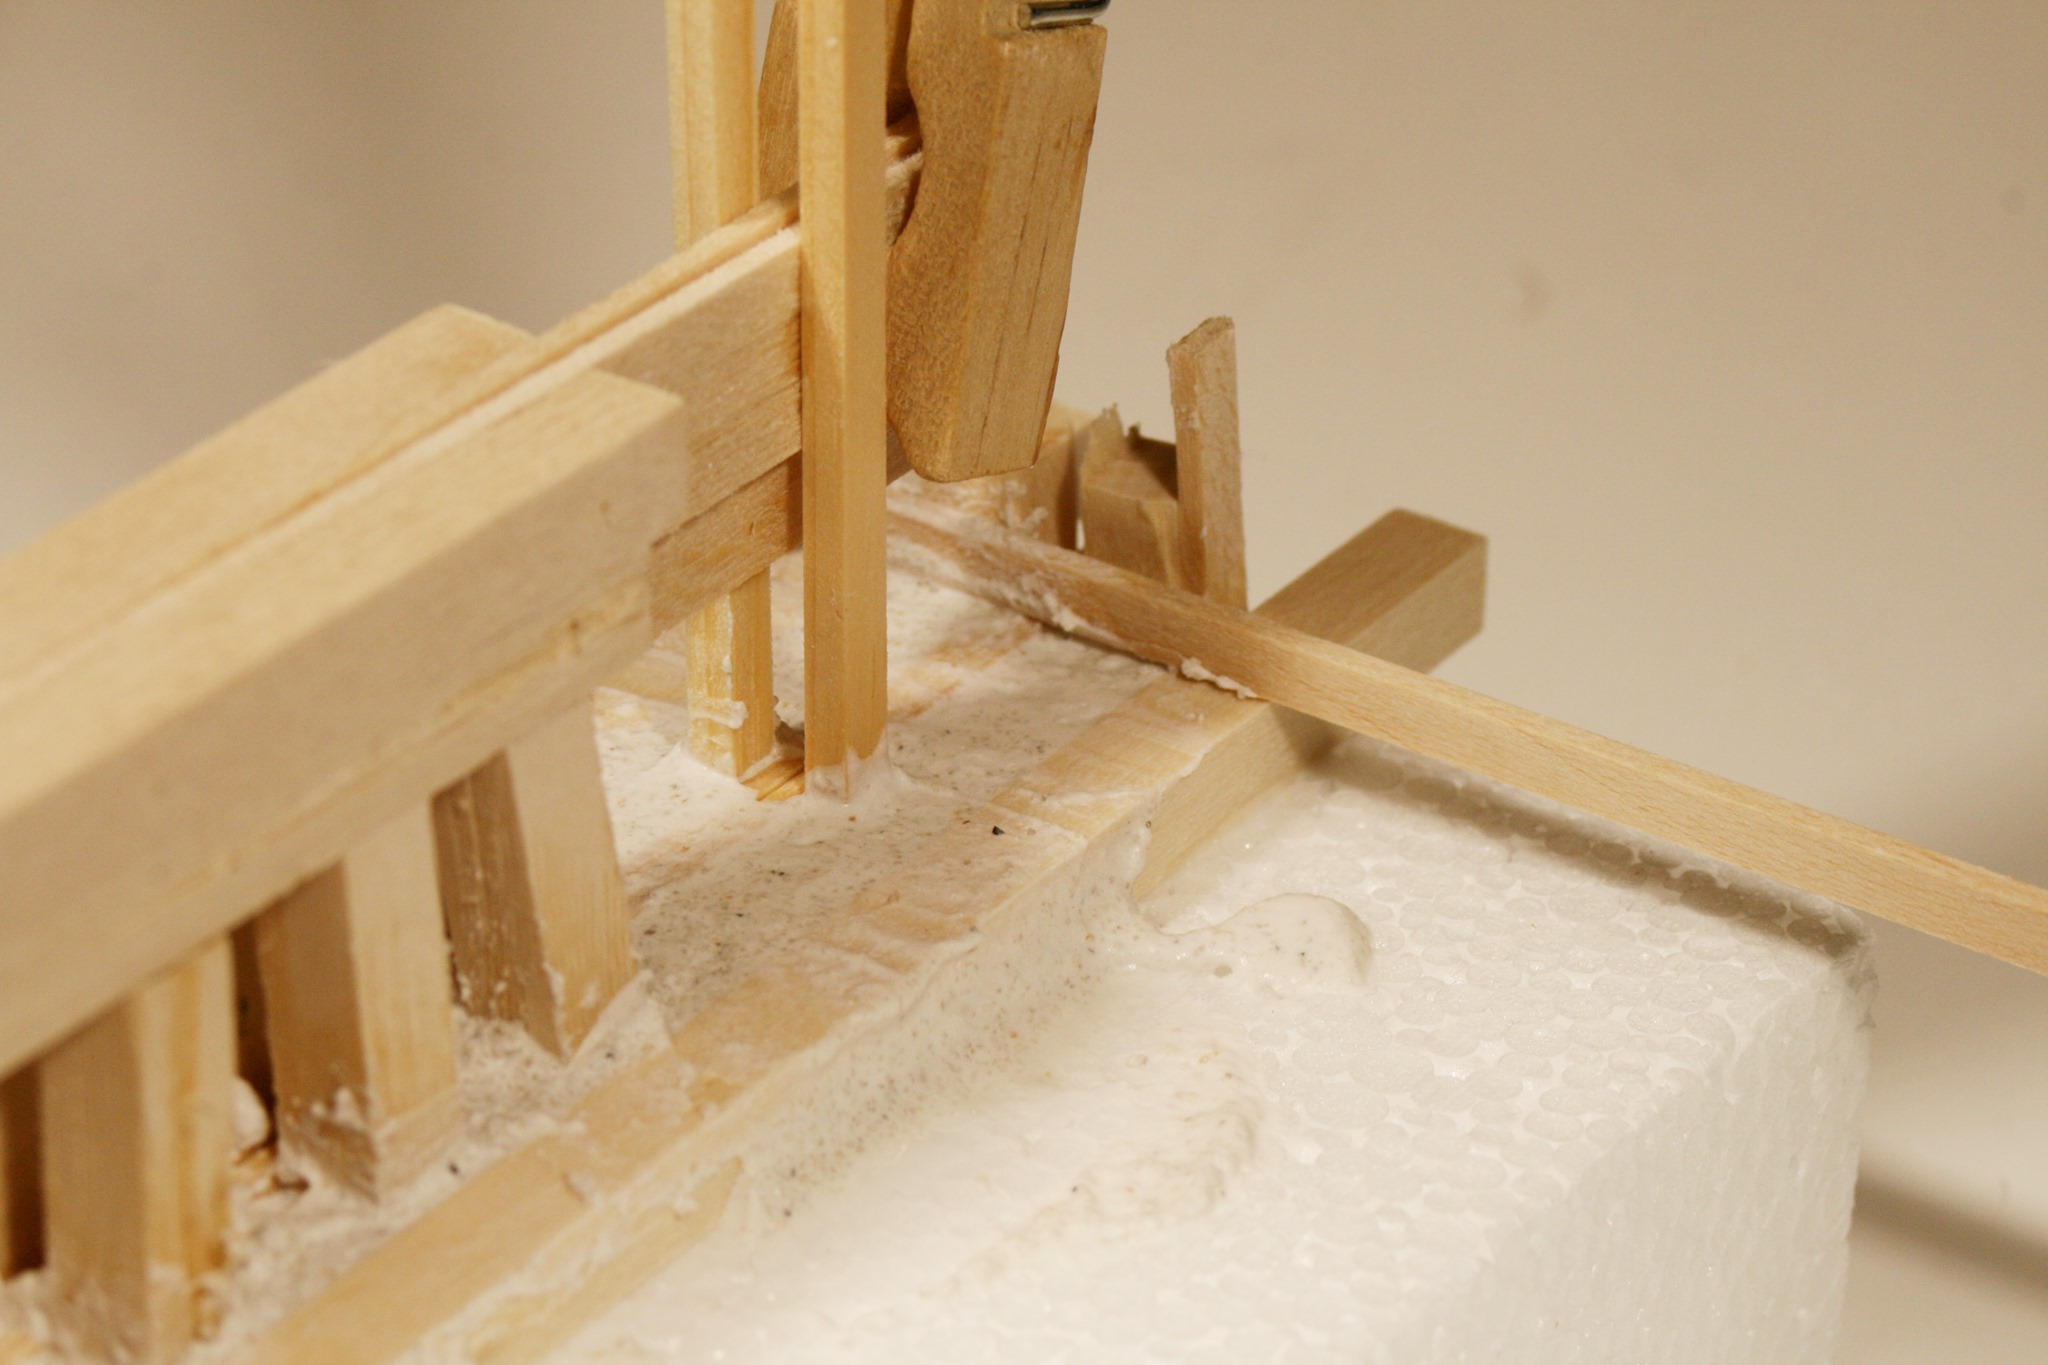
You will notice I’ve began adding a few bulkhead timbers to strengthen the bent legs, however, I left most off to allow me to work with the plaster. I have also temporarily added strip wood to the base of the bents which will act as the back of the mold for the plaster footings.
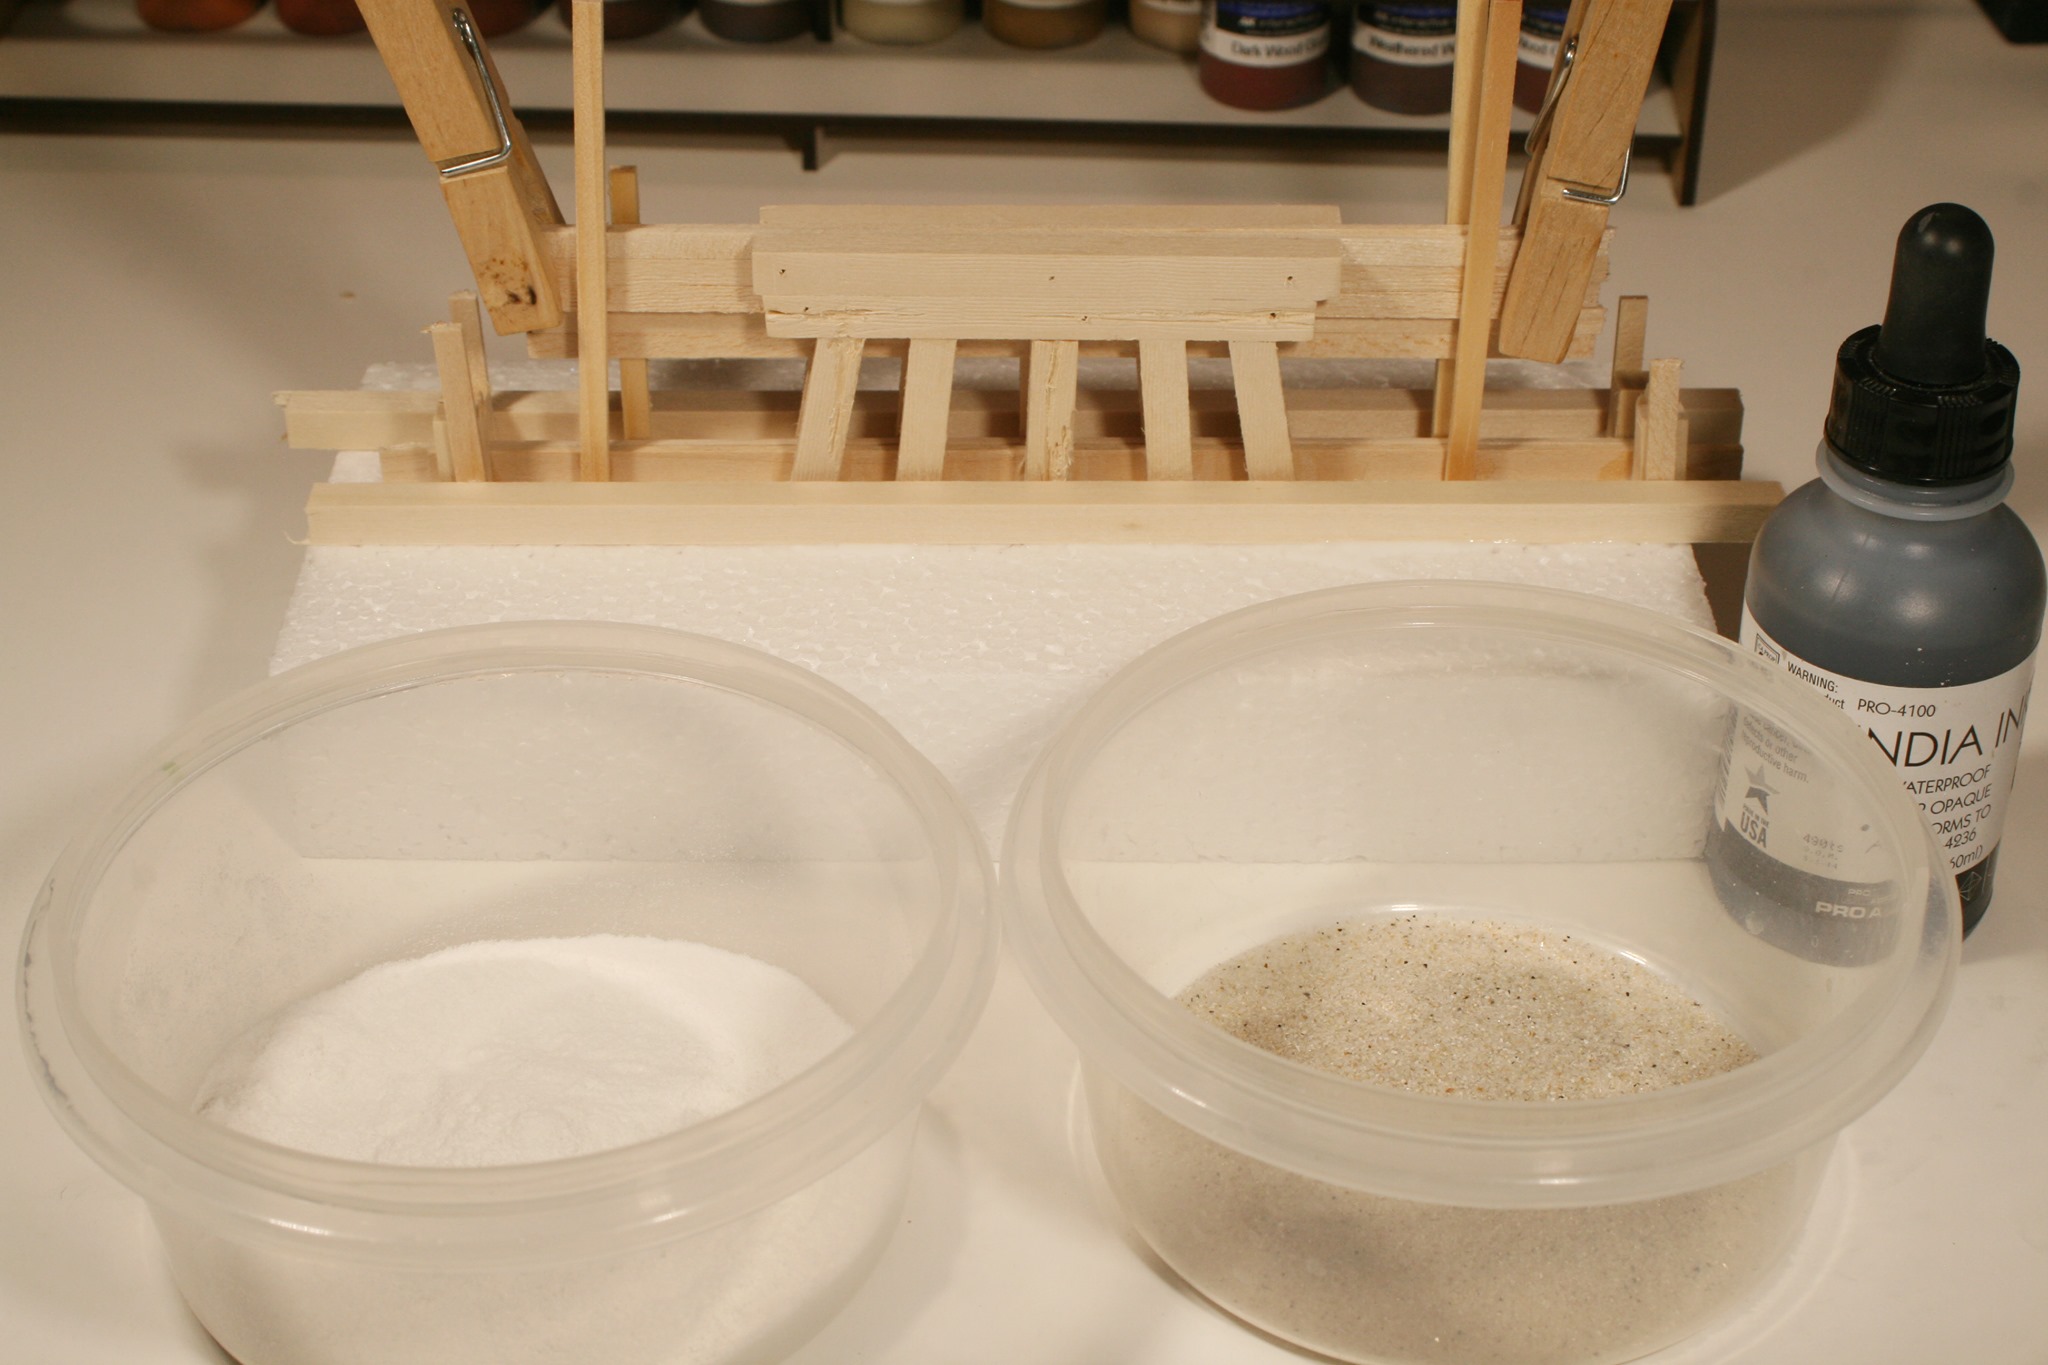
 Using finely sifted sand, I mix it with hydrocal to represent rough concrete. While the hydrocal is not quite dry, a wet makeup sponge is used to sand the plaster and expose the “stones” in the concrete. The more sand used, the rougher the texture you can achieve. One thing to note, sand makes the castings brittle and needs to be handled very carefully.
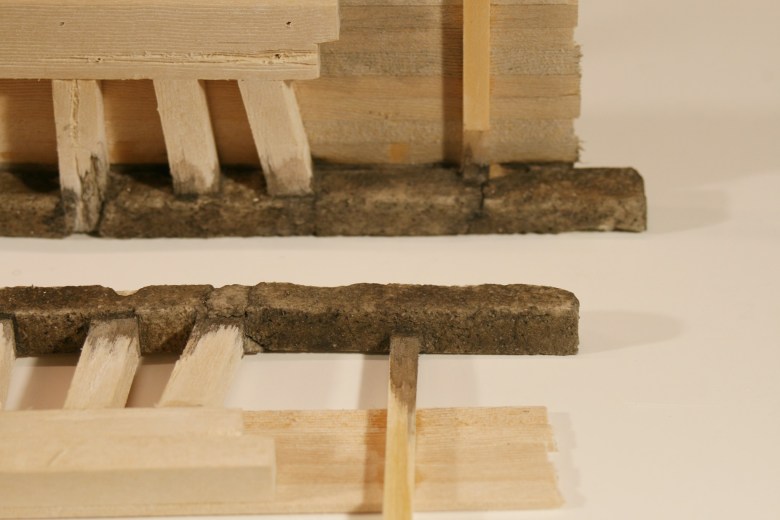
I used Styrofoam as a base for my concrete castings. I glued two bulkhead board to the back of the legs and built up the forms using stripwood. Using white glue, I temporarily attached the forms to the styrofoam base. My concrete mix was poured into the form and allowed to set up but not cure. While still setting, I removed the forms and used a damp makeup sponge to roughen the castings and expose the sand in the plaster.
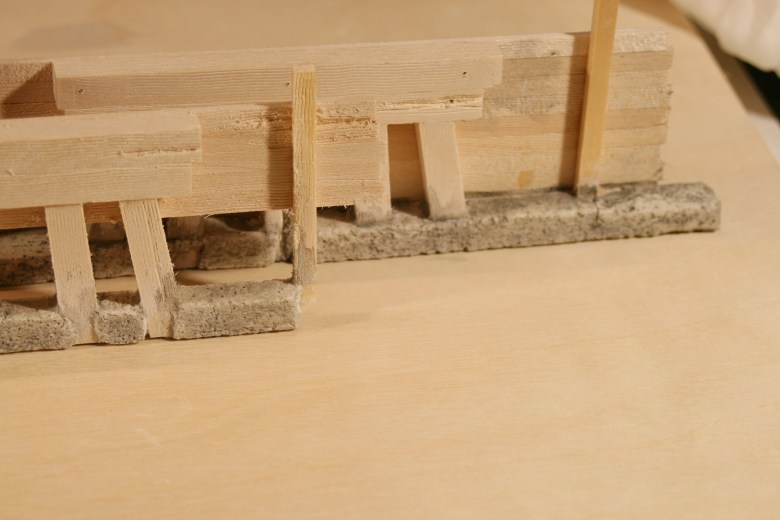 When dry, I colored the plaster using, Woodland Scenics Aged Concrete as a base. Thin acrylic washes of light brown were then applied with a makeup sponge. Finally, thin acrylic washes of flat black were applied to bring out the details in the castings.
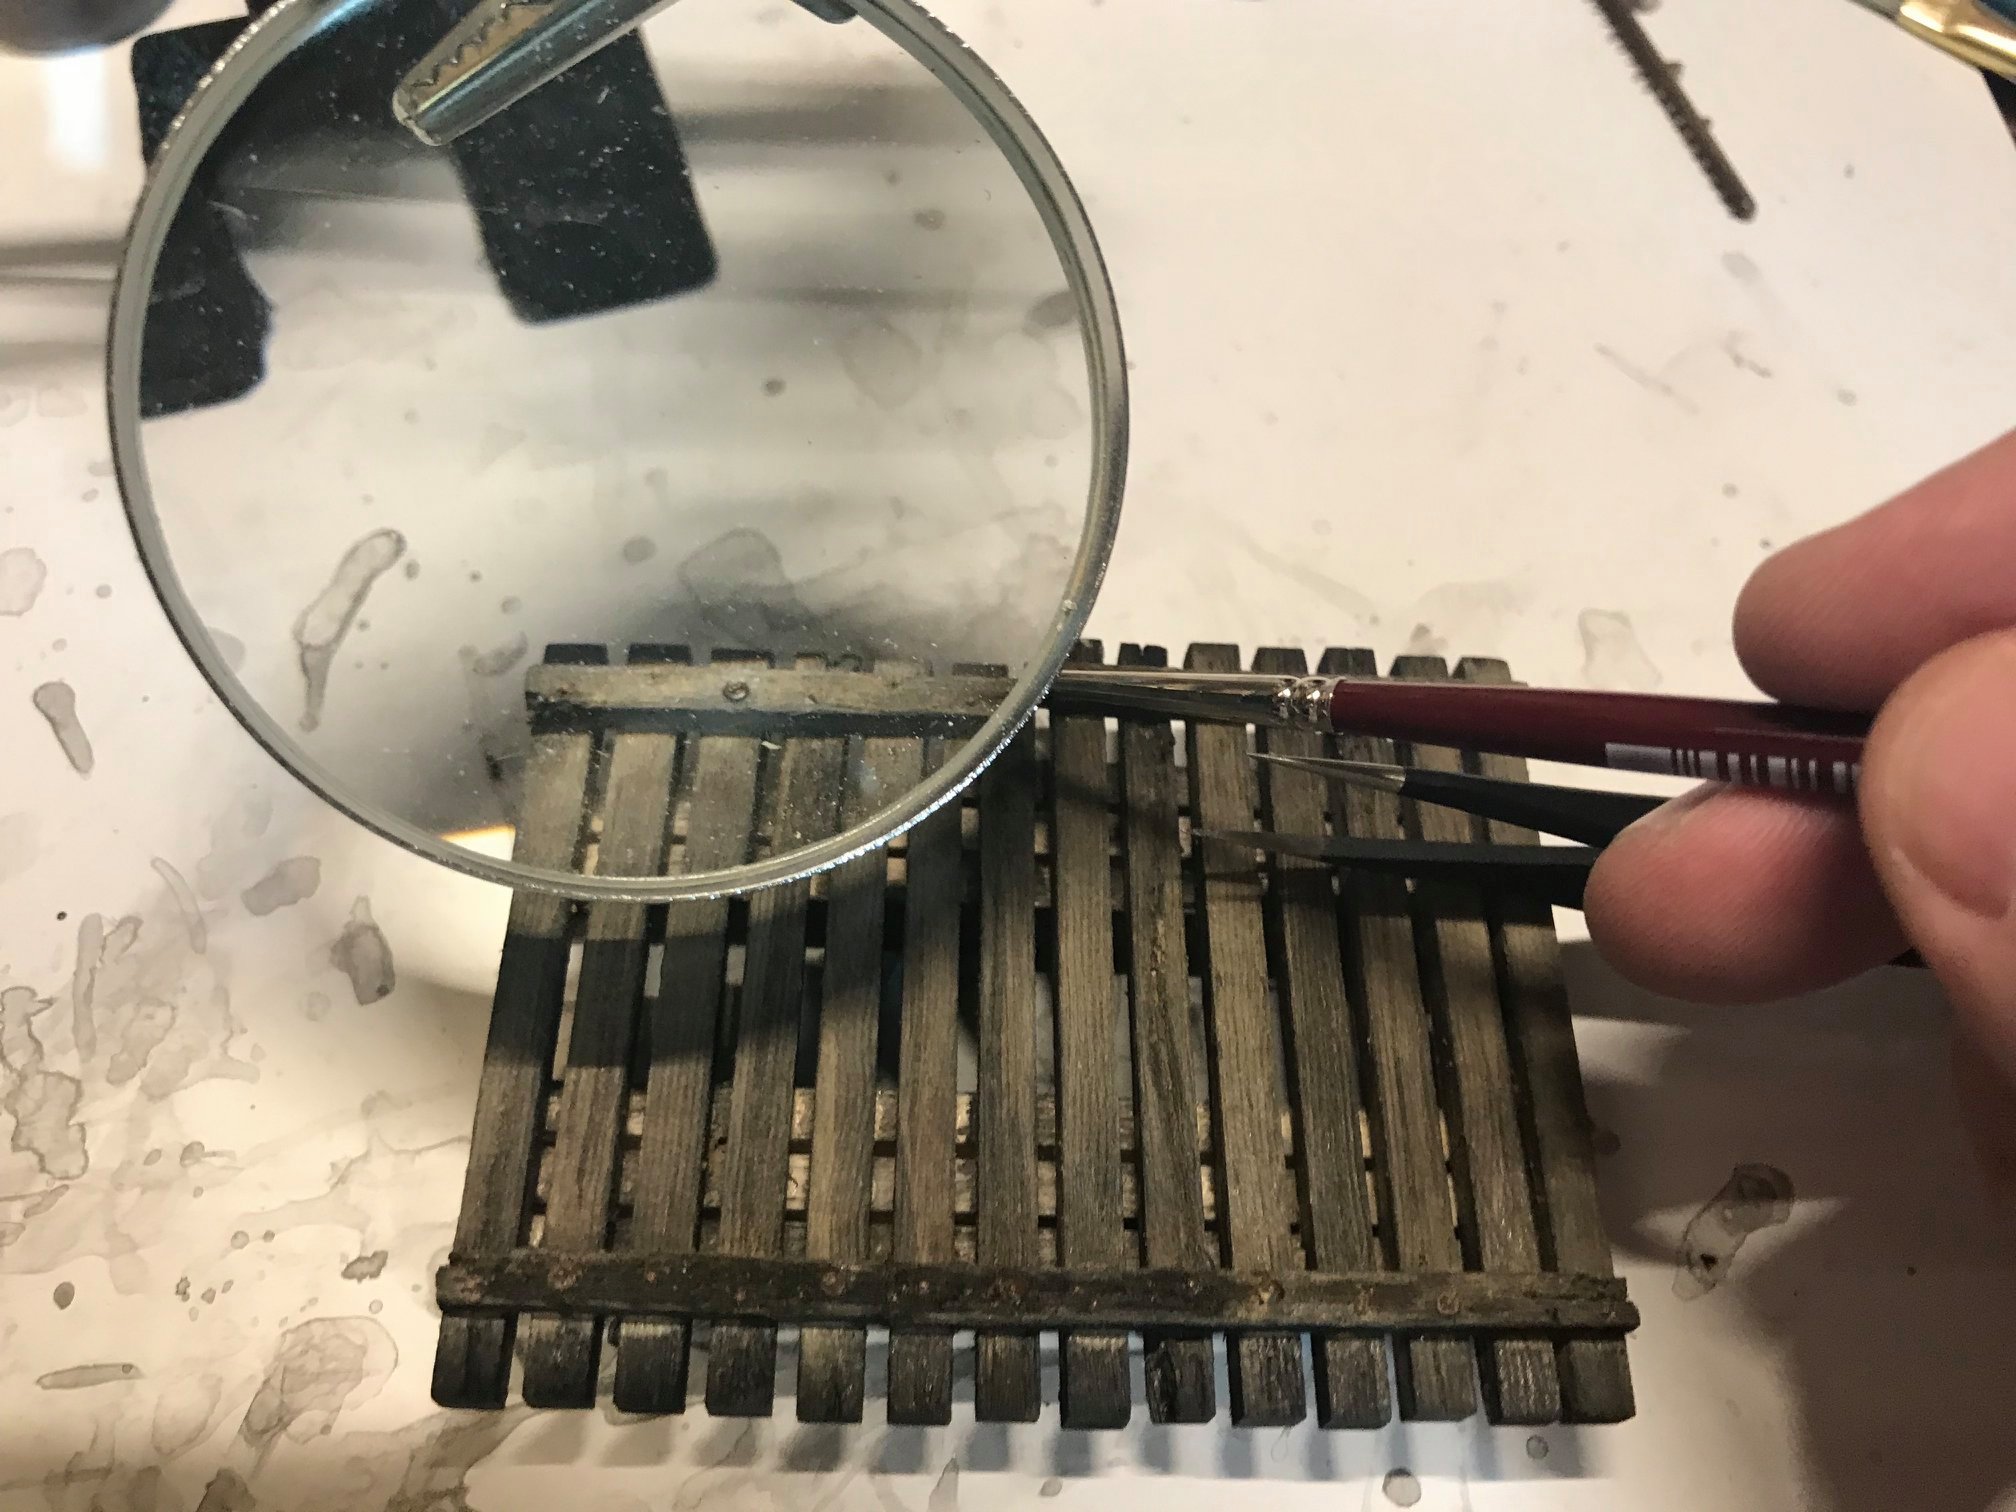
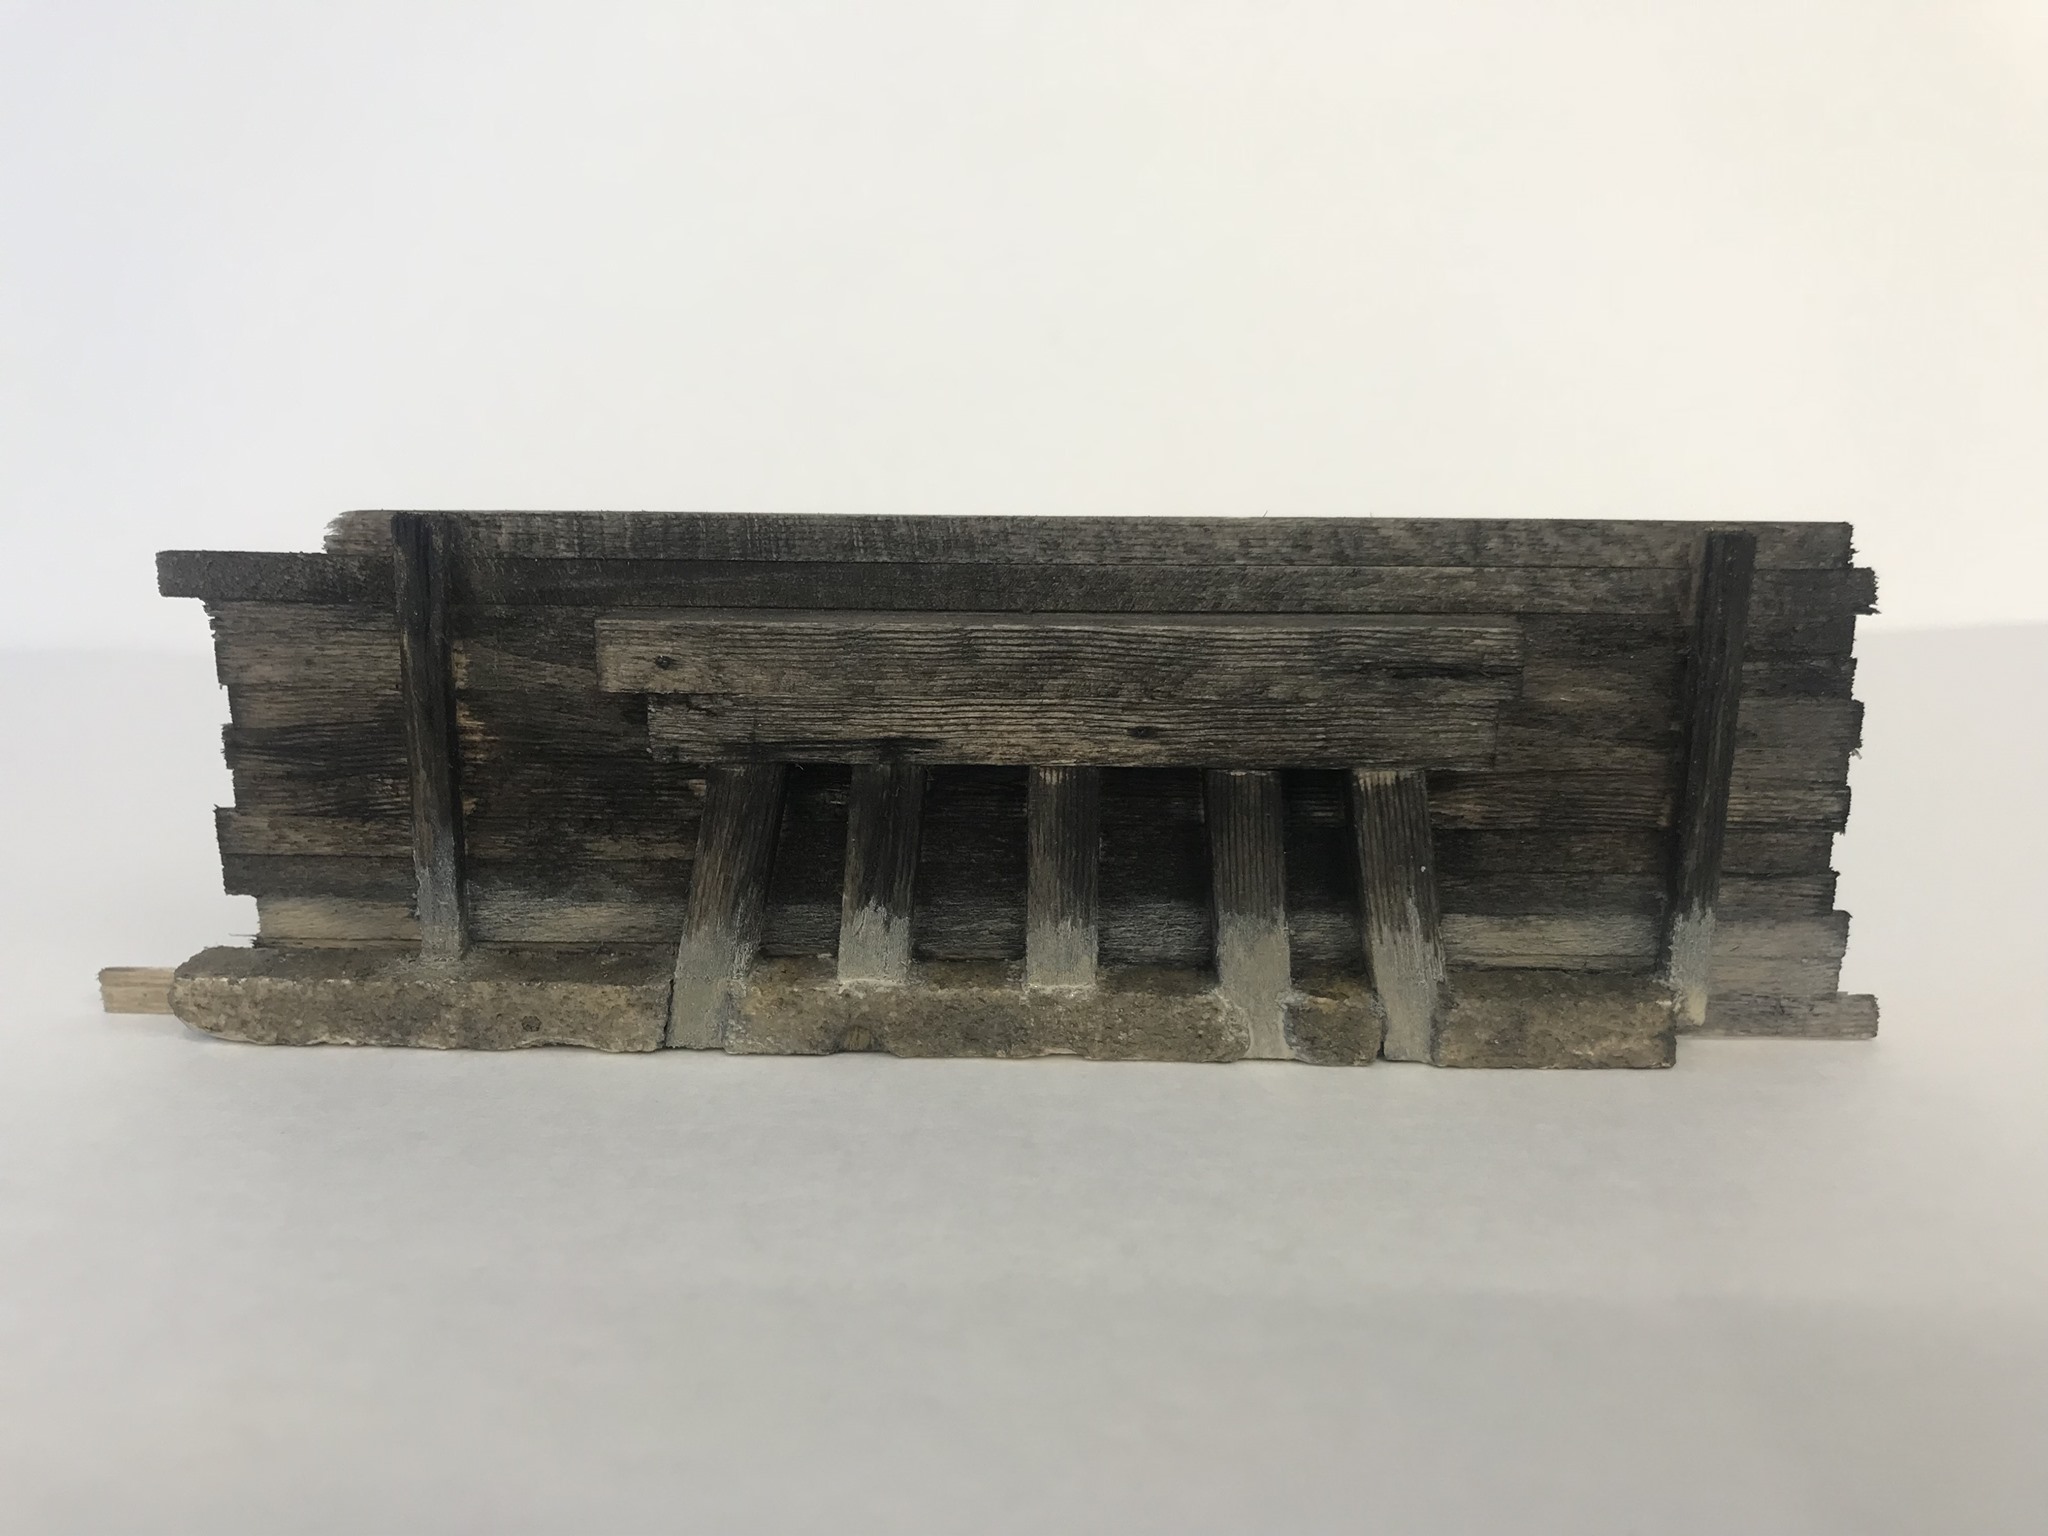
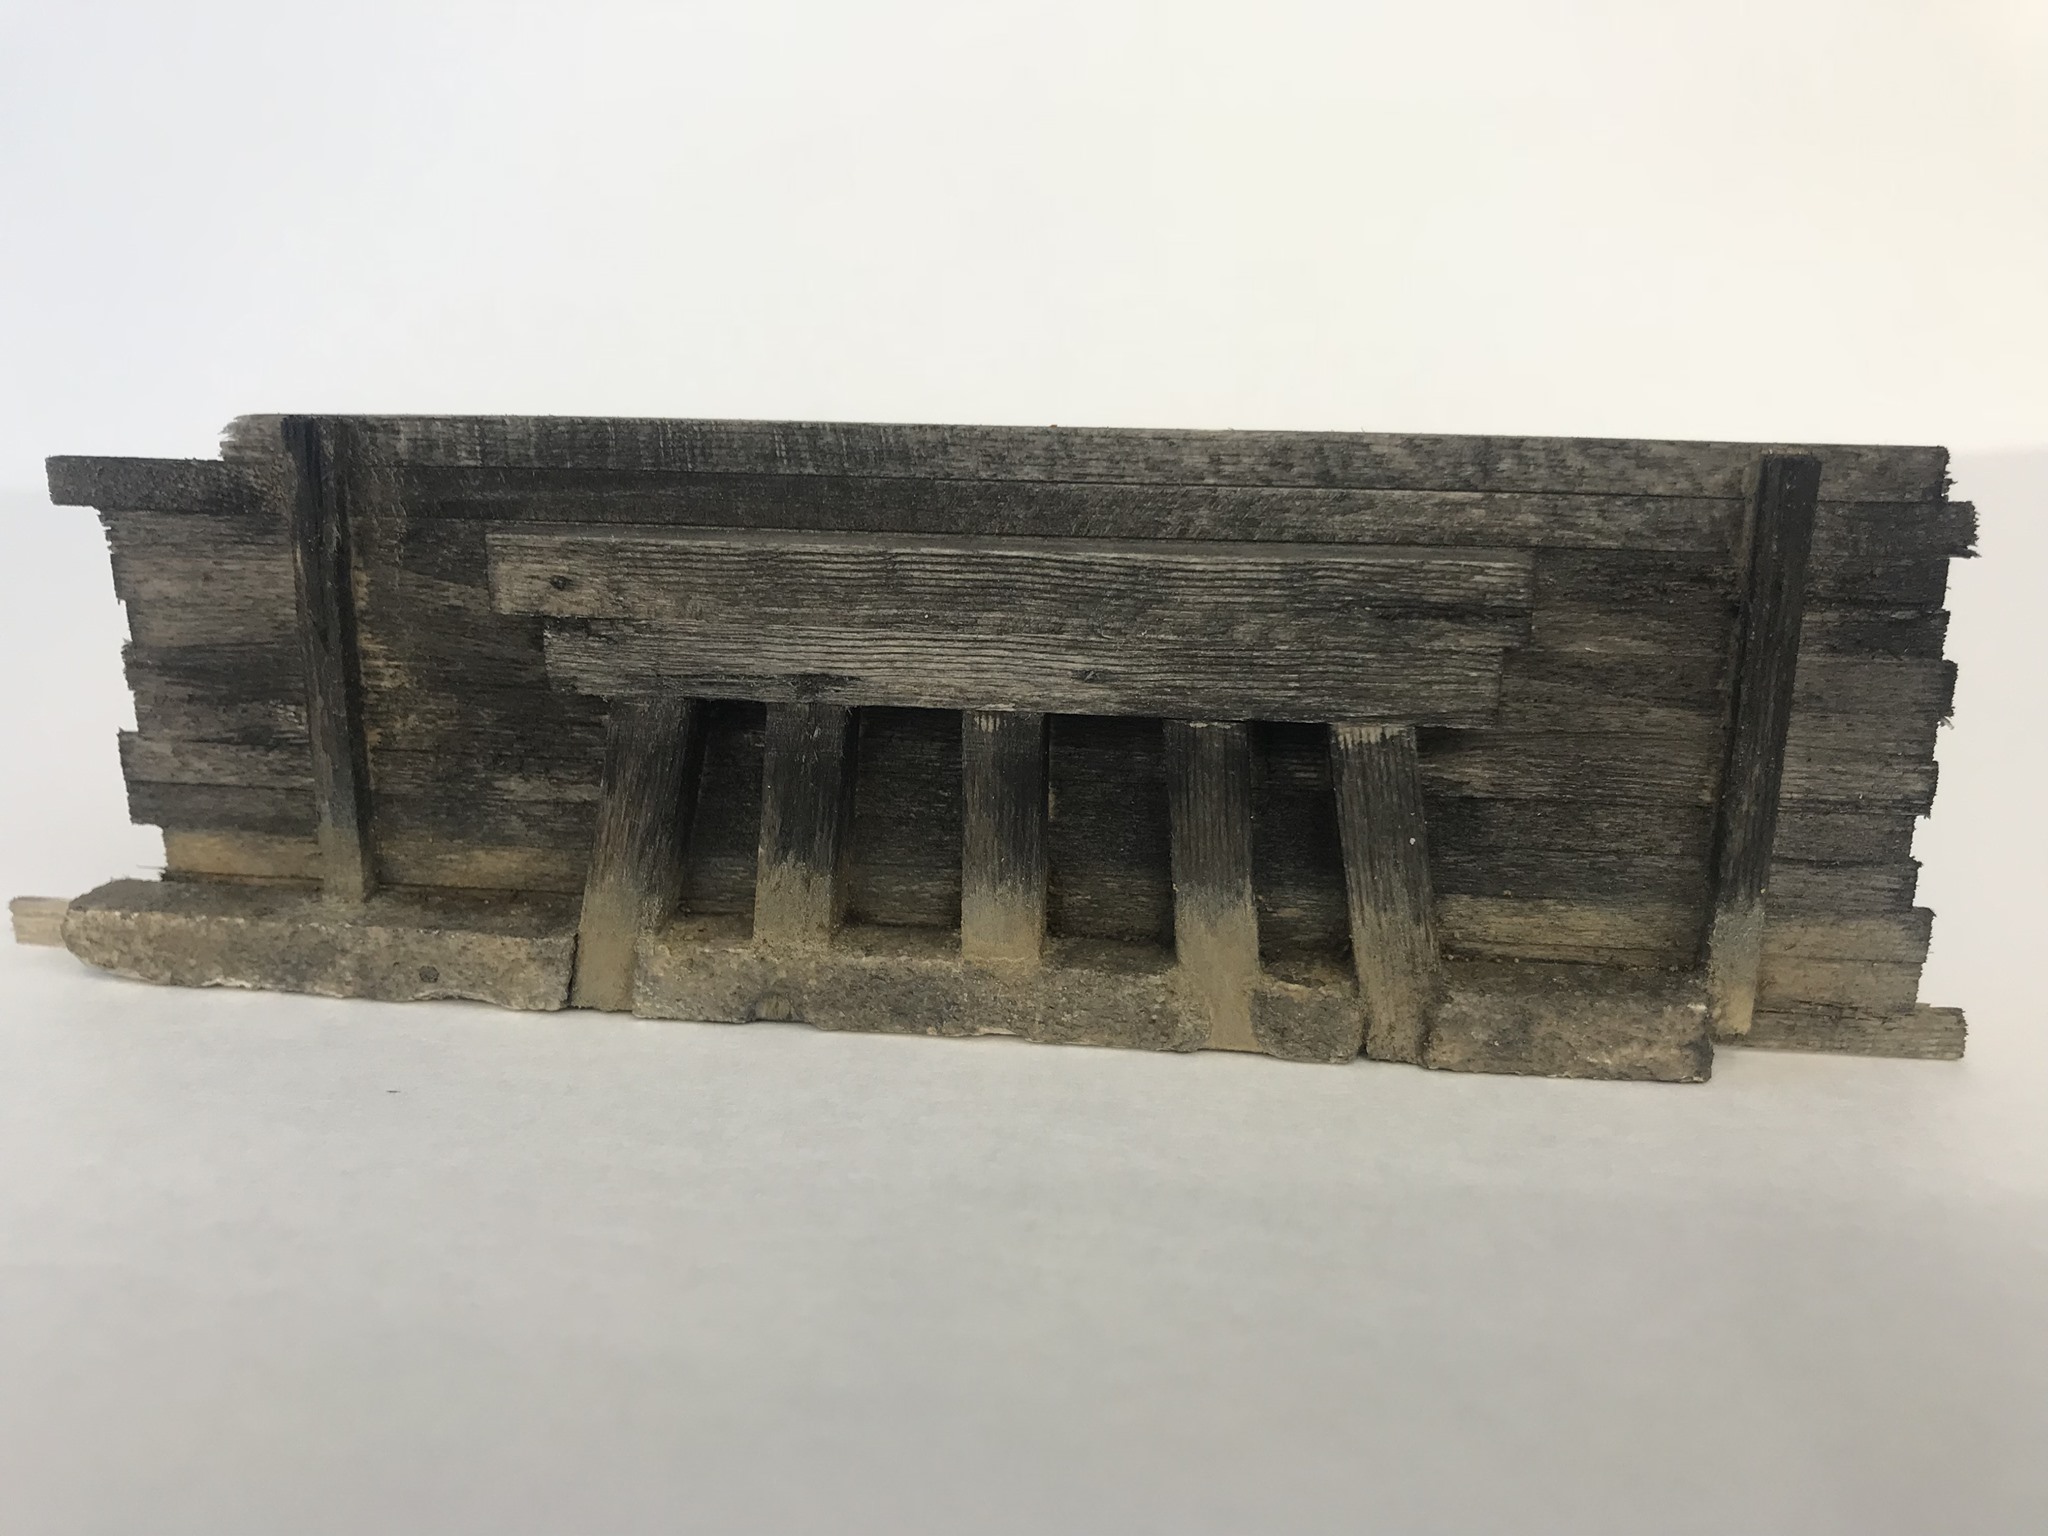
 Continue building up your colors until the desired effect is achieved. I then finished adding the bulkhead boards. I stained everything the same as the deck.
To create the waterline effect on the wood and concrete, I started with a base coat of light-gray acrylic paint from Ak-Interactive. I created a wash by thinning the paint in water and dabbing it onto the legs, concrete footings and bulkhead board with a brush. I let each coat dry until I was satisfied with the look. Then another wash of AK-Interactive earth enamel was made and allows to flow over then light-gray acrylic.
Pages: Page 1, Page 2, Page 3, Page 4